A Burlap Fabric Bowl Tutorial
A couple of weeks ago I wrote a tutorial showing how to make a burlap picnic mat.
Sometimes if you are eating outside, you need more than just a mat to eat off. You need bowls and things too!
Taking enough food to feed 6 hungry people already means a big bag of heavy stuff. You don’t want to add to that by taking of plastic bowls if you can avoid it. And certainly in our case, if we are going more than a few minutes down the road in the car, there’s a good chance that at least one of the bowls will end up being used to catch vomit. Obviously this renders it unusuable for picnic purposes!
So here’s a tutorial for making a fabric bowl from burlap! This way, you can have a bowl for bread, fruit, crisps, whatever, without it weighing the bag down more or taking up a lot of space. And the plastic bowl can live in the car ;).
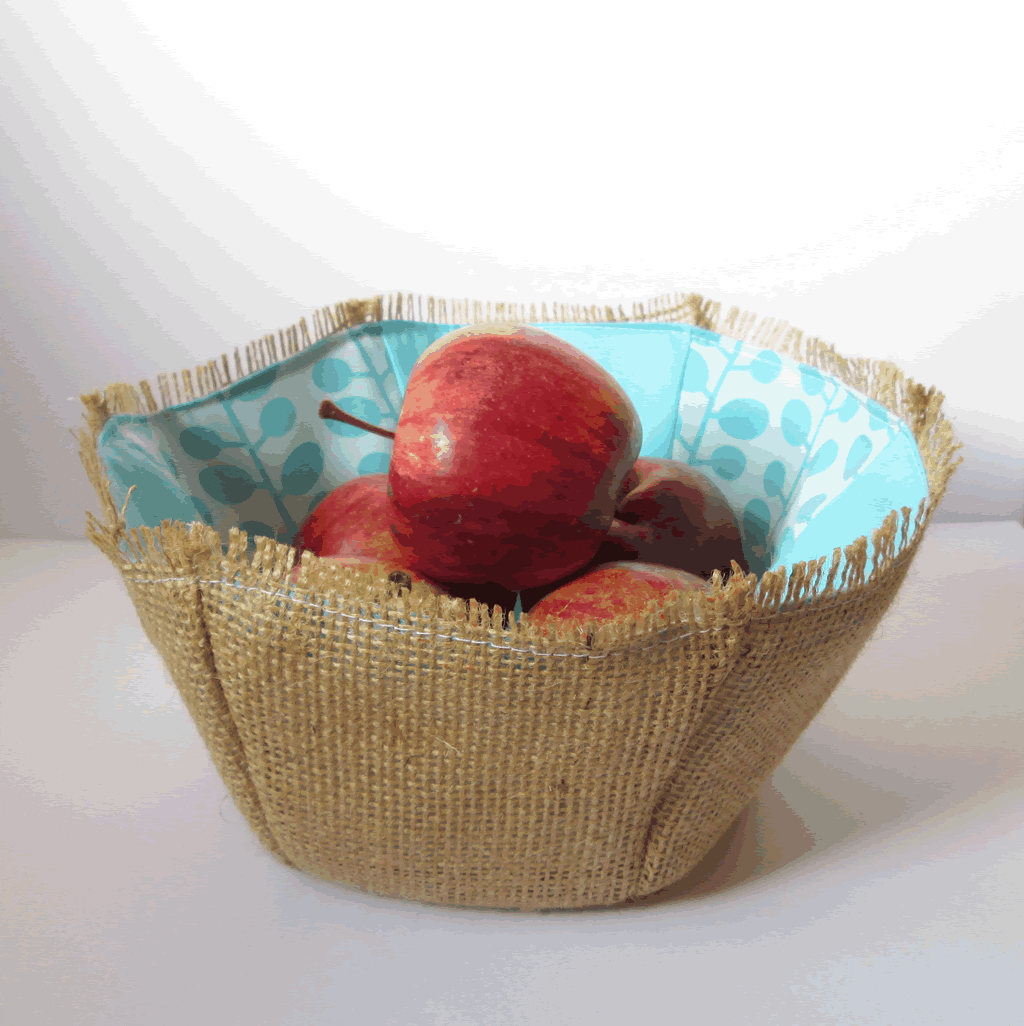
How to Make a Burlap Fabric Bowl
You Will Need
Burlap, cotton fabric, sew in interfacing (fusible will do if you don’t have the sew in sort), paper, pencil, ruler, bowl or cup, usual sewing supplies.
These are affiliate links from Minerva Crafts below.
Sew in interfacing £1.59/ metre
Making the Template
If you’d rather not make the template yourself, you can download one for free here.
Take a small bowl or a cup and draw round it. Divide it into 6. This will be the size of the bottom of the burlap fabric bowl. Pick one of the segments and continue the sides from the outside of the circle at a tighter angle. You will end up with a pit of a pointy bit, instead of a straight line that continues. Join them together along the top.
Cut it out. Fold it in half to check that it is even. If not, trim it down a bit.
If you don’t want to make your own template, you can download one for free here.
Cutting Out
Remembering to add a seam allowance to your template, cut 6 each from the burlap, the cotton fabric and the interfacing (the interfacing will not need a seam allowance at the top).
Sewing it Together
- Take 2 of the cotton pieces and sew them together along one of the sides, from the top to the bottom.
- Sew another cotton piece on in the same way.
- Repeat for the other 3 cotton pieces so that you have 2 halves of the lining of the bowl.
- Sew the 2 halves together.
- Repeat for the burlap and the interfacing. If you find that the burlap is fraying badly (it usually does!) try using a zigzag or a stitch for sewing knits.
- Pop the cotton bowl inside the interfacing bowl so that the seams are together. Fold the top edge of the cotton bowl over the top of the interfacing bowl. Pin it on the cotton side.
- Put the cotton/interfacing bowl inside the burlap bowl. You might find it helpful to pin it at the bottom so that it stays put! Matching the seams as far as possible, pin the sides together.
- Top stitch around the inside to sew the lining to the burlap.
- Pull some of the fibres from the top edge of the burlap. This kind of controlled fraying will stop it fraying more!
Linking up here.