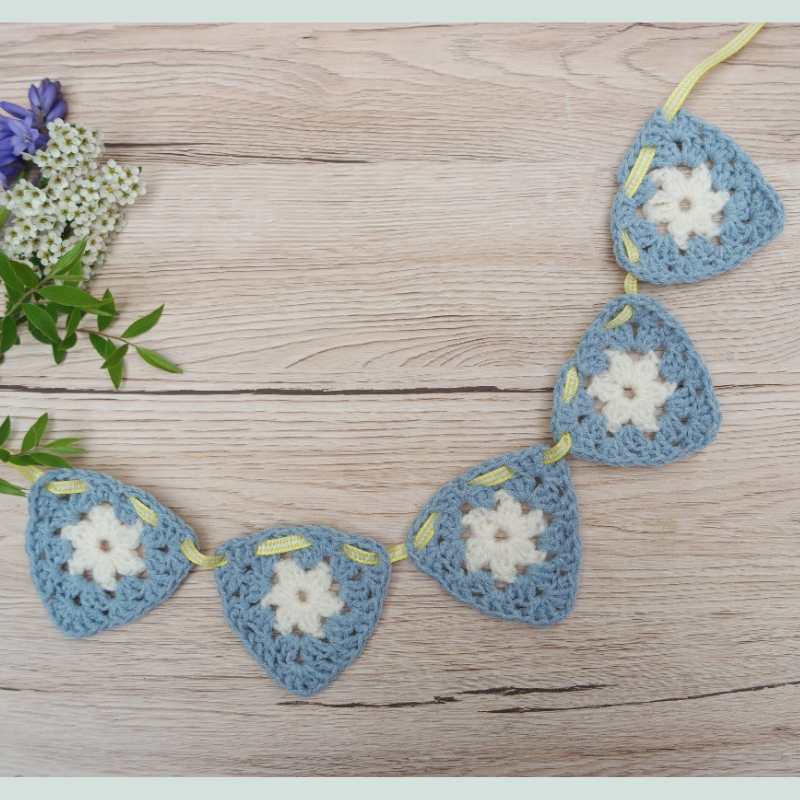
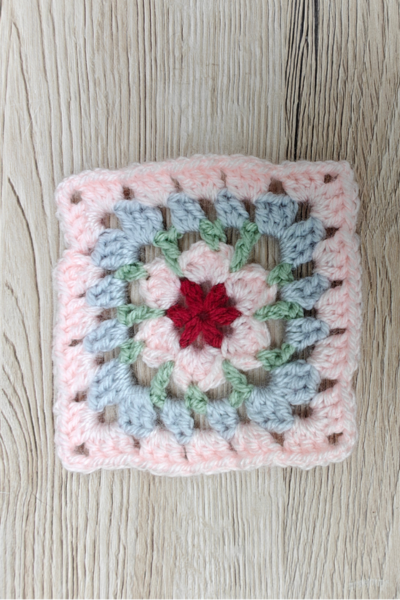
This Klein bottle hat crochet pattern was originally featured on the Minerva Crafts Bloggers’ Network, but since they’ve revamped their site it’s no longer there. As I’ve had several people asking about it, I’ve rewritten the post with the pattern here.
My son Aidan loves maths.
Some children like maths because they find it easy, but Aidan loves maths like a mathematician loves maths.
When Aidan was 9 (he’s 13 now), we were watching the Royal Institution Christmas Lectures, and Matt Parker of Stand Up Maths was talking about Mobius loops.
A Mobius loop is a loop that is made by taking a strip of paper, twisting it once and sticking the ends together. The twist means that you can run your finger all the way round it on both sides without having to take your finger off the paper. Without the twist, you can run your finger round the inside or round the outside, but not both without swapping sides.
If you’ve ever made an infinity scarf, this is a Mobius loop.
One of the reasons mathematicians like Mobius loops is because if you cut them in half along the long edge, the results are not what you might expect. Different numbers of twists get different results. I’m not going to tell you what they are in case you want to have some maths fun and try it out yourself!
A Klein bottle is a Mobius loop in 4 dimensions.
The whole idea of 4 dimensions makes my brain boggle a little bit. Apparently the way to deal with this is to not think about it too much.
Shapes with 2 dimensions are flat shapes. They have height and width. Shapes with 3 dimensions are solid shapes, with an extra line coming out that gives them depth. 4 D shapes are theoretical shapes that have a 4th dimension in addition to height, width and depth.
A Mobius loop in 4 dimensions becomes a solid shape. It works in the same way as the Mobius loop in that you can cover the inside and the outside of a Klein bottle in one go, just as you can cover the inside and the outside of a Mobius loop without needing to swap sides.
There are pictures of Klein bottles here.
Anyway, after giving it much thought and with help from Aidan’s drawings, I came up with a Klein bottle hat crochet pattern.
The hat is made by crocheting one piece, which has 2 head shaped pieces joined at the top by a tube. One of the head shaped pieces is then passed through a gap in the other head shaped piece, then the bottom edges are sewn together.
In 4 dimensions you wouldn’t have to do pass one hat through the other or sew the edges together, but in our normal 3D world it is necessary in order for the hat to be wearable!
I made the hat for Aidan when he was 9. Having said that, it fits my head, but I do have quite a little head. So please check the head of the person you are making the hat for because you might need to adjust it.

Instructions
For this Klein bottle hat crochet pattern, I used most of 200g of chunky yarn and a 6 mm hook.
Another thing to take into consideration is how much hair your favourite mathematician has. Yarn with a high wool content might irritate their head, so a synthetic yarn that’s nice and soft might be a better choice.
When you finish each round, join it with a slip stitch, then turn around and go back the way you came. This is so that it doesn’t look odd when you make the gap in the outer hat.
Make 70 ch
Round 1 2 ch, 1 tr into 3rd ch from hook, *1 tr into each st to end of round.* Join with ss.
Rounds 2-6 2 ch (counts as 1st stitch), 1 tr into 2nd st from previous round, *1 tr into next st* to end of round. Join with ss.
Rounds 7-8 2 ch (counts as 1st stitch), 1 tr into 2nd st from previous round, 1 tr into next 3 st. Crochet together the next 2 st. *1 tr into each next 5 st, then crochet the next 2 st together* to the end of the round. Join with ss.
Round 9 2 ch (counts as 1st stitch), 1 tr into 2nd st from previous round, *1 tr into next st* to end of round. Join with ss.
Round 10 2 ch (counts as 1st stitch), 1 tr into 2nd st from previous round, 1 tr into next 3 st. Crochet together the next 2 st. *1 tr into each next 5 st, then crochet the next 2 st together* to the end of the round. Join with ss.
Round 11 2 ch (counts as 1st stitch), 1 tr into 2nd st from previous round, *1 tr into next st* to end of round. Join with ss.
Rounds 12-14 2 ch (counts as 1st stitch), 1 tr into 2nd st from previous round, 1 tr into next 3 st. Crochet together the next 2 st. *1 tr into each next 5 st, then crochet the next 2 st together* to the end of the round. Join with ss.
Rounds 15-16 2 ch (counts as 1st stitch), 1 tr into 2nd st from previous round, 1 tr into next st. Crochet together the next 2 st. *1 tr into each next 3 st, then crochet the next 2 st together* to the end of the round. Join with ss.
Rounds 17-31 2 ch (counts as 1st stitch), 1 tr into 2nd st from previous round, *1 tr into next st* to end of round. Join with ss.
Rounds 32-33 2 ch (counts as 1st stitch) 1 tr into 2nd st from previous round, 1 tr into next 2 st, 2 tr into next st, *1 tr into each next 4 st, 2 tr into next st* to end of round.
Rounds 34-36 2 ch (counts as 1st stitch) 1 tr into 2nd st from previous round, 1 tr into next 4 st, 2 tr into next st, *1 tr into each next 6 st, 2 tr into next st* to end of round. Don’t join these rounds!
Round 37 2 ch (counts as 1st stitch), 1 tr into 2nd st from previous round, *1 tr into next st* to end of round. Don’t join this round.
Round 38 2 ch (counts as 1st stitch) 1 tr into 2nd st from previous round, 1 tr into next 4 st, 2 tr into next st, *1 tr into each next 6 st, 2 tr into next st* to end of round. Don’t join.
Round 39 2 ch (counts as 1st stitch), 1 tr into 2nd st from previous round, *1 tr into next st* to end of round. Don’t join.
Rounds 40-41 2 ch (counts as 1st stitch) 1 tr into 2nd st from previous round, 1 tr into next 4 st, 2 tr into next st, *1 tr into each next 6 st, 2 tr into next st* to end of round. Join with ss.
Rounds 42-48 2 ch (counts as 1st stitch), 1 tr into 2nd st from previous round, *1 tr into next st* to end of round. Join with ss.
Push the first hat through the slit you made in the second hat. Line up the bottom edges of the hats. Check that the lines where the rounds are joined are together. Dc the 2 hats together.
Aidan was very happy with his hat, so much so that he even agreed to model the hat so that I could take some pictures. Usually he hates having his photo taken!
Tips
If you are making the Klein bottle hat for a larger or smaller head, just adjust the number of stitches you start with, then follow the pattern.
The 2 hats need to be roughly the same size. If, when you get to Round 42, you find that you have a different number of stitches to what you started with, use the next couple of rounds to make adjustments by increasing or decreasing until you end up with the correct number of stitches.
If the 2nd hat seems a little short, then add an extra row.
Feel free to add a picot edging if you are making the hat for somebody who might like it!