• Home
  • About
  • Blog
  • Ebooks and Printables
  • Etsy
  • Sewing Journal

Make it Yourself. Yes You Can!

  • Sewing Projects
  • Tips and Techniques
  • Embroidery
  • Other Crafts
    • Crochet
    • Felting
    • Jewellery
    • Wreaths
  • Christmas

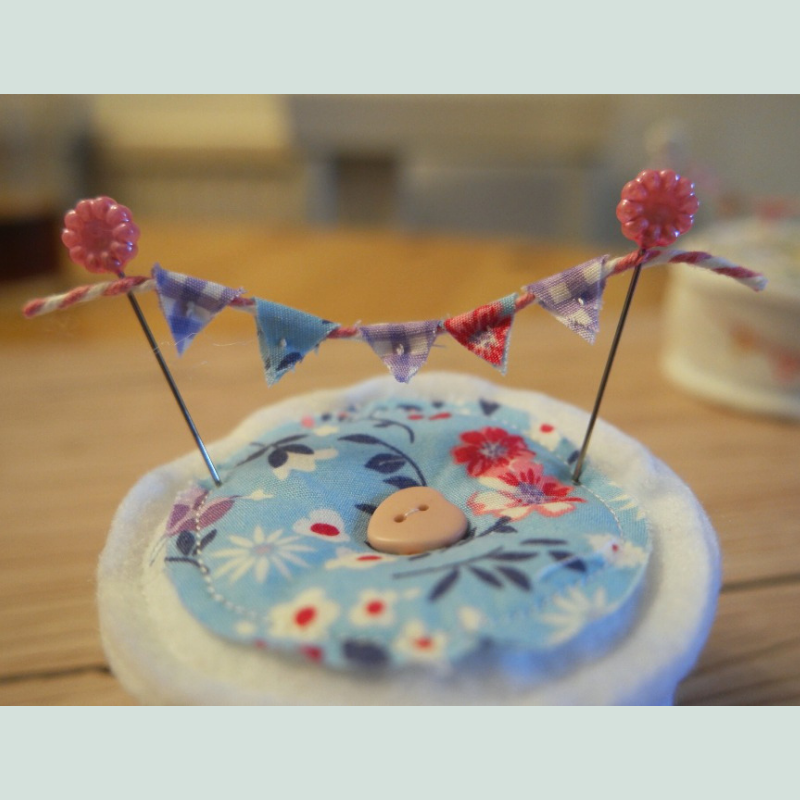
Embroidered Pincushion Tutorial

June 27, 2020 · Leave a Comment

embroidered felt pincushion

It could be possible to become addicted to pincushions. Like having an collection of pretty teacups, pincushions can be as different as you want them to be and pretty as you like. There are so many different ways to make them and, because they are little things, you can use scraps that are too big to throw away but too small to use for a larger project.

This embroidered pincushion is part of a kit that I’ve been developing. I wanted to call it the Safe At Home kit, but as the extra time people kept telling me I was going to have never appeared, it’s taking me a while to finish it!

The other projects in the kit are this bunting, and this needle case.

UPDATE: The kits have finally been completed and you can find them here!

Anyway, the last project is now finished and here it is, an embroidered pincushion!

embroidered felt pincushion tutorial

It can be sewn entirely by hand, or you could speed things up a bit and use the sewing machine to sew the pincushion together.

The embroidery design is free to download, but I do ask for an email address. You can find out more about why I do this here. The form is at the bottom of the post.

embroidered felt pincushion tutorial

Making the Embroidered Pincushion

You Will Need

Scraps of felt in pretty colours
Embroidery thread
Polyester filling, sawdust or emery sand to fill your pincushion
2 buttons
Pattern pieces and the embroidery design. You can either download mine (the form’s at the bottom), or you could make your own.

Cutting Out

You will need 2 circles the same size, and one circle a little bit smaller.

Embroidering the Design

embroidered felt pincushion tutorial

I used lazy daisies, fern stitch, woven wheels and French knots. It’s worth remembering that odd numbers of things usually look better, but you can do what you like! Just remember to leave a space in the middle for the button.

Sewing the Pincushion Together

Attach the embroidered section to one of the larger circles. You could hand sew it or use your sewing machine.

embroidered felt pincushion tutorial

Place the other larger circle on top of the embroidery. Sew around the edge, leaving a gap.

Trim the seam if you need to. Turn the pincushion the right way out. Fill it with your chosen material. It will need to be firm to make it easiest for pushing the pins in.

embroidered felt pincushion tutorial

Take a plain button (this one will be at the bottom) and tie the end of length of thread to it. You might want to use a stronger thread for this, or you could use ordinary sewing thread doubled.

embroidered felt pincushion tutorial

Now push the needle through the centre of the pincushion from bottom to top.

Thread a pretty button onto the needle. Pass the thread through, then back into the pincushion and through the button at the bottom.

embroidered felt pincushion tutorial

Do this a few times and pull it tight. Cut the thread and tie it off.

embroidered felt pincushion tutorial

If you wanted to turn this into a wrist pincushion, you could attach it to a piece of elastic, or make a strap for it like this one.

If you like pincushions, I have a whole Pinterest board devoted to them here!

Share this:

  • Click to email this to a friend (Opens in new window)
  • Click to share on Pinterest (Opens in new window)
  • Click to share on Facebook (Opens in new window)
  • Click to share on Twitter (Opens in new window)

Filed In: Blog, Embroidery, Sewing Projects / Tagged: beginner, craft fair, embroidery, felt, gift ideas, how to, pincushion

Year of Bunting Pincushion Tutorial With Mini Bunting

February 22, 2019 · Leave a Comment

Year of Bunting Pincushion Tutorial With Mini Bunting

year of bunting pincushion tutorial with mini bunting

I’ve got a thing about pincushions.

It’s partly because I associate them with a simpler time, when milk lived in jugs with beaded crocheted covers and everybody ate boiled eggs, toast and cake for tea.

It’s also because when it comes to making pincushions, the possibilities are endless. And it’s fine to have a few!

My favourite pincushion is this one that I can wear on my wrist. That way I don’t lose it in the mess that always seems to accompany making things!

I have others as well, including these that I made last year while my concentration was taking a holiday.

I even have a Pinterest board devoted to pincushions!

The Year of Bunting needs a bunting pincushion, so I’ve made these.

year of bunting pincushion tutorial with mini bunting

The bunting pincushions are made from white felt with appliqued cotton circles on the top and bottom and bunting on the side. The button on the top actually runs through to another smaller button on the bottom. This allows the pincushion to sit on a flat surface without wobbling about to much!

For some bunting fun, I made some tiny bunting from diamond shaped pieces of cotton and bakers’ twine. The bunting is strung across the pincushion by some pretty flower headed pins.

year of bunting pincushion tutorial with mini bunting

I filled the bunting pincushions with polyester filling recycled from an old pillow.

You might prefer to fill yours with wire wool or emery, so that your pins are sharpened when you stick them into your pincushion. There’s a tutorial for making a pincushion with emery here.

I’ve got some kits for sale here and here on Etsy if you want to make some like mine but you can’t be doing with faffing about finding everything.

How To Make a Bunting Pincushion With Mini Bunting

You Will Need

Felt
Scraps of cotton fabric
Filling for your pincushion (polyester filling, emery or wire wool)
2 buttons
Bakers’ twine
Longer than normal pins

Or you can buy a kit here.

Cutting Out

From the felt, cut 2 circles and a long rectangle. The rectangle needs to be as longs as the distance around the circle.

When I was learning about pi at school, I’d never have guessed that I would use it as much as I do!

It doesn’t matter an awful lot if you can’t remember anything about it! The only thing you need to remember is that the distance around the outside edge of a circle is about 3 times the distance across the circle passing through the centre.

So your rectangle needs to be 3 times longer than the straight edge of your circle if you fold it in half, plus a bit extra.

You’ll also need to cut 2 smaller circles from cotton fabric. I used jam jars for the circles.

For the appliqued bunting, cut 5 tiny triangles from the same fabric you used for your smaller circles. For the bunting that’s strung between the pins, cut 5 diamonds from the same cotton.

Assembling Your Bunting Pincushion

  1. Applique the cotton circles to the felt circles.
    year of bunting pincushion tutorial with mini bunting
  2. Applique the bunting flags to the side of the pincushion. To do this, I sewed the sides of the flags, then sewed across the top a couple of times. I sewed past the end of the flags by a cm or so.
    year of bunting pincushion tutorial with mini bunting
  3. Sew one of the circles to the side. The official way to do this is probably to sew the side into a circle, then to sew the circle. The problem with doing it this way is that the circles have to be exactly the same size! The way I did it was to start with one end of the rectangle and sew it all the way round the circle. I then sewed the rest of it so that it overlapped.
    year of bunting pincushion tutorial with mini bunting
  4. You might like to hand sew the seam of the side piece, although it might be fine to leave it if you are in a hurry.
  5. Sew the other circle to the side, leaving a gap.Fill the pincushion then sew up the opening.
    year of bunting pincushion tutorial with mini bunting
  6. Cut a length of thread and tie it to the button that you’re planning on putting on the bottom of your pincushion. With a needle, pass the thread through the pincushion in through the other button. Take the needle back through the button and the pincushion to the button at the bottom. Pull the thread, then tie it off.
    year of bunting pincushion tutorial with mini bunting
  7. Making the tiny bunting proved to be fiddly! I tried a number of ways and this is the one that proved to be easiest. Take one of the cotton diamonds and fold it over the bakers’ twine. Sew a couple of stitches in the centre of the flag to hold both halves together.
  8. Push a pin through the bakers’ twine at one end of the bunting. Do the same at the other end. Push the pins into the top of the pincushion.
    year of bunting pincushion tutorial with mini bunting
year of bunting pincushion tutorial with mini bunting

Share this:

  • Click to email this to a friend (Opens in new window)
  • Click to share on Pinterest (Opens in new window)
  • Click to share on Facebook (Opens in new window)
  • Click to share on Twitter (Opens in new window)

Filed In: Blog, Sewing Projects / Tagged: beginners, craft fair, gift, how to, pincushion

Pumpkin Pincushion Tutorial

October 11, 2016 · 6 Comments

A Pumpkin Pincushion Tutorial

Earlier in the year I made a pincushion.

I had been guilty of putting pins in my mouth, even though I knew it was dangerous and therefore probably not a good idea.

While watching The Great British Sewing Bee, I noticed that firstly none of the contestants put pins in their mouths, and also that Angeline had a rather nice one that she wore in her wrist.

I thought it would probably be easy to make one, so I had a go! This was the result.how to make a wrist pincushion tutorial pumpkin pincushion tutorial

The fabric I used was left over from another project and the button was a spare one from a jumper I bought.It’s very handy with it being on my wrist, and now I almost never put pins in my mouth!

Anyway, with it being the autumn, it occurred to me that the shape, as well as being like a flower, was also a lot like a pumpkin. So I decided to make a pumpkin pincushion!

I had some orange fabric left over from something else and I used brown thread instead of white to make the pumpkin shape.

When I made the first version of this pincushion, somebody warned me that I might accidentally stab myself in the arm as she had a pincushion that was similar and she had done this herself. Despite efforts to be careful, I did manage to stab myself in the arm and it hurt!

So this version has 2 little squares of acrylic in the wristband, underneath the pumpkin, to reduce the chances of this happening.

Somebody else actually suggested using the plastic reinforcements from a “bag for life”, which is another option for the wristband.

Here’s the pincushion tutorial again. If you’d prefer the original version with pictures, you can find it here.

And if you would like to buy a kit to make a pumpkin pincushion, I have some kits for sale here.

pumpkin pincushion tutorialHow to Make a Pumpkin Pincushion

There are affiliate links below.

You Will Need

Scraps of cotton fabric in orange, a small piece of velcro, a button, polyester filling, singe strand embroidery thread in dark brown, acrylic squares, usual sewing supplies.

Cutting Out

From your fabric, cut 2 circles about 10 cm in diameter (distance across the circle passing through the middle). I used a roll of sellotape.

Cut a rectangle about 10 cm wide and long enough to go around your wrist and overlap by 3 -4 cm. Mine was 25 cm long,but I have freakishly skinny wrists.

Sewing Up

1. Sew the 2 circles together with the right sides together. Leave a gap. Clip the seam allowance.

2. Turn the circles the right way out and stuff with polyester filling. It will need to be firm so that it doesn’t yield too much when you stick the pins in it. Slip stitch the opening.

3. Cut a length of your strong thread (I used Perle cotton embroidery thread, but sewing thread doubled will probably do) and tie a good big knot at one end.

4. Bring your thread through the middle of your pumpkin pincushion. Take the thread over the pincushion and put the needle in again where you started. Bring it through again and pull it tight.

Take the thread round the outside of the pincushion on the opposite side, then back in through where you started. Keep going in this way until the pincushion is divided up into 8.

Tie the thread off.

5. Pick the side that looks neatest and sew a button at the centre.

6. To make the strap, pin the fabric strips with the right sides together. Sew along both the long edges. Trim the seams and turn it out.

7. Fold the strap in half widthways. Measure 2.5 cm from the centre. Sew across the strip where you have measured,

8. Slip the acrylic squares into the strap, one after the other. Sew the other side of the squares. Using a zip foot here will enable you to sew close to the squares.

9. Tuck the ends of the strap in. Pin, then sew.

10. Cut a small piece of velcro (about 3-4 cm) and sew to the ends of the strap. You will need one piece on one side, and the other piece on the other side.

11. Hand sew the pincushion to the middle of the strap.pumpkin pincushion tutorialpumpkin pincushion tutorialpumpkin pincushion tutorial

The kits are available to buy here.

Linking up here

Share this:

  • Click to email this to a friend (Opens in new window)
  • Click to share on Pinterest (Opens in new window)
  • Click to share on Facebook (Opens in new window)
  • Click to share on Twitter (Opens in new window)

Filed In: Blog, Sewing Projects / Tagged: autumn, craft fair, gift, how to, pincushion

I'm Anna and I live in rural Norfolk in the UK. My mum taught me how to use a sewing machine when I was 10 and I haven't looked back! I love making all sorts of things and I hope you find inspiration here.

Join the list

Join the mailing list to receive updates, useful and interesting links and free pages from the Sewing Journal.

My New Ebook

things to male and do in the autumn

Bunting Makes Everything Better Tote Bag

Featured Kit

The Sewing Journal

My Kits and Patterns on Etsy

Shop the Christmas Shop at Sew and So


Join the List

Join the mailing list to receive updates, useful and interesting links and free pages from the Sewing Journal.

Privacy Policy

For information about cookies and Tea and a Sewing Machine's privacy policy, please click here.

Instagram

Instagram Widget by SnapWidget


UK Sewing Blogs

Theme by 17th Avenue · Powered by WordPress & Genesis

loading Cancel
Post was not sent - check your email addresses!
Email check failed, please try again
Sorry, your blog cannot share posts by email.
We use cookies to ensure that we give you the best experience on our website. If you continue to use this site we will assume that you are happy with it.Ok