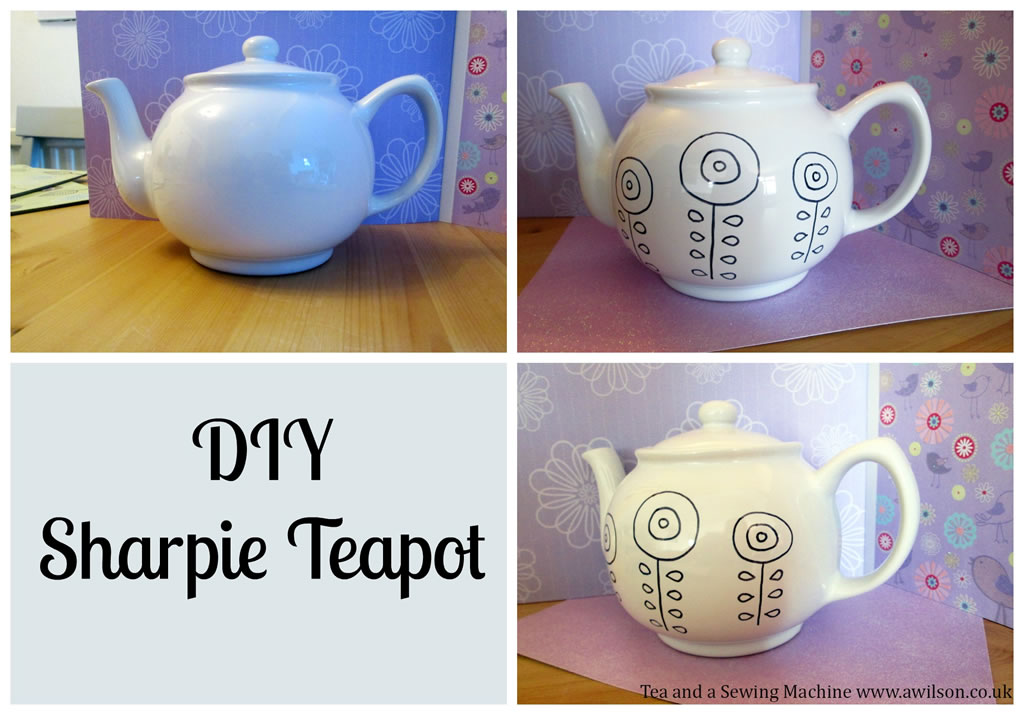
• Home
  • About
  • Blog
  • Ebooks and Printables
  • Etsy
  • Sewing Journal

Make it Yourself. Yes You Can!

  • Sewing Projects
  • Tips and Techniques
  • Embroidery
  • Other Crafts
    • Crochet
    • Felting
    • Jewellery
    • Wreaths
  • Christmas

DIY Sharpie Teapot

May 21, 2015 · 7 Comments

Making a Sharpie teapot is something I’ve wanted to try for ages!

Ever since I saw some beautiful cups somebody very talented had decorated with a blue Sharpie on a link up somewhere.

I opted for a teapot because I drink gallons of the stuff.sharpie teapot

The only slight problem was that I can’t really draw! Making thingsĀ is fine but drawing usually is not. However, I decided to keep it simple and just to see how it turned out.

We decorated the living room a while ago (it’s not quite finished!) and I made some new curtains. lined curtains tutorialI chose the fabric because I loved the flowers, so I decided to do something similar with the teapot. My other source of inspiration was this lovely Orla Kiely decorated bus from The Year of The Bus. year of the busI love her designs and, without wanting to copy, I wanted to do something similar.

I drew a design on paper first. As you can see I kept it very simple!sharpie teapot

Next I wanted to check how easy it would be to remove the Sharpie ink from the teapot. I used baby wipes as these things remove all sorts of stuff!sharpie teapot

Thankfully the baby wipes removed Sharpie ink even after it had dried, so I was free to make plenty of mistakes!sharpie teapot

Then all I had to do was draw the design onto the teapot! I started with the flowers, then I did the stems, then the leaves.sharpie teapotsharpie teapotsharpie teapot

I did have to have several goes at it, but I’m pleased with the results!sharpie teapotsharpie teapotsharpie teapot

The last thing to do was to put it in the oven on 200 degrees C for half an hour, then let it cool completely.

I like the black and white but I might colour them in. What do you think?

Here are some tips if you want to try this yourself!

  • If you have small children, wait until they are asleep. It is very difficult to draw on a teapot while a two year old is climbing all over the table.
  • Keep a supply of baby wipes to hand.
  • If you are right handed, start with the design at the top right hand corner and work left to right so you don’t smudge your design.
  • I found it easiest to draw on the teapot with it on my lap. However this will only work for the first side.

Happy crafting! xx

Share this:

  • Click to email this to a friend (Opens in new window)
  • Click to share on Pinterest (Opens in new window)
  • Click to share on Facebook (Opens in new window)
  • Click to share on Twitter (Opens in new window)

Filed In: Other Crafts / Tagged: craft fair, decor, gift, kitchen, sharpie

I'm Anna and I live in rural Norfolk in the UK. My mum taught me how to use a sewing machine when I was 10 and I haven't looked back! I love making all sorts of things and I hope you find inspiration here.

Join the list

Join the mailing list to receive updates, useful and interesting links and free pages from the Sewing Journal.

My New Ebook

things to male and do in the autumn

Bunting Makes Everything Better Tote Bag

Featured Kit

The Sewing Journal

My Kits and Patterns on Etsy

Shop the Christmas Shop at Sew and So


Join the List

Join the mailing list to receive updates, useful and interesting links and free pages from the Sewing Journal.

Privacy Policy

For information about cookies and Tea and a Sewing Machine's privacy policy, please click here.

Instagram

Instagram Widget by SnapWidget


UK Sewing Blogs

Theme by 17th Avenue · Powered by WordPress & Genesis

loading Cancel
Post was not sent - check your email addresses!
Email check failed, please try again
Sorry, your blog cannot share posts by email.
We use cookies to ensure that we give you the best experience on our website. If you continue to use this site we will assume that you are happy with it.Ok