Leaf Rubbings Revisited
It goes without saying that beautiful leaves are one of the best things about autumn.
In recent years, I’ve noticed that no two years are the same. This year, there has been a lot of yellow. In other years, there have been more reds, and in others more coppery browns.
It’s as though nature is saying that although summer is over, it’s got one more thing to do before winter. There is one more gorgeous season where the sun is less strong and the flowers are pretty much over, but there is this one more, this beautiful, colourful, golden time when the leaves are their most beautiful, even though they are over, and won’t been green again, and soon will fall to become soil to nourish the tree on which they grew.
If I want to make something that echoes the season of autumn, I don’t want it ruined by perfectionism. This is what I like about creative invitations. It’s as much more about doing something enjoyable than it is about having something finished and perfect.
Leaf rubbings can be done at any time of year, but I feel most inspired to do them in the autumn. I did some last year using chalky pastels, and the results weren’t quite what I was expecting! Perfectionism would have us believe that the results should be perfect after one attempt. Obviously that is unlikely to happen! The rubbings I made were far from perfect, but they did improve and actually their imperfectness is one of the most appealing things about them.
The other week I was toying with the idea of trying printing with a gelli plate. I have so far resisted, because it looks like so much fun I could easily become addicted, and I’m already struggling to do all the things I currently do, both the necessary and the more fun things. So taking on some other addictive hobby is probably not a good idea.
I realised that one of the things that appeals about printing with a gelli plate is the way that layers can be used. Then it occurred to me that I could try something similar with leaf rubbings.
Creative invitations can be revisited over time and in different ways. And because there is no right or wrong way, different things and versions can be tried, which can lend itself quite nicely into generating more ideas.
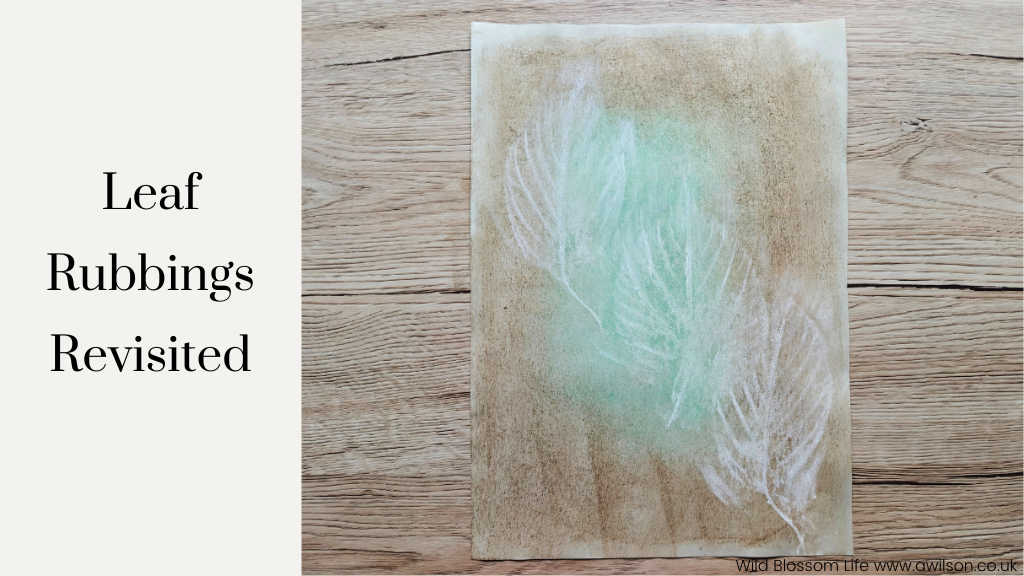
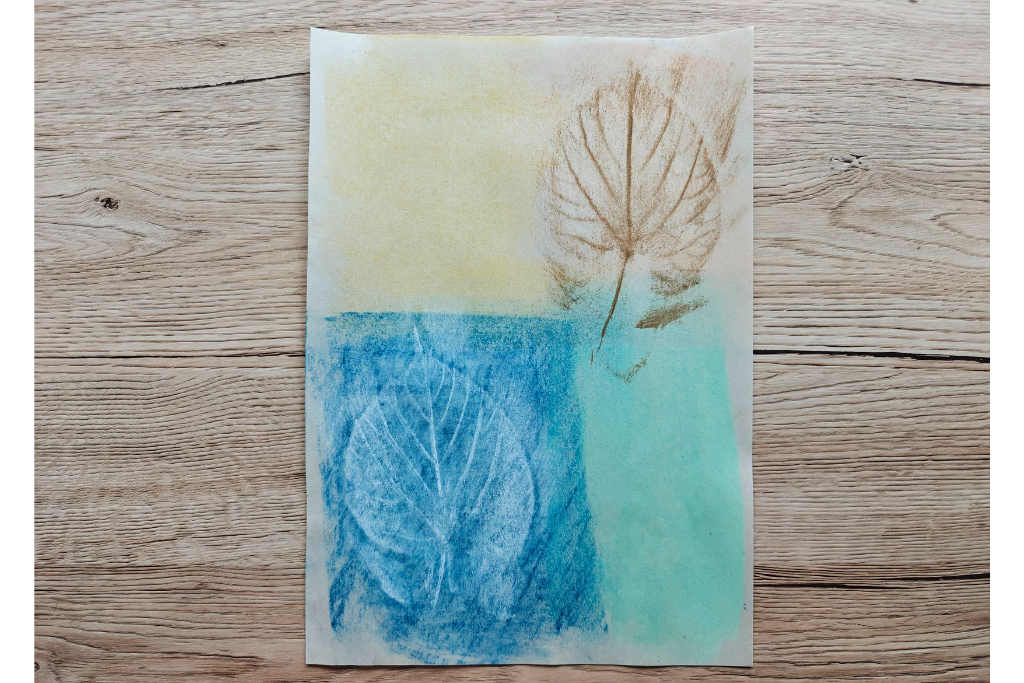
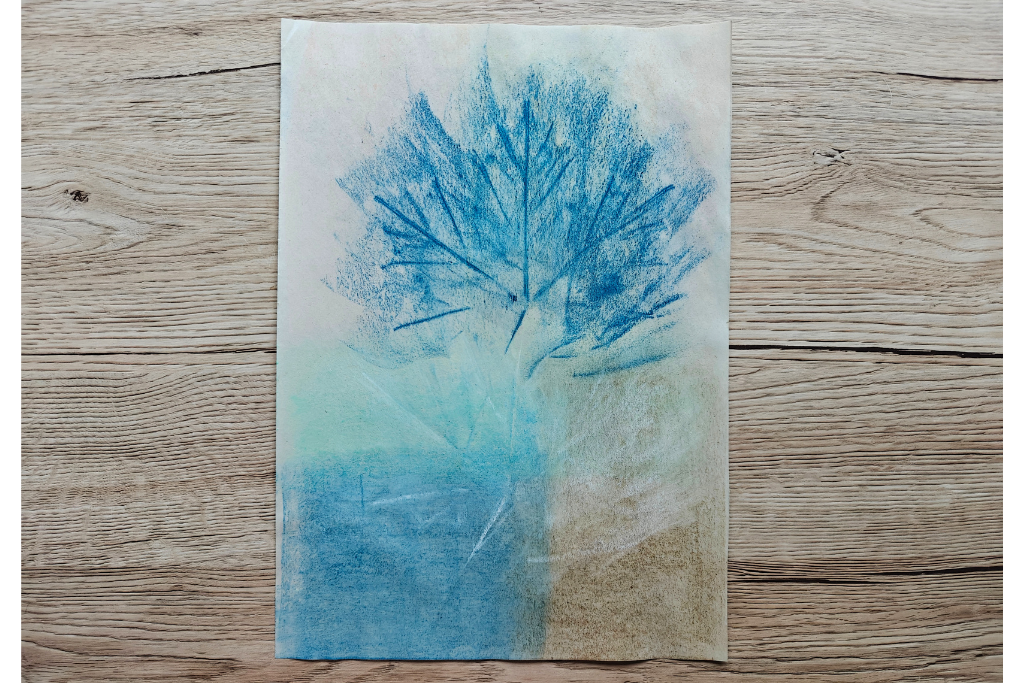
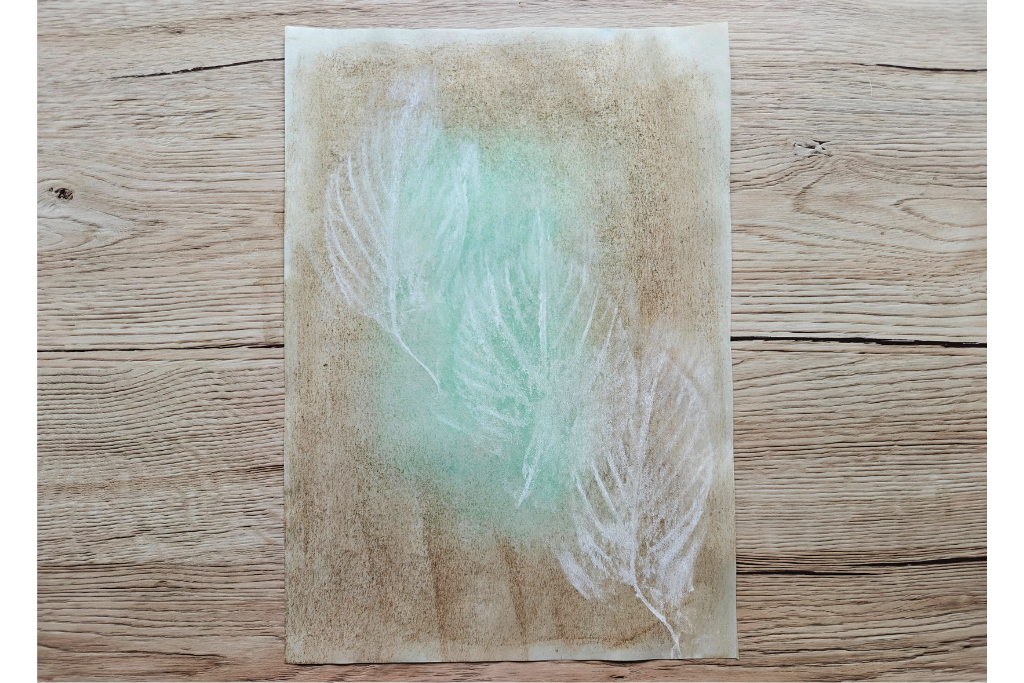
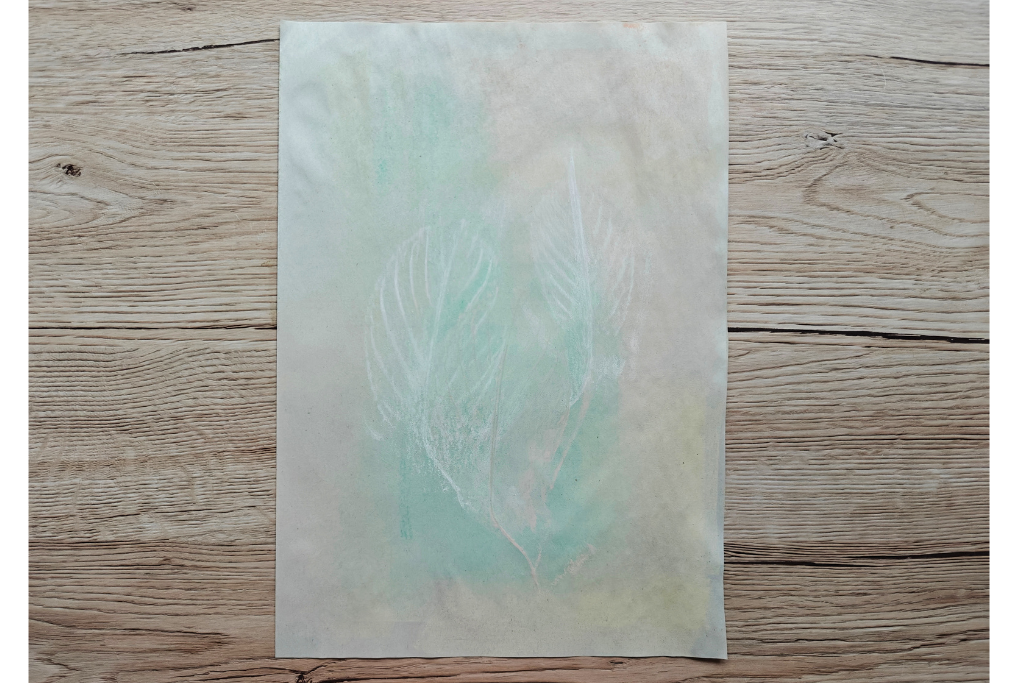
When I did the leaf rubbings last time, I used combinations of colours, but only on the leaves themselves. This time, I wanted to experiment with a background layer first, then make the leaf rubbings over the top.
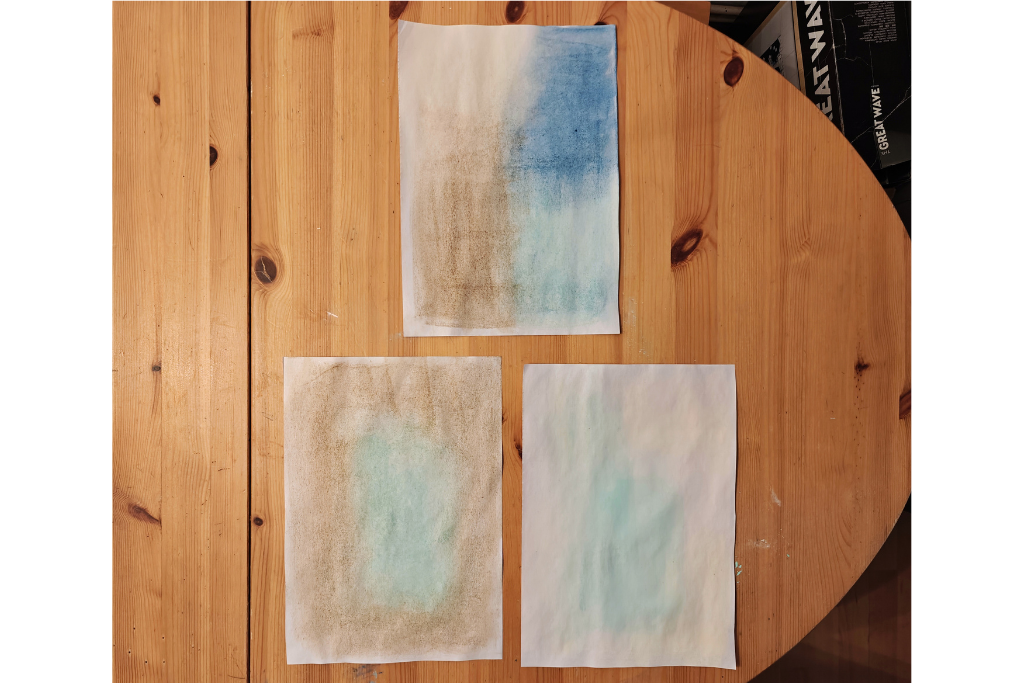
These were the first lot of backgrounds. I just chose a few colours and made some coloured patches on the paper.
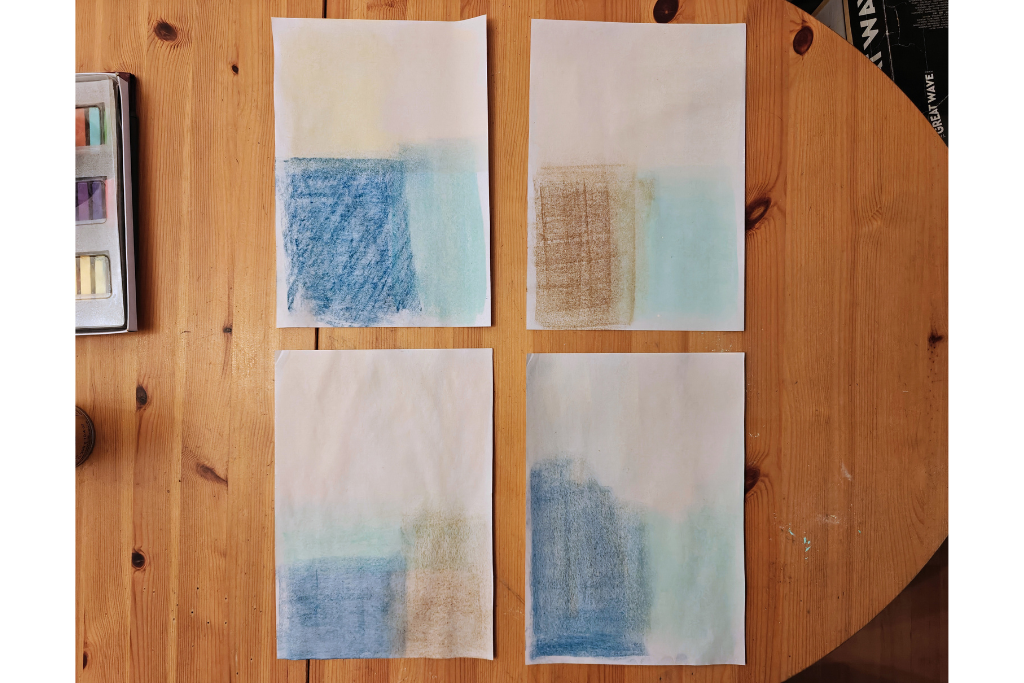
They looked a bit blocky, although the last one was less so, and I wanted something softer.So on the next batch I made patches that were less square.
After that, I sprayed them with fixative (doing the rubbings straight onto unfixed chalk pastel was likely to result in an almighty mess, most of which would be on my hands and probably on my jumper sleeves as well!). Once they had dried, I did the leaf rubbings over the top.


Making the leaf rubbings definitely scratched the itch. One thing I might do is see how they translate into fabric and stitch, but that will be for another time. I haven’t entirely given up on the gelli plates though!
If you try this, I’d love to see what you make! Leave me a comment below, tag me on Instagram @anna_wildblossomlife, or send me an email at hello.wildblossomlife@gmail.com.