• Home
  • About
  • Blog
  • Ebooks and Printables
  • Etsy
  • Sewing Journal

Make it Yourself. Yes You Can!

  • Sewing Projects
  • Tips and Techniques
  • Embroidery
  • Other Crafts
    • Crochet
    • Felting
    • Jewellery
    • Wreaths
  • Christmas

Embroidered Pincushion Tutorial

June 27, 2020 · Leave a Comment

embroidered felt pincushion

It could be possible to become addicted to pincushions. Like having an collection of pretty teacups, pincushions can be as different as you want them to be and pretty as you like. There are so many different ways to make them and, because they are little things, you can use scraps that are too big to throw away but too small to use for a larger project.

This embroidered pincushion is part of a kit that I’ve been developing. I wanted to call it the Safe At Home kit, but as the extra time people kept telling me I was going to have never appeared, it’s taking me a while to finish it!

The other projects in the kit are this bunting, and this needle case.

UPDATE: The kits have finally been completed and you can find them here!

Anyway, the last project is now finished and here it is, an embroidered pincushion!

embroidered felt pincushion tutorial

It can be sewn entirely by hand, or you could speed things up a bit and use the sewing machine to sew the pincushion together.

The embroidery design is free to download, but I do ask for an email address. You can find out more about why I do this here. The form is at the bottom of the post.

embroidered felt pincushion tutorial

Making the Embroidered Pincushion

You Will Need

Scraps of felt in pretty colours
Embroidery thread
Polyester filling, sawdust or emery sand to fill your pincushion
2 buttons
Pattern pieces and the embroidery design. You can either download mine (the form’s at the bottom), or you could make your own.

Cutting Out

You will need 2 circles the same size, and one circle a little bit smaller.

Embroidering the Design

embroidered felt pincushion tutorial

I used lazy daisies, fern stitch, woven wheels and French knots. It’s worth remembering that odd numbers of things usually look better, but you can do what you like! Just remember to leave a space in the middle for the button.

Sewing the Pincushion Together

Attach the embroidered section to one of the larger circles. You could hand sew it or use your sewing machine.

embroidered felt pincushion tutorial

Place the other larger circle on top of the embroidery. Sew around the edge, leaving a gap.

Trim the seam if you need to. Turn the pincushion the right way out. Fill it with your chosen material. It will need to be firm to make it easiest for pushing the pins in.

embroidered felt pincushion tutorial

Take a plain button (this one will be at the bottom) and tie the end of length of thread to it. You might want to use a stronger thread for this, or you could use ordinary sewing thread doubled.

embroidered felt pincushion tutorial

Now push the needle through the centre of the pincushion from bottom to top.

Thread a pretty button onto the needle. Pass the thread through, then back into the pincushion and through the button at the bottom.

embroidered felt pincushion tutorial

Do this a few times and pull it tight. Cut the thread and tie it off.

embroidered felt pincushion tutorial

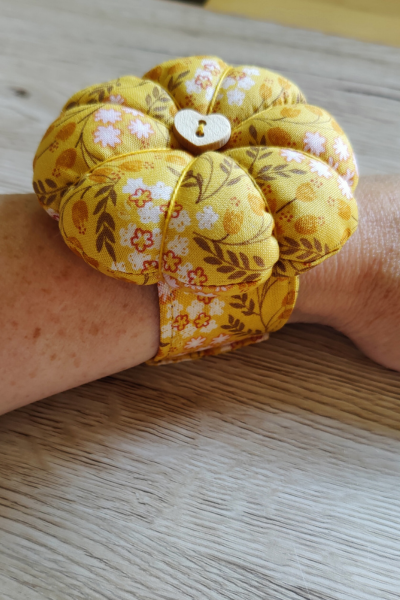
If you wanted to turn this into a wrist pincushion, you could attach it to a piece of elastic, or make a strap for it like this one.

If you like pincushions, I have a whole Pinterest board devoted to them here!

Share this:

  • Click to email this to a friend (Opens in new window)
  • Click to share on Pinterest (Opens in new window)
  • Click to share on Facebook (Opens in new window)
  • Click to share on Twitter (Opens in new window)

Filed In: Blog, Embroidery, Sewing Projects / Tagged: beginner, craft fair, embroidery, felt, gift ideas, how to, pincushion

Boxy Pouch Tutorial

May 7, 2020 · 2 Comments

boxy pouch tutorial

This post contains affiliate links.

Creativity is an odd thing sometimes. Usually I have lots of ideas, but this hasn’t been the case as much recently.

Alan Turing apparently had his best ideas in the bath, and I suspect there’s something in feeling relaxed that helps ideas to flow.

The current global situation is enough to make anybody feel the opposite of relaxed, so I suppose it’s not really a surprise that I haven’t felt as creative as I often do.

Anyway, last week I had an overwhelming urge to make something pretty. The fabric pile behind the bedroom door yielded a little piece of Tilda fabric, and some plain pink cotton. I also found an old bag that I’d kept, thinking that I could use the zips for something (the whole of the front panel is zips; it’s a weird bag). Last week that bag finally came into its own and I used one of the zips!

boxy pouch tutorial

The size of the boxy pouch was decided by the length of the zip. And, as a word of warning, if you use a zip that doesn’t have things at the ends to stop the zipper thing coming off, pull it slowly! It’s tricky to get it back on once it’s come off.

I used boxed corners on the ends to make the boxy shape, and I added ribbon tabs to make it easier when pulling the zip open and closed.

boxy pouch tutorial

Instructions For Making a Boxy Pouch

You Will Need

Cotton fabric for the outer and the lining. You could use the same fabric or a plain cotton with a contrasting print. I used a little bit of a print with some plain for the outer, and the same plain for the lining. If you are new to sewing you’ll find it easier to use one whole piece for the outer.

Interfacing. I like to use a medium weight sew in interfacing because it gives it some weight and just enough squodginess, but you can use what you have. Even lightweight interfacing will make a difference.

A zip. The zip I used was 26 cm long.

Ribbon or similar for the tabs (optional)

A zip foot (optional)

Cutting Out

Cut 2 pieces of outer fabric 26 cm x 18 cm, 2 pieces of interfacing 26 cm x 18 cm and 2 pieces of lining fabric 26 cm x 18 cm.

To make the outer from 2 different fabrics, cut 2 pieces 26 cm x 10 cm and join them along the long edge.

The finished boxy pouch measures 27 cm x 8 cm x 7 cm.

If you want to make a pouch that’s a different size but has the same proportions, the long edge needs to be the same length as the zip, and the short edge needs to be 2/3 the length of the long edge.

Cut 2 pieces of ribbon 5 cm in length.

Sewing the Boxy Pouch

If you are joining pieces to make the outer, do that first.

Take one one of the lining pieces and lay it down with the right side upwards. Position the zip on top of the lining, also face up, with the edge of the zip aligned with one of the long edges of the lining.

boxy pouch tutorial

On top of this, place one of the outer pieces with right side down on top of the zip, and a piece of interfacing on top of the fabric. Make sure that the long edges are lined up and the zip is inside.

boxy pouch tutorial
boxy pouch tutorial

Pin it together, then sew along the long edge, leaving about a cm at either end. This is much easier to do if you have a zip foot, but it’s still possible if you don’t have one.

Fold the lining and the outer the right way out away from the zip. It’s a good idea to run the iron over it at this stage. As you are doing this, check that you have pulled the outer and the lining away from the zip. Otherwise you’ll end up catching things in the zip (guess how I know!).

Leaving a cm free at either end, top stitch the lining and the outer, keeping close to the folded edge.

Repeat these steps to attach the other lining piece, outer and interfacing to the other side of the zip.

boxy pouch tutorial
boxy pouch tutorial

With the right sides together, sew the other long edge of the outer with the interfacing.

Repeat with the lining, but this time leave an opening.

Trim the seams.

boxy pouch tutorial

Now open the zip a little way. This is very important! When you turn the box pouch out, it will need to go through the zip opening as well as through the gap in the lining, so make sure you open it enough!

Squash the lining and the outer so that the seams you have just sewn are aligned with the zip. Pin the short edges of the lining, then pin the outer and interfacing.

boxy pouch tutorial

This is where it will make a difference if you remembered to leave a cm or so free at each end. If you didn’t do this, don’t panic! Just unpick a few stitches.

If you want your box pouch to have tabs, take a piece of ribbon, fold it in half and slip the folded edge inside the seam. Pin it in place, then do the same on the opposite side.

Sew the sides of the lining, catching the zip in the seam each time.

boxy pouch tutorial

Repeat with the outer and the interfacing, again catching the zip in the seams. Trim the seams.

boxy pouch tutorial

Making the Boxed Corners

Find the half way point between one of the corners and the bottom seam. Mark it with a pin.

boxy pouch tutorial

Press from the corner with your finger to crease the fabric. Now open out the corner and match the crease to the side seam. Pin the corner where you marked the half way point.

boxy pouch tutorial
boxy pouch tutorial

This is a bit fiddly and you might have to put your hand in through the gap in the lining to get the crease and the seam lined up.

Do the same with the rest of the corners of the lining, and with the outer.

If you would like a more detailed tutorial showing how to make boxed corners, there’s one here. Please note though that these were boxed corners for a bag and although the process is the same, it was less fiddly!

Sew across the corners at right angles to the seam. Cut the corners off. Trim away all the threads.

boxy pouch tutorial

Finishing the Pouch

It’s time to turn it out! This is where I’m really hoping that you remembered to open the zip!

If you didn’t, unpick the side seam of the outer a little bit, open the zip a few cm, then resew the seam.

Push the corners of the pouch out. Handstitch the opening in the lining.

Now all you have to do is decide what to use your boxy pouch for! I think I might keep the pens I like to use for drawing in mine!

boxy pouch tutorial
boxy pouch tutorial
boxy pouch tutorial

Share this:

  • Click to email this to a friend (Opens in new window)
  • Click to share on Pinterest (Opens in new window)
  • Click to share on Facebook (Opens in new window)
  • Click to share on Twitter (Opens in new window)

Filed In: Blog, Sewing Projects / Tagged: beginner, craft fair, gift, how to, puch, purse

9 Tips For Sewing With Shiny Fabric

March 5, 2020 · 6 Comments

9 tips for sewing with shiny fabric

When you’re new to sewing, working with cotton is by far and away the easiest sort of fabric to use. It doesn’t fray too much, it doesn’t stretch, it holds its shape and it will go through the sewing machine without getting stuck or sliding around all over the place.

But sooner or later, you’re going to want to sew with something else. Perhaps something shiny, floaty, thicker, or stretchy.

Sewing with shiny fabric can seem daunting, especially if you read people’s blog posts about how hard they are to sew!

It’s true that these fabrics do present with some challenges, but they’re not impossible! All you need is a few tips to point you in the right direction.

Recently I made this. I actually considered not posting this picture because I’m not happy about the extra padding that’s started to creep on around my middle.

9 tips for sewing with shiny fabric

I decided to post it anyway because there is to much out here in internetland where people look perfect. I am a real human. I’ve produced 4 kids and I like cake. And if any of you are feeling depressed because your house is messy, I’ve got pictures of mine that would make you feel so much better!

Anyway, the fabric’s beautiful, I love the colour, and a different top might help, so I’m going to wear it anyway.

Sewing With Shiny Fabric

Before I get into this, I just want to say that making this skirt was NOT a nightmare! Although the fabric is shiny, it’s quite thick so it holds its shape well. Because of that I didn’t have issues associated with those kinds of fabrics.

If you follow these tips, you can totally make something shiny and gorgeous without it being a disaster, and without wanting to throw your sewing machine through the nearest window.

1. Change the Needle

There is proper advice for how often you should change your needle. It’s after a certain number of hours but I can’t remember how many. I usually only change the needle if it breaks or if my machine is complaining!

When sewing with shiny fabric though, a blunt needle will pull at the threads and they will show. So before you do anything else, put a new needle into your machine, and ideally use a smaller than average one. It’s an easy thing to do and could make all the difference.

2. Check the Tension

It’s important that you change the needle before fiddling about with that little dial!

Issues with loopy stitches, pulling and skipped stitches are usually due to the needle, not the tension at all, so always try changing your needle first.

So if you are experiencing problems that look as though tension might be to blame, change the needle, the try sewing on a test piece of fabric. If that doesn’t solve things, then try adjusting the tension.

9 tips for sewing with shiny fabric

3. Use Sharp Pins

As with the needle on your sewing machine, you don’t want to ruin your beautiful fabric with something as easy to avoid as blunt pins.

For some reason, I find that the pins that are all metal are often sharper than the ones with the little plastic bobbles.

So check that your pins are sharp. You might want to buy some new ones, or check the ones you have and put to one side any that are blunt.

There might be a proper way to check the sharpness of pins, but if there is, I don’t know what it is. My method of testing pins is to jab myself in the finger!

Emery pin cushions are a good way to keep pins sharp. There’s a post here on Vicky Myers Creations showing how to make one.

4. Pin the Seam Allowance

Shiny fabric is often less forgiving than cotton when it comes to pin marks, so pin in the seam allowance where possible.

9 tips for sewing with shiny fabrics

5. Make Use of Selvedges Where You Can

A massive issue when sewing with shiny fabric is that it often frays like nobody’s business. I was very happy when I was making my skirt to find that I was able to use the selvedges for the side seams.

They don’t fray, so if you can use them, even if it’s just for the odd seam, then do!

6. Use a Generous Seam Allowance

And don’t trim it down too much! I made that mistake with this skirt that I loved and wore a lot until the fraying got too bad and I ran out of safety pins!

Sewing right next to a raw edge will make the fraying worse. If you trim the seam down too much, the fabric will fray into the seam and you’ll be left with a hole.

So allow a good couple of cm (an inch) for your finished seams.

9 tips for sewing with shiny fabrics

7. Use French Seams to Contain Fraying Hems

French seams offer a nice, neat solution to fraying hems, as the raw edges are contained inside the seam. This helps to prevent the fraying from getting much worse. So if you can’t use the selvedge, sewing French seams might be the answer. Just don’t trim the seams down too much! If you need to learn how to do this, there’s a tutorial here.

8. Finish Hems With Bias Binding

This is my favourite way of finishing a hem, especially on a circle skirt. The bias binding stretches with the curve of the hem which makes it much easier to sew.

With shiny fabrics, it means that the fraying raw edges are trapped inside the bias binding. For instructions for how to finish a hem in this way, there’s a post here.

9 tips for sewing with shiny fabrics

Use a Cool Iron

I hardly ever iron unless I’m making something! When I do, it’s usually something cottony that’s very creased, so I stick the iron on its hottest setting.

Unfortunately shiny fabric falls into the category of things that might melt if the iron’s too hot. So check the temperature first! Even if the hot iron doesn’t melt a hole in the fabric, it might take some of the shiny off.

Do you have a tip you’d like to share? Leave it in comments!

Share this:

  • Click to email this to a friend (Opens in new window)
  • Click to share on Pinterest (Opens in new window)
  • Click to share on Facebook (Opens in new window)
  • Click to share on Twitter (Opens in new window)

Filed In: Blog, Tips and Techniques / Tagged: beginner

Easiest Notebook Ever! How To Make a Notebook

February 19, 2020 · Leave a Comment

how to make a notebook

Easiest Notebook Ever! How To Make a Notebook

This post contains affiliate links. It doesn’t cost you anything but if you click on a link and make purchase, you’ll help to support Tea and a Sewing Machine.

Oh my goodness, who doesn’t love stationery??

Pretty notebooks, matching pens, washi tape, colouring pencils that are pretty to look at and colour nicely too, it all comes second only to a pile of fat quarters!

Notebooks are probably my favourite. I usually have several on the go at once, and I’ll buy another one at the slightest excuse.

One of the things I want to do with the home ed boys is nature journaling. (I’ll be writing a post at some point about how home education looks in my house!)

Writing is often an issue for boys in particular. During his time at school, Barnabas was put off writing, and I’m treading carefully with Cosmo as I don’t the same to happen with him.

Nature journaling sounds like fun. It’s one of those things where there’s no one way, so you can make it whatever you like! Cosmo has said that he wants to learn about space, so we’ve started using it to record stars and things that we’ve seen. With any luck, Barnabas will decide that he wants to do one too!

It’s also the perfect excuse for a new notebook, and what could be better than making one yourself?

how to make a notebook

These notebooks are made from stuff you may well have lying about already. Using elastic to attach pages makes it very easy (no faffing about trying to sew through paper!) and you can add as many different sections as you like.

How To Make a Notebook

how to make a notebook

You Will Need

Thick cardboard. Amazon boxes are ideal. A cereal packet might be a bit thin, but you could stick to pieces together to give it some more weight.

Pretty paper. I used scrapbooking paper that I had already (this from Amazon). You could try wrapping paper as long as its quite thick. The cheapy thin kind probably won’t last long. Paper packs that come free with papercraft magazines would be just the thing, although you’ll probably need to patch pieces together to make it big enough.

If you don’t want to use paper, here are some other things you could try: fabric, felt, an old map, your own artwork, pretty much anything that you could fold round a piece of cardboard and sew it or glue it!

Glue that will stick whatever it is you are using. I used a glue stick. For fabric or felt you’ll need to use PVA.

Elastic. I used this from Amazon. The kind you might put in a waistband probably won’t do. It needs to be the stringy kind. At a push, you could use long elastic bands.

A button. You’ll need this for the closure so a largish one is best.

Paper for the pages. The easiest thing to do is to take some sheets of printer paper and fold them in half.

Instructions

Decide on how big you want your notebook to be.

For the pages I was planning to use sheets of A4 folded in half, so the cover needed to be slightly bigger than A5 so as to protect the pages inside.

Cut a piece of cardboard so that it will be a little bit bigger than the pages when folded in half. I cut the cardboard 32 cm x 23 cm. Yours can be whatever size you like, but ideally slightly larger than the pages.

Cover the inside of the notebook. I used a piece of plain paper, cut to the same size as the cardboard, and glued on using a gluestick.

how to make a notebook

Cut a piece of scrapbooking paper (or whatever you’ve chosen to use instead) a couple of cm (about an inch) larger all the way round than the piece of cardboard. This is so that you have enough to fold over the edges.

how to make a notebook

If you are using bits of paper or fabric that are of different sizes, you could glue them on as you go or stick them to a piece of paper the correct size first. You could even sew them straight onto the cardboard. I haven’t actually tried this, so you might want to experiment a bit yourself first!

Don’t forget to cut a little square out of each of the corners!

how to make a notebook

Attach your covering to the outside of the cover, then fold the edges over and stick them down onto the inside.

If you’re using paper and a gluestick, you might want to leave it for an hour or two under a heavy book so it has a chance to stick properly.

When everything has had a chance to dry, fold the cover in half.

Adding Pages

Cut some pieces of elastic about the same length as the distance round the spine of your notebook. I’ve started off with three. It will be easy enough to add more later if I need them.

Tie the ends together and slip them over the notebook so that they sit in the spine of the cover.

how to make a notebook

how to make a notebook

Add some pages. The easiest way to do this is by taking some sheets of A4 and folding them in half. I used black paper for the first section because I’m going to be recording space stuff too! Slip the pages under one of the pieces of elastic so that the elastic is in the fold of the paper.

how to make a notebook

Making the Elastic Closure

Having some way of keeping the notebook closed is handy. The cover of mine springs open, but even if yours doesn’t, you might find that if it gets very full, you might want an option for keeping it closed.

Cut a piece of elastic long enough to go all the way round your notebook widthwise doubled.

Slip a button onto the elastic and knot the ends. Move the button down so that it hides the knot.

how to make a notebook

To keep your notebook closed, pop the elastic round the it and loop the end of the elastic over the button.

To keep your notebook closed, pop the elastic round the it and loop the end of the elastic over the button.

If you’re worried about losing it, you could make a couple of little holes in the back of the notebook and thread it through.

Now your notebook’s ready to use! If you find yourself running out of pages, or if you need another section, just add some more elastic to the spine and slip some more in.

To keep your notebook closed, pop the elastic round the it and loop the end of the elastic over the button.
how to make a notebook

If you liked this post, you might also like this one showing how to make a fabric diary cover.

Share this:

  • Click to email this to a friend (Opens in new window)
  • Click to share on Pinterest (Opens in new window)
  • Click to share on Facebook (Opens in new window)
  • Click to share on Twitter (Opens in new window)

Filed In: Blog, Other Crafts / Tagged: beginner, easy, how to, notebook, papercraft

Bunting Tote Bag Tutorial

March 29, 2019 · Leave a Comment

bunting tote bag tutorial

Bunting Tote Bag Tutorial

This is a post I actually wrote 3 years ago when a new law was introduced in the UK that required shops to charge for plastic bags.

I’m recycling it because it fits in nicely with the Year of Bunting!

For making the bunting tote bag, I’d recommend using a strong fabric, like a heavy weight cotton. The canvas I used was left over from some curtains I’d made, and the appliqued bunting from scraps of cotton from dresses and other things.

If you don’t have any canvas, you might have an old tablecloth or some curtains you could use.

If you’d rather use a lighter cotton or polycotton fabric, you could line it to make it stronger, or just decide to use it to carry bread and flowers instead of potatoes and gallons of milk!

The bunting tote bag has boxed corners, which means that depending on what you put it, it should stand up.

bunting tote bag tutorial

How to Make a Bunting Tote Bag

1. Cut a rectangle of fabric. Good dimensions would be the same width as a Lidl bag (or other bag for life) and twice as long, plus seam allowance. Mine measured at 48 cm x 120 cm.

If you are using fabric with a directional print, cut 2 rectangles and sew them together.

2. If you do not have an overwhelming urge to cover everything in bunting, you can skip this bit and go straight to Step 3.

shopping bag tutorial

To make the bunting, cut a rectangle 9 cm x 10 cm. Fold in half lengthways. Cut diagonally from the folded corner to the corner opposite. Use this triangle to cut 5 triangles. Position them onto the fabric, allowing for seams. Pin in place, then applique them to the fabric. Sew a piece on of ribbon so that it covers the tops of the triangles.

shopping bag tutorial

3. With the right sides together, pin the side seams then sew them up. Trim the seams. Finish the seams with zigzags, or an overcasting stitch if you don’t have an overlocker. This could be the difference between getting all of your shopping home and the bag breaking and veg and milk and stuff ending up all over the road!

shopping bag tutorial

4. To make the boxed corners, press firmly on the fold at the bottom. Squash one of the corners flat so that the seam is aligned with the fold at the bottom. Measure up 6 cm from the corner. Pin. Sew across the corner. Cut the corner off. For more detailed instructions for making boxed corners, visit this tutorial here.

5. Hem the top of the bag.

shopping bag tutorial

6. To make the handles, cut 2 pieces of fabric 40 cm long and 10 cm wide. Fold in half lengthways. Then fold the outer edges into the middle. Fold in half and pin. Sew. I like to sew along both edges so that it looks symmetrical. Repeat for the other handle.

shopping bag tutorial

7. Sew the handles to the bag. You will need to sew them on in a few places to ensure that they stay on when the bag is full of shopping.

shopping bag tutorial

Now all you have to do is remember to take it with you when you go shopping!

Tips

Heavy weight fabric will be strongest, but other fabrics can be made stronger by adding a lining.

Ripstop will make good bags that are both strong and waterproof.

You could make bunting tote bags in different sizes.

Decorate them as you like to jazz them up.

If you will be carrying your shopping a long way, add some wadding to the handles and quilt them to make them more comfortable.

They make great last minute Christmas gifts and are a good way of using up fabric that you don’t know what to do with!

Share this:

  • Click to email this to a friend (Opens in new window)
  • Click to share on Pinterest (Opens in new window)
  • Click to share on Facebook (Opens in new window)
  • Click to share on Twitter (Opens in new window)

Filed In: Blog, Sewing Projects / Tagged: beginner, bunting, craft fair, easy, gift, how to

  • 1
  • 2
  • 3
  • Previous Entries
I'm Anna and I live in rural Norfolk in the UK. My mum taught me how to use a sewing machine when I was 10 and I haven't looked back! I love making all sorts of things and I hope you find inspiration here.

Join the list

Join the mailing list to receive updates, useful and interesting links and free pages from the Sewing Journal.

My New Ebook

things to male and do in the autumn

Bunting Makes Everything Better Tote Bag

Featured Kit

The Sewing Journal

My Kits and Patterns on Etsy

Shop the Christmas Shop at Sew and So


Join the List

Join the mailing list to receive updates, useful and interesting links and free pages from the Sewing Journal.

Privacy Policy

For information about cookies and Tea and a Sewing Machine's privacy policy, please click here.

Instagram

Instagram Widget by SnapWidget


UK Sewing Blogs

Theme by 17th Avenue · Powered by WordPress & Genesis

loading Cancel
Post was not sent - check your email addresses!
Email check failed, please try again
Sorry, your blog cannot share posts by email.
We use cookies to ensure that we give you the best experience on our website. If you continue to use this site we will assume that you are happy with it.Ok