• Home
  • About
  • Blog
  • Ebooks and Printables
  • Etsy
  • Sewing Journal

Make it Yourself. Yes You Can!

  • Sewing Projects
  • Tips and Techniques
  • Embroidery
  • Other Crafts
    • Crochet
    • Felting
    • Jewellery
    • Wreaths
  • Christmas

Embroidered Pincushion Tutorial

June 27, 2020 · Leave a Comment

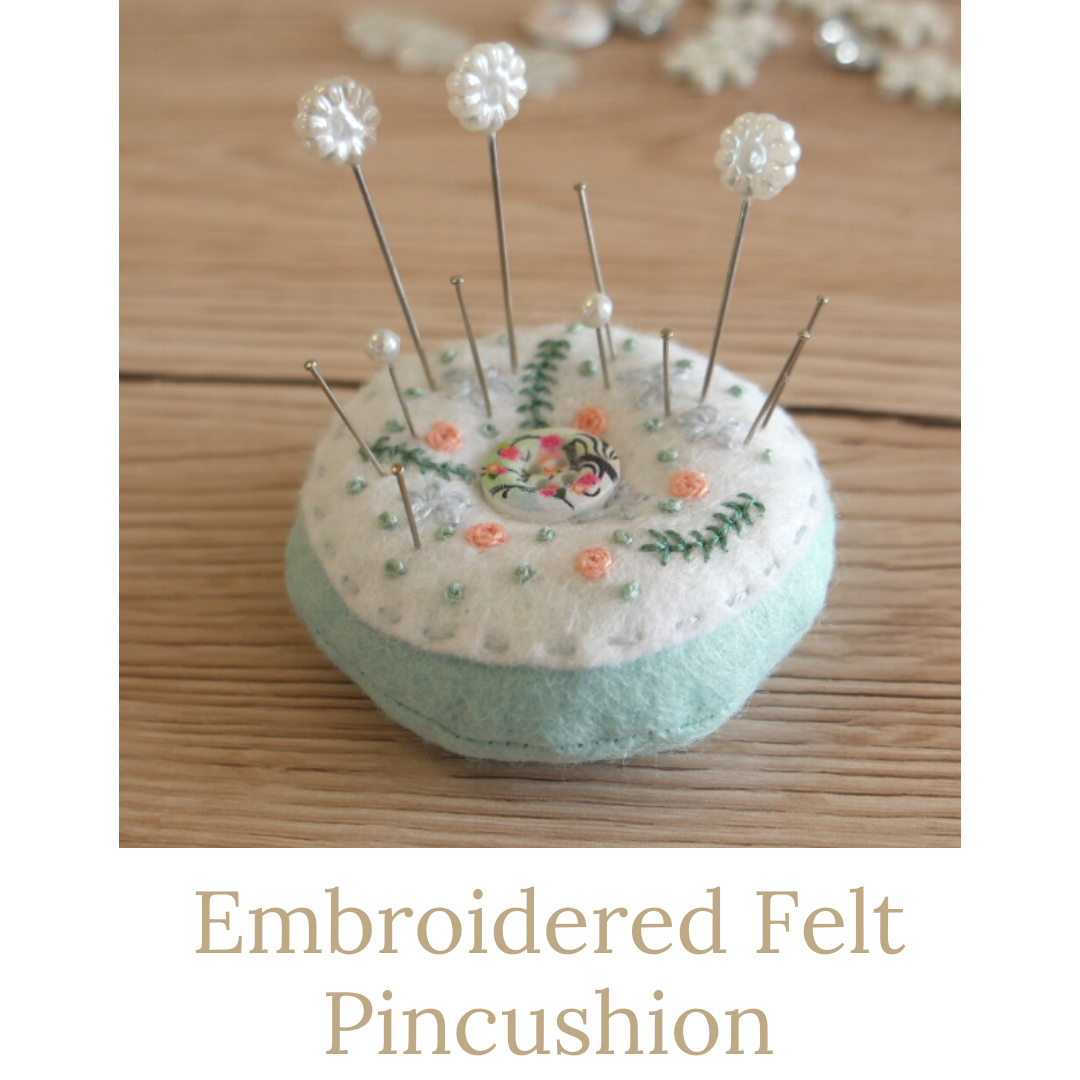
embroidered felt pincushion

It could be possible to become addicted to pincushions. Like having an collection of pretty teacups, pincushions can be as different as you want them to be and pretty as you like. There are so many different ways to make them and, because they are little things, you can use scraps that are too big to throw away but too small to use for a larger project.

This embroidered pincushion is part of a kit that I’ve been developing. I wanted to call it the Safe At Home kit, but as the extra time people kept telling me I was going to have never appeared, it’s taking me a while to finish it!

The other projects in the kit are this bunting, and this needle case.

UPDATE: The kits have finally been completed and you can find them here!

Anyway, the last project is now finished and here it is, an embroidered pincushion!

embroidered felt pincushion tutorial

It can be sewn entirely by hand, or you could speed things up a bit and use the sewing machine to sew the pincushion together.

The embroidery design is free to download, but I do ask for an email address. You can find out more about why I do this here. The form is at the bottom of the post.

embroidered felt pincushion tutorial

Making the Embroidered Pincushion

You Will Need

Scraps of felt in pretty colours
Embroidery thread
Polyester filling, sawdust or emery sand to fill your pincushion
2 buttons
Pattern pieces and the embroidery design. You can either download mine (the form’s at the bottom), or you could make your own.

Cutting Out

You will need 2 circles the same size, and one circle a little bit smaller.

Embroidering the Design

embroidered felt pincushion tutorial

I used lazy daisies, fern stitch, woven wheels and French knots. It’s worth remembering that odd numbers of things usually look better, but you can do what you like! Just remember to leave a space in the middle for the button.

Sewing the Pincushion Together

Attach the embroidered section to one of the larger circles. You could hand sew it or use your sewing machine.

embroidered felt pincushion tutorial

Place the other larger circle on top of the embroidery. Sew around the edge, leaving a gap.

Trim the seam if you need to. Turn the pincushion the right way out. Fill it with your chosen material. It will need to be firm to make it easiest for pushing the pins in.

embroidered felt pincushion tutorial

Take a plain button (this one will be at the bottom) and tie the end of length of thread to it. You might want to use a stronger thread for this, or you could use ordinary sewing thread doubled.

embroidered felt pincushion tutorial

Now push the needle through the centre of the pincushion from bottom to top.

Thread a pretty button onto the needle. Pass the thread through, then back into the pincushion and through the button at the bottom.

embroidered felt pincushion tutorial

Do this a few times and pull it tight. Cut the thread and tie it off.

embroidered felt pincushion tutorial

If you wanted to turn this into a wrist pincushion, you could attach it to a piece of elastic, or make a strap for it like this one.

If you like pincushions, I have a whole Pinterest board devoted to them here!

Share this:

  • Click to email this to a friend (Opens in new window)
  • Click to share on Pinterest (Opens in new window)
  • Click to share on Facebook (Opens in new window)
  • Click to share on Twitter (Opens in new window)

Filed In: Blog, Embroidery, Sewing Projects / Tagged: beginner, craft fair, embroidery, felt, gift ideas, how to, pincushion

DIY Embroidered Christmas Star

December 19, 2018 · 2 Comments

diy embroidered christmas star

DIY Embroidered Christmas Star

When I was younger, I did a lot of Christmas crafting. I used to make cards and decorations and bake stuff.

Then I had kids and everything changed! I’d plan to make lots of things, then feel frustrated and annoyed that I hadn’t managed to get them done.

One year I tried to get round the fact that I had several tiny children by starting early. I was making stuff from August onwards. But because I’d been thinking about Christmas for so long, by the time it eventually came round I was sick of it!

So a couple of years ago, I made the decision to not worry too much. I’d do a bit if I had time and if I felt like it, and not attempt anything too ambitious. There is a limit to how many decorations I can hang off the tree anyway and I don’t send that many Christmas cards.

This year has been different again. Home educating my younger three means that I have boys at home in the day again. As they were showing signs of needing a break from the academic stuff, we spent most of last week doing Christmas crafts while listening to The Lion, The Witch and the Wardrobe. It was lovely! 

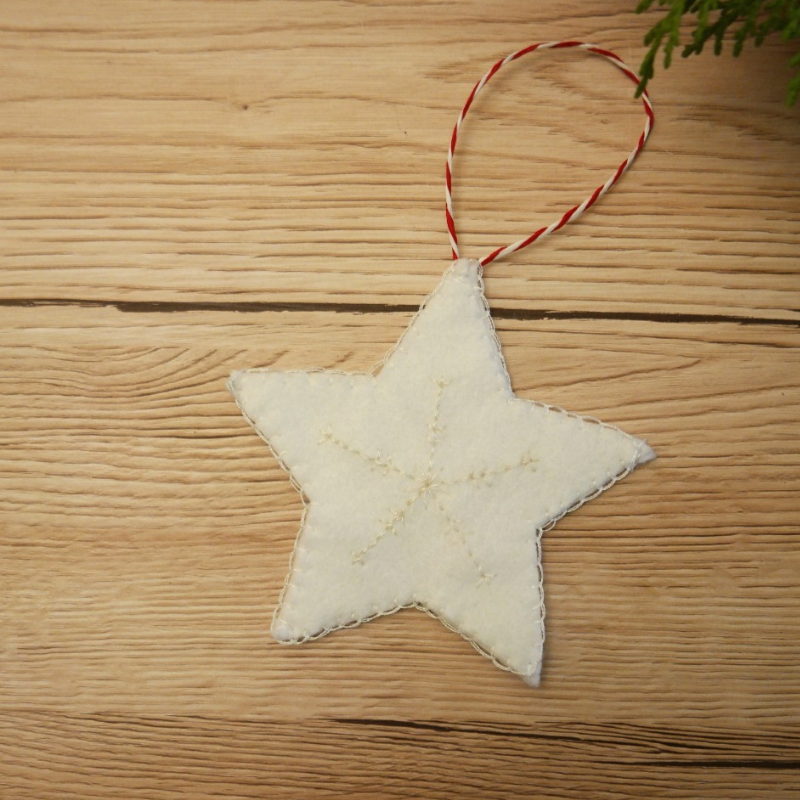
One “grown up” thing that I’ve been working on recently is an diy embroidered Christmas star.

diy embroidered christmas star

It’s made from felt with a snowflake design embroidered in the centre. The stars are sewn together using blanket stitch. 

It’s a perfect project for a busy person who’s left things a bit late! It doesn’t take long to make. You can do a bit when you have a minute. You can make one, or a few and string them together. And to make things easier, you can download a template with the snowflake design at the bottom of the post.

How To Make a DIY Embroidered Star

You Will Need

Felt
Embroidery thread
Ribbon for hanging
Star shape
Snowflake design

diy embroidered christmas star

Making the Star

1.Cut 2 stars from felt.

2. Embroider the snowflake design onto one of the stars.

diy embroidered christmas star

3. Sew the 2 stars together. I used blanket stitch, but you could use back stitch or running stitch if you prefer.

diy embroidered christmas star

4. Attach some ribbon or twine for hanging.

diy embroidered christmas star

If you would like the template I used, please enter your email address in the form below. Please note that by doing this, you will be added to the Tea and a Sewing Machine email list. I never send spam, only a weekly email containing updates, links, and other things that you might like. You can unsubscribe from these emails at any time. For more information about why I do this, please click here.

chimpy_form(’41’)

Share this:

  • Click to email this to a friend (Opens in new window)
  • Click to share on Pinterest (Opens in new window)
  • Click to share on Facebook (Opens in new window)
  • Click to share on Twitter (Opens in new window)

Filed In: Blog, Christmas, Sewing Projects / Tagged: beginner, Christmas, craft fair, easy, embroidery, felt, how to

Easy DIY Felt Flower Wreath

February 8, 2018 · 2 Comments

Easy DIY Felt Flower Wreath

Since my Christmas wreath came down, my poor front door has been left without a wreath.

I’ve got plans to cheer it up by painting it a pretty shade of green, but the weather’s been either too cold or too wet!

Until spring turns up (hopefully soon, so bored of winter now!), my door needs something.

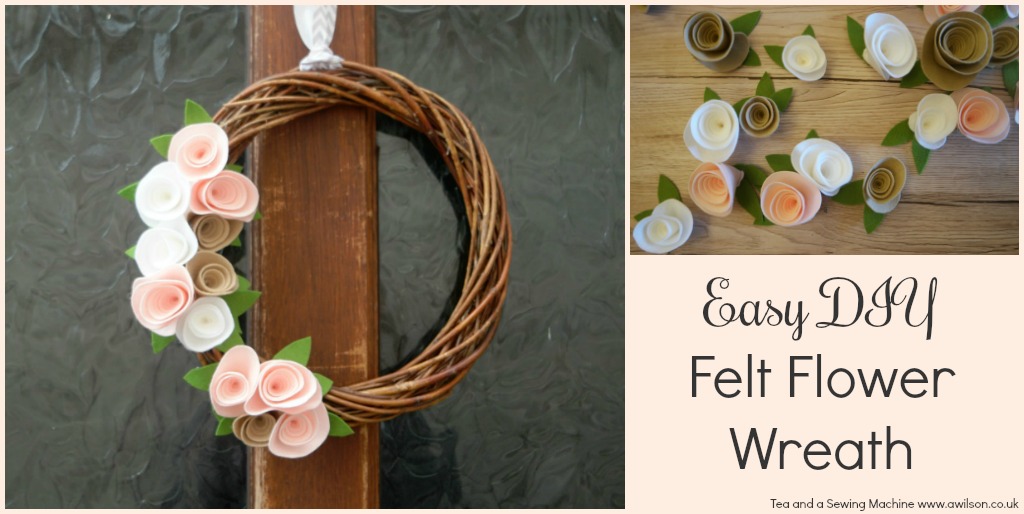
Inspired by so many beautiful felt flowers on Pinterest, I decided to have a go at making some, which I could then use to make a felt flower wreath.

Making the felt flowers was surprisingly easy! The best kind of crafts are the sort when you can get good results easily, and these felt flowers definitely fall into that category.

I bought some buttons to put in the centre of the flowers, but in the end I decided they were pretty enough for a felt flower wreath without them!easy diy felt flower wreath

How to Make Felt Flowers

I have included some affiliate links.

You Will Need

Felt (I used these felt sheets from Minerva Crafts), a glue gun, items to make the circle templates, a willow or grapevine wreath.

Making the Templates

I made three templates by drawing round a bowl, the lid of a tin and a mug. This gave me templates that were 16 cm across, 12 cm and 9 cm.

In the end I decided that the largest flowers were a little bit too big, so I didn’t use them. I might glue them to hair clips and wear them in my hair instead!

Making the Flowers

1. Cut circles from felt.easy diy felt flower wreath

For the wreath I used 3 of the middle sized flowers and 9 smaller flowers.

2. Cut a spiral into the circle. As the centre of the circle will form the outside of the flower, the spiral will need to get wider towards the middle.easy diy felt flower wreath

3. Starting at the outside, carefully roll the spiral up. To start with, the bit you cut will be the bottom of the flower.easy diy felt flower wreath

4. Keep rolling! When you’ve rolled up the whole spiral, you might like to put a pin through the flower to hold it.easy diy felt flower wreath easy diy felt flower wreath easy diy felt flower wreath

5. Using the glue gun, put a blob of glue on the bottom of the flower. Stick the end of the spiral over the base of the flower.easy diy felt flower wreath easy diy felt flower wreath

You could probably sew them if you prefer, or use PVA glue or fabric glue, but I’d recommend using the glue gun. I’d actually not used one before, but it was very easy, the things stuck very well and the glue dried nice and quickly.easy diy felt flower wreath

6. To make the leaves, cut a strip of green felt, then cut it into rectangles. easy diy felt flower wreath easy diy felt flower wreath Cut a curved bit away from corner to corner, then do the same on the other side. easy diy felt flower wreath easy diy felt flower wreath Don’t worry about getting them all the same size. You can use smaller leaves with the smaller flowers, and anyway in nature leaves are usually different, even on the same plant!

7. Stick 2 leaves to the base of each flower.easy diy felt flower wreath

Attaching the Flowers to the Wreath

I apologise for the lack of photos for the steps here, I got so carried away I kept forgetting to take pictures!

1. Take the 3 middle sized flowers and glue them to the wreath. I put the top and bottom flowers closer to the inside edge of the wreath with the leaves pointing inwards, in the middle flower closer to the outside edge with the leaves pointing outwards.

2. Take 3 of the smaller flowers and arrange them around one of the larger flowers.easy diy felt flower wreath

Then do the same with the other 2 larger flowers and the rest of the smaller ones. Don’t worry if there’s some wreath showing. You might want to cover it completely, but I think that being able to see wreath in between breaks it up a bit, like silences in music.easy diy felt flower wreath

3. Thread a piece of ribbon through the felt flower wreath and hang it up!easy diy felt flower wreath easy diy felt flower wreath

If you enjoy making door wreaths, you might like to have a look at my wreaths page!


Share this:

  • Click to email this to a friend (Opens in new window)
  • Click to share on Pinterest (Opens in new window)
  • Click to share on Facebook (Opens in new window)
  • Click to share on Twitter (Opens in new window)

Filed In: Blog, Wreaths / Tagged: decor, felt, flowers, how to, spring crafts, wreath

How To Make Felt Poinsettias

November 30, 2017 · 4 Comments

How To Make Felt Poinsettias

A splash of red is always lovely at Christmas. Poinsettias offer that splash of red, but unfortunately for any plants that enter my house, the chances of them lasting more than a week are slim.

Thankfully there is an alternative for those of us who do not have green fingers!

I’ve been amazed at the beautiful flowers some people are able to make just from a simple medium like felt. And once the flowers are made, they can be used in all sorts of ways, including ways that might not be possible with real flowers.

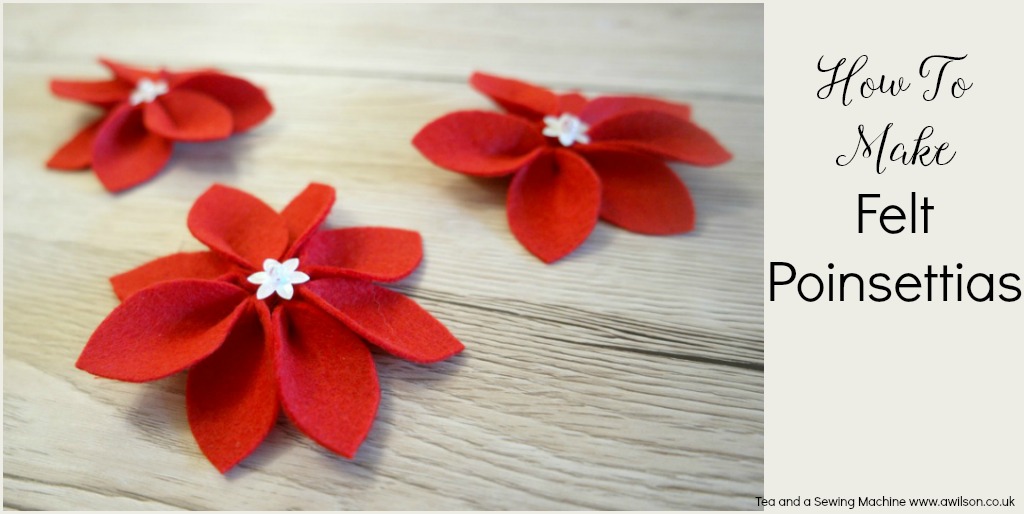
So here’s a tutorial showing how to make felt poinsettias!

I have included some affiliate links.how to make felt poinsettias

How To Make Felt Poinsettias

You Will Need

Red felt (you can buy it by the sheet at Minerva Crafts and at Hobbycraft), needle and thread, buttons or sequins and beads, template (download it here or you could make your own).

If you use my template, the finished flowers will be approximately 8 cm across.

Instructions

1. Make your template, or print and cut out the one I used. If you’re making your own, the template will need to be a symmetrical leaf shape.

2. Cut leaf shapes from red felt. You will need 8 for each of the felt poinsettias you want to make.how to make felt poinsettias

3. Take one of the felt shapes and fold it in half lengthways. Sew a couple of stitches up from the point to hold the shape. Do this for the other 7.how to make felt poinsettias how to make felt poinsettias

4. With the thread doubled, thread the petals onto the needle near where you sewed in the previous step. Pull the thread through, leaving a tail. how to make felt poinsettias When you have threaded all the petals, pull both ends and tie them together in a knot. how to make felt poinsettias

5. Arrange the petals, then sew a sequin and a bead to the centre of the flower. Pass the thread from the back of the flower to the front, then through the sequin. Pass the needle through the bead, then back through the sequin and through to the back of the flower. Tie off the thread. You could sew a button instead if you wanted to, or even glue a sparkly thing to the centre.how to make felt poinsettias how to make felt poinsettias

6. Use one of the tails to sew a couple of loops to the back of the flower. You can then use these loops to sew the flowers to something, or thread a piece of wire or a pipe cleaner through the loops to attach the felt poinsettias.

If you make some felt poinsettias I’d love to see! Share them on Tea and a Sewing Machine’s Facebook page!

Share this:

  • Click to email this to a friend (Opens in new window)
  • Click to share on Pinterest (Opens in new window)
  • Click to share on Facebook (Opens in new window)
  • Click to share on Twitter (Opens in new window)

Filed In: Blog, Christmas / Tagged: decor, felt, flowers, how to

How to Sew Felt Birds

November 17, 2017 · Leave a Comment

How to Sew Felt Birds

My favourite Christmas decorating style is Scandinavian, and after a trip to Norway last year, I love it even more!

A couple of years ago I made some Scandi style felt birds as Christmas decorations. They’re the kind of thing that you can get away with leaving up even when it’s not Christmas, but the red is quite Christmassy. So I decided to make some similar birds in blue instead of red, and these I will be leaving up all year round!

Like the ones, the blue felt birds are made from felt. Gingham felt can be hard to find, but I bought all the felt for these birds, including the gingham, from Minerva Crafts. This is an affiliate link.

I sewed them together with the sewing machine, but being small, they could be sewn by hand.

Here’s the tutorial!
how to sew felt birds

Felt Birds Tutorial

You Will Need

Blue felt, white felt, gingham felt, blue and white ribbon, tiny black buttons, wooden heart buttons.

Instructions

1. Cut 2 bird pieces from the blue felt, 2 from the white felt and 4 wings from the gingham felt. Before cutting the wings, fold the felt in half so that you have 2 wings facing one way and 2 facing the other.how to sew felt birds

2. Pin 1 wing to each bird body and sew in place.how to sew felt birds

3. Sew a heart button to the centre of each wing as shown on the picture.how to sew felt birds

4. Sew a tiny black button to the head of each bird piece.how to sew felt birds

5. Take the 2 blue body pieces and, with the wrong sides together, sew around the outside edge of the body. Repeat with the 2 white body pieces.how to sew felt birds

6. Sew a piece of ribbon to each bird for hanging.how to sew felt birdshow to sew felt birds

I have kits available for these birds if you don’t want to faff about finding the supplies yourself. They’d also make nice gifts for people.

You might like the tutorial for the red felt Christmas birds.

I have kits for sale for the red birds too!

If you make some birds, I’d love to see! You can post them to the Tea and a Sewing Machine Facebook page!

Share this:

  • Click to email this to a friend (Opens in new window)
  • Click to share on Pinterest (Opens in new window)
  • Click to share on Facebook (Opens in new window)
  • Click to share on Twitter (Opens in new window)

Filed In: Blog, Sewing Projects / Tagged: birds, craft fair, craft kits, decor, felt

  • 1
  • 2
  • 3
  • Previous Entries
I'm Anna and I live in rural Norfolk in the UK. My mum taught me how to use a sewing machine when I was 10 and I haven't looked back! I love making all sorts of things and I hope you find inspiration here.

Join the list

Join the mailing list to receive updates, useful and interesting links and free pages from the Sewing Journal.

My New Ebook

things to male and do in the autumn

Bunting Makes Everything Better Tote Bag

Featured Kit

The Sewing Journal

My Kits and Patterns on Etsy

Shop the Christmas Shop at Sew and So


Join the List

Join the mailing list to receive updates, useful and interesting links and free pages from the Sewing Journal.

Privacy Policy

For information about cookies and Tea and a Sewing Machine's privacy policy, please click here.

Instagram

Instagram Widget by SnapWidget


UK Sewing Blogs

Theme by 17th Avenue · Powered by WordPress & Genesis

loading Cancel
Post was not sent - check your email addresses!
Email check failed, please try again
Sorry, your blog cannot share posts by email.