• Home
  • About
  • Blog
  • Ebooks and Printables
  • Etsy
  • Sewing Journal

Make it Yourself. Yes You Can!

  • Sewing Projects
  • Tips and Techniques
  • Embroidery
  • Other Crafts
    • Crochet
    • Felting
    • Jewellery
    • Wreaths
  • Christmas

Easy Tulle Circle Skirt

June 16, 2018 · 2 Comments

Easy Tulle Circle Skirt

One of the nice things about getting older is that I’m so much comfier in my own skin.

I’m also much comfier in things I Iike wearing. I know what I like and I’m not bothered about what other people think!

Being in the happy situation that I’ve lost 3 stone over the last year and nothing fits anymore, I’ve got the perfect excuse to sew things for myself!

Back in the autumn I made this tulle skirt. It’s now too big and I also had a mishap with a candle, not to mention some issues with the handles on the kitchen cupboards.

There’s nothing like dressing up in a foofy skirt when you’re not doing anything special, so it was time to make a new one!

Although there are lots of layers in this easy tulle circle skirt, they can all be attached to the waistband at the same time, and the only layer that needs hemming is the lining.

If you are fairly slim, or if you don’t mind the skirt being short (ie above the knee), you’ll be able to cut complete circles from the tulle. Otherwise you’ll need to cut half circles and sew them together.

Ready to feel like a 4 year old at a birthday party? Here we go!easy tulle circle skirt

How to Make an Easy Tulle Circle Skirt

You Will Need

2 metres of lining fabric 150 cm (59 inches) wide

Several metres of tulle. I got 4 layers out of 6 m, but it will depend on your dimensions.

Enough waistband elastic to go round your middle

Bias binding for hemming the lining, at least 5 m.

Usual sewing supplies

Before You Start

You’ll need to measure your waist, round your hips and waist to knee (or however long you want the skirt to be.

There are tips about taking measurements here!

Take your hips measurement and divide it by pi. Don’t worry too much about this! It’s 3.14 something and it’s basically the relationship between the distance around the outside of a circle (ie your hips measurement) and the distance across the circle passing through the centre.

Most calculators have a pi button, but you could just divide by 3 instead.

This is the maths that you need to do:

Hips divided pi (or 3).

Desired skirt length x 2.

Add these numbers together. This will tell you how big the square of fabric needs to be in total.

When you’ve divided your hips measurement by pi, you’ll need to divide that answer by 2.

Hopefully you’ll be able to cut complete circles out of your tulle.

If not, you’ll need to cut half circles instead and sew them together.

Cutting Out

When you bought the tulle, it was probably already folded in half length ways.

It will be easiest to cut out if you fold it into squares.

So keep it folded in half, then fold the short end over to make a triangle. easy tulle circle skirtMark where the edge of the triangle is. When you open this out, it will give you a square. Fold the square over. Mark where the short edge is and cut.easy tulle circle skirt

Keep going like this until you run out of tulle!

You can cut the lining in the same way.

Now take one of the squares of tulle. Keep it folded and identify the centre corner. From this corner, measure down the same distance as your hips divided by pi divided by 2. Mark it with a pin, then measure across the corner to the other side.easy tulle circle skirt

Now measure the total length of your folded piece of tulle down one side.

If you’re making a shorter skirt, if you are small or if you’re making it for a child, measure down from the top corner the same distance as your hip measurement divided by pi then divided by 2, plus your desired skirt length.

Measure this amount across the square to the other side, marking with pins as you go.easy tulle circle skirt

easy tulle circle skirt

Cut the bottom edge.easy tulle circle skirt

Now you can use this as a template to cut the other pieces.

When you’ve cut the bottom edge, cut the top corner. You could do this at the same time as cutting the bottom, it’s just easier to line up the pieces when the top corner is still there.

The lining can be cut in the same way, but it will need to be a bit shorter. Cut an extra 10 cm (4 inches) or so off the bottom edge.easy tulle circle skirt

You have one more thing to cut now and that’s the elastic! Cut a piece that will go comfortably around your waist without being too tight, plus enough extra to sew the ends together.

Sewing the Skirt

Now you’re ready to sew your easy tulle circle skirt!

If you need to sew side seams, do this now so that you have complete circles of tulle and lining.

Hem the lining. This is easiest to do with bias binding. There’s a tutorial for the method I used here.

Lay the lining out right side up. Put the tulle layers on top of this and line up the circle in the middle.

Pin the layers together, then tack them. When you’re doing this, keep checking that you have all the layers.easy tulle circle skirt

On the edge of the centre circle, mark off quarters. This is to make thing easier when you attach the tulle.

Sew the ends of the elastic together. I like to enclose the raw edges to minimise fraying. You might need to do this by hand if your sewing machine protests.easy tulle circle skirt

With pins mark quarters on the waistband like you did with the skirt.

Now you can sew the skirt to the waistband!

To do this, you’ll need the elastic at the bottom, then the tulle with the lining uppermost.

Choose a zigzag stitch on your sewing machine. This will allow everything to stretch so that you can get in and out of your skirt!

As you sew, stretch the elastic so that you can match the quarters of the waistband with the quarters of the skirt. You’ll need to use both hands for this.easy tulle circle skirt

Trim away any stray threads and you’re ready to wear your easy tulle circle skirt to a party, or just for the school run and removing limescale from the loo like I did the other day!easy tulle circle skirt

easy tulle circle skirt

Share this:

  • Click to email this to a friend (Opens in new window)
  • Click to share on Pinterest (Opens in new window)
  • Click to share on Facebook (Opens in new window)
  • Click to share on Twitter (Opens in new window)

Filed In: Blog, Sewing Projects / Tagged: beginners, gift, how to, sewing clothes without a pattern, Skirt

Easy DIY Tulle Skirt With a Hanky Hem

October 28, 2017 · 2 Comments

DIY Tulle Skirt With a Hanky Hem

I’d been considering making or buying a tulle skirt for a while.

The thing that was putting me off was the idea that I am perhaps a little on the old side to go galumphing through the Norfolk countryside like an overgrown, overweight fairy.

I’ve since decided that life is too short to let what other people might or might not be thinking dictate what you want to do, and if somebody wants to go about dressed in a tulle skirt like an unconvincing ballerina, well, why not?

Nothing gets done in my world withoutl consulting Google first, so I googled wearing a tulle skirt over 40 and found some pictures of people looking amazing. I also found some of people who looked silly, but I’m choosing to ignore those!

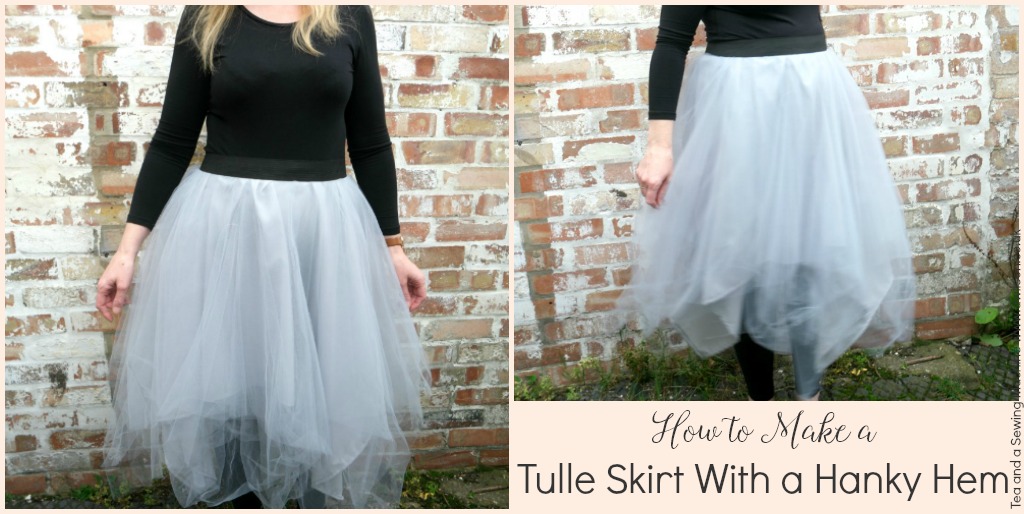
So I bought myself some tulle and some elastic and here are the results!How to make a tulle skirt with a hanky hem

Making the skirt was very similar to making to a circle skirt, except that the pieces are square. It’s gathered a little bit at the waist, then sewn to a piece of waistband elastic.

As the tulle didn’t need hemming, it was very quick to make!

I used 6 layers of tulle. Initially I wasn’t going to line it, but as the tulle was quite fine it was not completely opaque. I’m only ever going to wear it over leggings, but I decided it did need lining after all. I’d already completed the skirt, so I made the lining and just sewed it in under the tulle.

One little thing: make sure that you buy tulle and not dress net! Dress net is stiffer. Tulle is drapey and soft. I’ve seen dress net described as tulle but they’re not the same!

Instructions For Making a Tulle Skirt With a Hanky Hem

You Will Need

Several metres of tulle. I used 4.5 m of tulle that’s 280 cm wide. This gave me 6 pieces roughly 140 cm square. If I was making a circle skirt, this would result in quite a short skirt, but as the bits are square, it was fine.

You’ll also need waistband elastic (enough to go round your middle plus a bit extra), tape measure, calculator (there’s probably a calculator on your phone if you don’t have one), pencil and paper and a needle and thread.

If you want to line it, you’ll need enough fabric to make a square about the same size as the tulle squares. I used anti static lining fabric, but you could use cotton or polycotton.

Working Out the Measurements

As the points of the squares will be quite a lot longer than the straight edges, you can get away with the straight edges being shorter than you’d want the hem of a circle skirt to be.

1. Measure your waist, then around your hips. Jot both of these measurements down.

2. Take your waist measurement and divide it by pi.

If you don’t know what this is, don’t panic!

Pi is the relationship between the distance around the outside edge of a circle (ie your waist) and the distance across the circle passing through the centre. The distance around the circle is about 3 times the distance across it. The actual number is more exact, which is why you need pi, otherwise people would have to remember a number with lots of decimal places.

So divide your waist measurement by pi.

As we only need to know the distance from the edge of the circle to the centre, not all the way across it, divide this answer by 2.

The answer you get here will tell you how far down the fabric to measure when you’re cutting the hole for your waist.

Cutting Out

1. Cut your tulle into squares. The fabric I used was 280 cm wide, so I cut it in half, then into squares. This gave me pieces that were 140 cm x 140 cm.

2. Take one of the squares and fold it into 4. Identify the corner that is the centre of the square. Find the number you got when you divided your hip measurement by pi and then by 2. Measure down from the corner along one side by this much and mark with a pin.How to make a tulle skirt with a hanky hem

3. Do the same on the other side, then measure all the way across.How to make a tulle skirt with a hanky hem

4. Cut out the circle. Now you can use this is as a template to cut out the other pieces.How to make a tulle skirt with a hanky hem

How to make a tulle skirt with a hanky hemIf you want to line your skirt, cut a square of your lining fabric an the same way. You might have to join 2 pieces together to get it the right size, but don’t worry if it’s a bit smaller.

5. Cut a piece of waistband elastic the same as your waist measurement, plus 4 extra cm.

Making Up the Skirt

1. You’ll need some space to do this! Lay out one of the squares flat so that one of the straight edges is facing you.

Take a 2nd square and put it on top of the 1st one, on the wonk, so that the corner is facing you. In other words, you have one piece square, then the second piece diamond.

Layer the squares up in this way, so the odd numbered layers are all square, and the even numbered layers are all on the wonk.

2. Using strong thread or normal sewing thread doubled, hand sew all the layers together around the waist line. How to sew a tulle skirt with a hanky hem

Pull the thread to gather the waist so that it is 5-10 cm larger than your waist. This is to allow for some stretch so you can get the skirt on and off!

3. Mark halfway round the skirt, then mark the quarters. Do the same on the elastic, leaving a couple of extra cm at each end.How to make a tulle skirt with a hanky hem

4. Now sew the elastic to the skirt. Start a couple of cm from the end of the elastic. As you sew, pull the elastic gently. Try to match where you marked the quarters on the elastic to where you marked them on the waist of the skirt.How to make a tulle skirt with a hanky hem

5. Fold the ends of the elastic over and sew.How to make a tulle skirt with a hanky hem

Now your skirt is finished and you can go off galumphing!How to make a tulle skirt with a hanky hemHow to make a tulle skirt with a hanky hemHow to make a tulle skirt with a hanky hem

How to make a tulle skirt with a hanky hem

Share this:

  • Click to email this to a friend (Opens in new window)
  • Click to share on Pinterest (Opens in new window)
  • Click to share on Facebook (Opens in new window)
  • Click to share on Twitter (Opens in new window)

Filed In: Blog, Sewing Projects / Tagged: beginners, easy, how to, making clothes without a pattern, Skirt

How to Sew a Reversible Wrap Skirt

July 28, 2017 · 4 Comments

How to Sew a Reversible Wrap Skirt

In my quest for a neat and tidy house, I have realised that the best way to achieve this is to have less stuff.

With 6 of us in a small house, this is not easy! But I know that there are things I can do to make things much better.

Having too many clothes can be an issue. How many of us have opened a wardrobe bulging with clothes  and immediately thought, “I have nothing to wear!”?

I’m trying to cut mine right down to a few things I wear all the time and get rid of things that hardly see the light of day (or refashion them into something else, like I did with this top!).

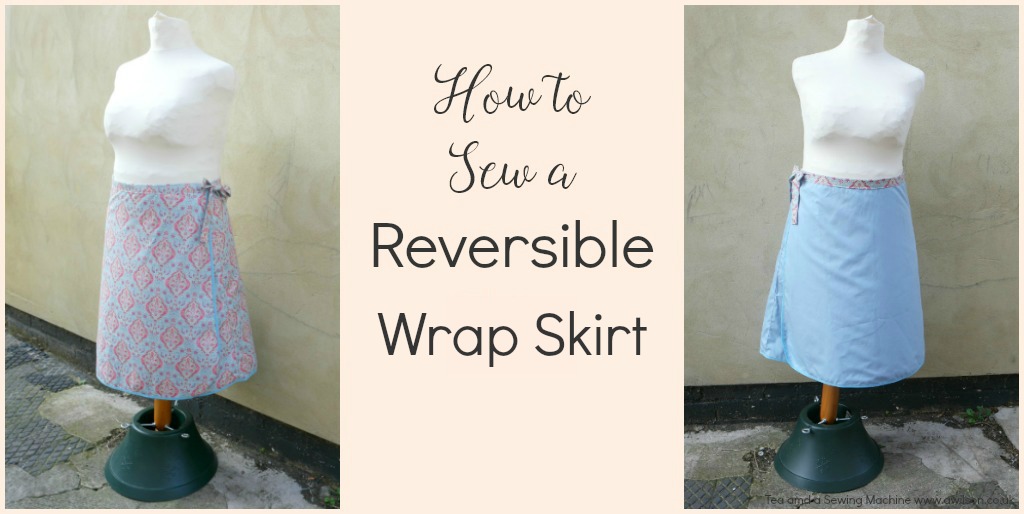
So to maximise on wardrobe space and keep actual outfits to a minimum, I’ve made a reversible wrap skirt, so it’s 2 skirts in 1!

The good thing about a wrap skirt is that they are easy to adjust. All you have to do is check that the button is in the right place. And if you gain or lose weight, it’s easy enough to move the button.

It’s a good project for a beginner as it’s easy to make and it doesn’t matter too much if your measurements are a bit off.how to sew a reversible wrap skirt

Making a Reversible Wrap Skirt

I have included some affiliate links.

You Will Need

Some large pieces of paper (pattern paper is ideal but you could use newspaper), pencil, ruler, tape measure, french curve (optional) cotton fabric for the outside, contrasting cotton fabric for the inside (2 metres of each will be plenty), bias binding, 2 buttons.

Drafting the Pattern Pieces

To draft the pattern pieces for a reversible wrap skirt, you will need your waist measurement and your measurement from your waist to your knee. You’ll also need to decide how wide you want the skirt to be at the bottom.

On a folded piece of pattern paper, measure down the fold the same length as you would like your skirt to be. Now draw a line outwards from the top of where you marked. The length of this line will need to be your waist divided by 4, and it will need to go upwards slightly.

From the bottom of where you marked on the fold, draw another line your desired skirt width. This will also need to go upwards.

Join the end of this line to the end of the other horizontal line. Both the horizontal lines will need to curve gently.

If you are unsure about drawing the bottom edge, take your tape measure and find the halfway point along the waistline. Measure down to your desired skirt length. You could do this ¼ and ¾ of the way along as well. This will help you to draw the curve so that the skirt is the same length all the way across.how to sew a reversible wrap skirt

This is half of the skirt back. To draft the skirt front pieces, you will need to draw around this so that you have one complete skirt. Using a French curve (or a plate if you don’t have one), round off one corner.how to sew a reversible wrap skirt how to sew a reversible wrap skirt

Cutting Out

From both outer and inside fabric, you will need to cut 2 skirt front pieces on folded fabric, and 1 skirt back piece.

You will also need to cut a waistband 10 cm wide and long enough to go around the top of the skirt, plus 40 cm extra for tying. You might need to cut this in a couple of sections and sew them together.

For the ties, cut 2 more pieces 10 cm wide and 40 cm long.

Sewing Up

1. Take the outer skirt pieces and sew the front sections to either side of the back. Make sure you sew the straight edges as the curved edges need to be at on the outside. Trim the seams and press themhow to sew a reversible wrap skirt

Do the same with the inside skirt pieces.

2. Pin the outer to the inside with the wrong sides together, matching the seams.

3. Starting up at the top of the skirt, pin one end of the bias binding to the inside of the skirt. The raw edges will need to line up and it will be easier if you fold the bias binding in half lengthways before sewing.

Don’t worry about pinning it all the way round. Just pin it at the start then sew, keeping close to the fold.how to sew a reversible wrap skirt

4. Fold the bias binding over the raw edges and top stitch all the way round. If you remembered to fold the bias tape in the previous step, you will find this much easier!how to sew a reversible wrap skirt

5. To make the waistband, join the sections together if you haven’t already.

Fold it in half lengthways and press. how to sew a reversible wrap skirt Open it out, then fold the raw edges into the middle. Press again.how to sew a reversible wrap skirt how to sew a reversible wrap skirt

Fold it in half lengthways again and press.how to sew a reversible wrap skirt

6. Starting at the left side of the skirt, fold the end over, then pin the raw edge of the waistband to the top of the skirt on the inside. Sew it to the skirt. Don’t worry about the extra for the tie at the moment.how to sew a reversible wrap skirt how to sew a reversible wrap skirt

7. Fold the waistband over the raw edges and pin. Top stitch all the way round. When you get to the tie, keep going, stopping 3 or so cm before the end. Tuck the end in, then stitch over it.how to sew a reversible wrap skirt

8. Make the ties in the same way as the waistband. Fold the strips in half lengthways, press, then open them out. Fold the raw edges into the centre and press again. Tuck the ends in a couple of cm, then sew along the open edge.how to sew a reversible wrap skirt

9. Sew the ties to the waistband at the left hand side seam. You will need to sew one to the outside of the skirt and one to the inside.how to sew a reversible wrap skirt

10. Try the skirt on so you can establish where the buttons need to go. If your measuring was accurate, it should be roughly where the other side seam is. Sew a button onto both sides.how to sew a reversible wrap skirt

On the part of the skirt opposite the button, make a loop by making chains with doubled thread.  Attach the end close to where you started. If you need a tutorial showing how to do this, there’s a good one here.

how to sew a reversible wrap skirt Run the iron on your reversible wrap skirt one last time and it’s ready to wear!how to sew a reversible wrap skirt how to sew a reversible wrap skirt how to sew a reversible wrap skirt how to sew a reversible wrap skirt how to sew a reversible wrap skirt how to sew a reversible wrap skirt

This reversible wrap skirt could be adjusted to make a lined skirt for the colder months.

If you liked this post, you might also like these:

Making Trousers Without a Pattern

How to Draft a Bodice

Cherry Blossom Dress Without a Pattern

Circle Skirt Tutorial

Linking up here.

Share this:

  • Click to email this to a friend (Opens in new window)
  • Click to share on Pinterest (Opens in new window)
  • Click to share on Facebook (Opens in new window)
  • Click to share on Twitter (Opens in new window)

Filed In: Blog, Sewing Projects / Tagged: dressmaking, how to, no pattern, sewing clothes without a pattern, Skirt, tutorial

How to Sew on Bias Binding

September 17, 2015 · 6 Comments

As a little girl, I used to enjoy rummaging through my mum’s blanket box full of left over fabric and the cubby of her sewing machine where she kept other bits and bobs.

I can remember finding masses of bias binding, wondering what on earth it was for and why my mum had so much of it!

Now of course I know that bias binding has lots of uses!how to sew on bias binding

One way in which it can be used is to finish the raw edge on a skirt instead of hemming. It is actually my favourite way of finishing the hem on a circle skirt because the curve of the circle actually makes it quite difficult to hem neatly. This is what I did to finish this circle skirt and my favourite summer dress.how to sew on bias binding

It can also be used to finish necklines. I have said before in this post how I try to avoid using facings. They never stay put! Using bias binding to finish a neckline is much easier, neater and quicker! This is how I finished the neckline of this dress.how to sew on bias binding

Bias binding can also be used to hold side seams together and, if sewn to the right side of an item, add a decorative finish. I have also used it to finish raw edges on bags and purses.

With all kinds of colours, widths and even prints, there is no reason not to use it! And if you can’t find some that you like, it is very easy to make your own!

How to Sew On Bias Binding

1. When you buy bias binding, it will usually come with the raw edges pressed lengthways  inwards to the middle.

When you sew it, one of the raw edges will be sewn to the wrong side. The other raw edge will be tucked underneath and sewn onto the other side.

So the first thing to do is to fold the bias binding in half lengthways. If you will be sewing only a small piece, cut it off the roll first, allowing a few extra cm. If you are sewing several metres of it, leave it on the roll and fold it as you go.

2. Unfold the bias binding and pin one of the raw edges to the raw edge of your garment, on the wrong side. Neatly fold the short end over. circle skirt how to sew on bias binding

If you start at a seam, the folded end of the bias binding will be less obvious.

If you are going to be sewing masses of it, just pin the at the start and line up the raw edges as you sew.

3. Sew all the way around, keeping close to the raw edge. If your fabric looks like it might fray, use a zigzag or an overcasting stitch.

Cut the bias binding so that the ends overlap by about a cm. You don’t need to bother with folding the end over.how to sew on bias binding

4. Fold the bias binding over so that the raw edges are enclosed. This is where having already folded it in half lengthways will really help! 10 top tips to make sewing projects easier how to sew on bias binding

5. Pin it in place, then sew all the way round, keeping close to the edge of the bias binding.circle skirt how to sew on bias binding

6. When you are a couple of cm away from being back to where you started, check that the end is tucked under neatly, then sew over it. You might need to add a couple of stitches by hand, although I don’t usually!

If you want to make your own bias binding, there’s a gadget you can use.

If you enjoyed this post, you might also like these!

How to Finish a Necklinehow to finish a necklineHow to Finish Seamshow to finish a seamHow to Attach a Waistbandattach a waistbandHow to Alter a Dresshow to alter a dress!0 Tips to Make Sewing Projects Easier10 tips to make sewing projects easier

Share this:

  • Click to email this to a friend (Opens in new window)
  • Click to share on Pinterest (Opens in new window)
  • Click to share on Facebook (Opens in new window)
  • Click to share on Twitter (Opens in new window)

Filed In: Tips and Techniques / Tagged: bias binding, clothes, how to, Skirt

How to Attach a Waistband

July 23, 2015 · 8 Comments

According to my mum, the first skirt I ever made was when I was 9 or 10. It was a rectangle of fabric sewn together along one edge, with a hem and casing for and elastic at the waist.

Unfortunately now, as a slightly chunky grown up, I am not going to get away with wearing skirts with elasticated waists. Those are best left to children and the very slim.

Thankfully attaching a waistband to a skirt is pretty easy once you know how! I’ve included three slightly different methods.attach a waistband

How to Attach a Waistband

You will need to sew in the zip first! For instructions how to sew in a zip, you can read this post here.

Ribbon Waistbandattach a waistband

You will need a piece of ribbon slightly longer than the distance around your waist and 5 – 6 cm wide.

1. Fold the ribbon in half lengthways. You will need to crease it so you could iron it, but pressing it with your finger will probably do the job well enough.

2. Fold the ribbon in half widthways to find the middle.

3. Starting opposite the zip and with the middle of the ribbon, put the ribbon over the raw edge at the waist and pin. attach a waistbandCarefully top stitch the ribbon to the skirt. Leave a couple of cm either side of the zip.attach a waistband

4. Fold the raw edges of the ribbon underneath so that they match up with where the fabric of the skirt joins the zip. Sew in place.attach a waistband

Fabric Waistbandcircle skirt

1. Cut a piece of fabric as long as the distance round your waist plus a bit extra, and about 10 cm wide. You might need to join 2 pieces together, that’s fine. If the fabric is quite lightweight or creases very easily, you might want to add some fusible interfacing to make it a bit thicker.

2. Fold the fabric in half lengthways and press it, either with the iron or with your finger. Open it out, then fold the raw edges into the middle. Press again.attach a waistbandattach a waistband

3. Start opposite the zip and with the middle of the waist band. Pin the edge of the waistband to the wrong side of the fabric so that the raw edges are together and the right side of the waistband is next to the wrong side of the fabric. attach a waistbandSew all the way round, leaving a couple of cm either side of the zip. If you need to finish the raw edges, now is the time to do it!

4. Fold the waistband over the top of the skirt and fold the edge back under. Pin, then top stitch round the waist again. still leaving a couple of cm at the zip.attach a waistband

5. Fold the raw edges underneath so that the edge of the waistband is aligned with where the skirt meets the zip. attach a waistbandSew in place.attach a waistband

Bias Binding Waistband.

To make a waistband using bias binding, you will find it easier and probably more comfortable if you use wide bias binding.

The process is exactly the same as the one above, except that you don’t have to faff about with folding in the raw edges! Just cut it to the right length, then fold the bias binding in half lengthways. Follow the steps above from step 3!

You might also like this post here about making a circle skirt, and this post here about upcycling a shapeless old dress into a skirt and this post here about making a skirt with godets. You don’t need a pattern for any of them but knowing how to attach a waistband will be useful!

Linking up here: Behind the Seams Sewingclairejustine “HM" Amy

Live Randomly SimpleSuper Busy MumSincerely, PaulaCraftyAllieCreativeHump Day HappeningsVIEW FROM THE FRIDGEDear Creatives

Seasons of a Homemaker

Craft DictatorLink PartySew-Many_Ways
Inspire Me Monday
Show and Tell

Do Tell Tuesday

Tuesday Pintorials

Create, Link, Inspire

Create It Thursday
Seasons On Saturday
Skip The Housework Saturday

Share this:

  • Click to email this to a friend (Opens in new window)
  • Click to share on Pinterest (Opens in new window)
  • Click to share on Facebook (Opens in new window)
  • Click to share on Twitter (Opens in new window)

Filed In: Tips and Techniques / Tagged: clothes, how to, no pattern, Skirt

  • 1
  • 2
  • Previous Entries
I'm Anna and I live in rural Norfolk in the UK. My mum taught me how to use a sewing machine when I was 10 and I haven't looked back! I love making all sorts of things and I hope you find inspiration here.

Join the list

Join the mailing list to receive updates, useful and interesting links and free pages from the Sewing Journal.

My New Ebook

things to male and do in the autumn

Bunting Makes Everything Better Tote Bag

Featured Kit

The Sewing Journal

My Kits and Patterns on Etsy

Shop the Christmas Shop at Sew and So


Join the List

Join the mailing list to receive updates, useful and interesting links and free pages from the Sewing Journal.

Privacy Policy

For information about cookies and Tea and a Sewing Machine's privacy policy, please click here.

Instagram

Instagram Widget by SnapWidget


UK Sewing Blogs

Theme by 17th Avenue · Powered by WordPress & Genesis

loading Cancel
Post was not sent - check your email addresses!
Email check failed, please try again
Sorry, your blog cannot share posts by email.
We use cookies to ensure that we give you the best experience on our website. If you continue to use this site we will assume that you are happy with it.Ok