
How to Make a Water Bottle Carrier
How to Make a Water Bottle Carrier
I have been planning to make a water bottle carrier for ages and at last I have got round to it! I actually need to whip up a few; we’re going on holiday in a couple of weeks and I know how heavy 6 bottles of water can be!
The water bottle carrier is simple in construction and can be made to fit whatever size of bottle you have. The outer is quilted to insulate the bottle and keep your water cooler for longer.
I had planned to line it but as the lining ended up being a bit of a snug fit, I just finished the raw edge at the top with bias binding instead.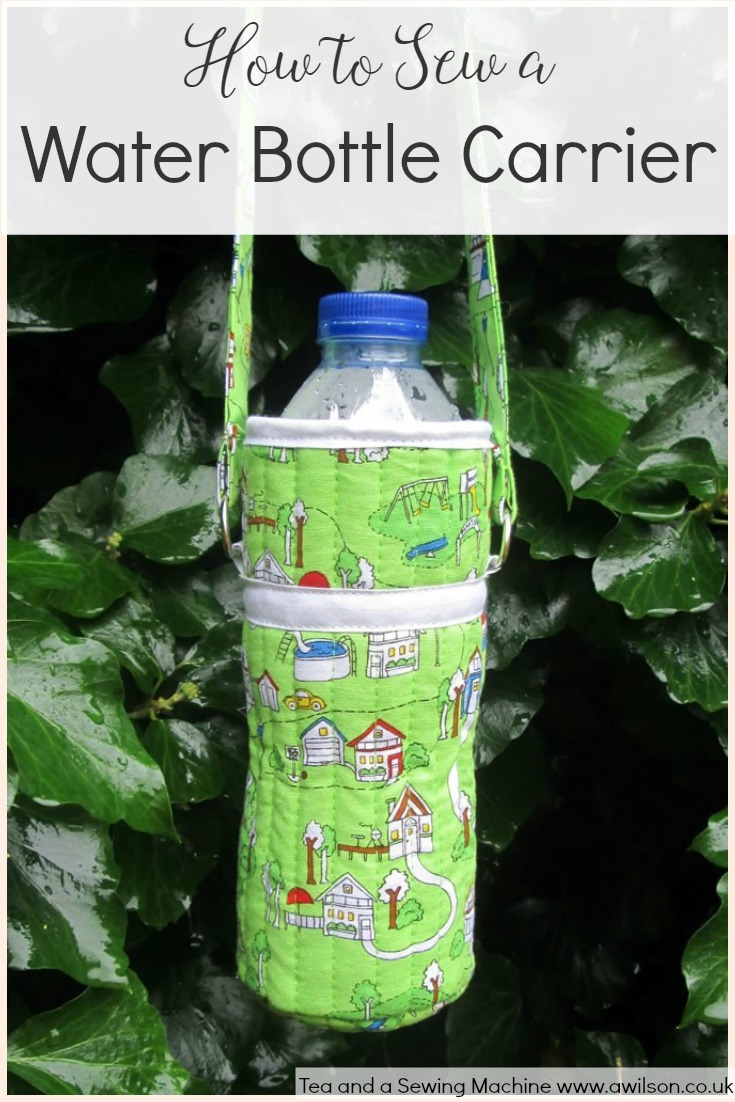
How to Make a Water Bottle Carrier
You will need: fabric for the outer and lining (if you are making a separate lining you will need 2 pieces), wadding, ribbon or bias binding, D rings.
1. Wrap a piece of paper around the outside of your bottle. Mark on the paper the height of the bottle and where the paper overlaps. This is to determine the size of rectangle that you will need to cut from the fabric. Add a cm for the seam allowance and another couple of cm for quilting.
Draw around the bottom of the bottle and add an extra 2 -3 cm extra there too.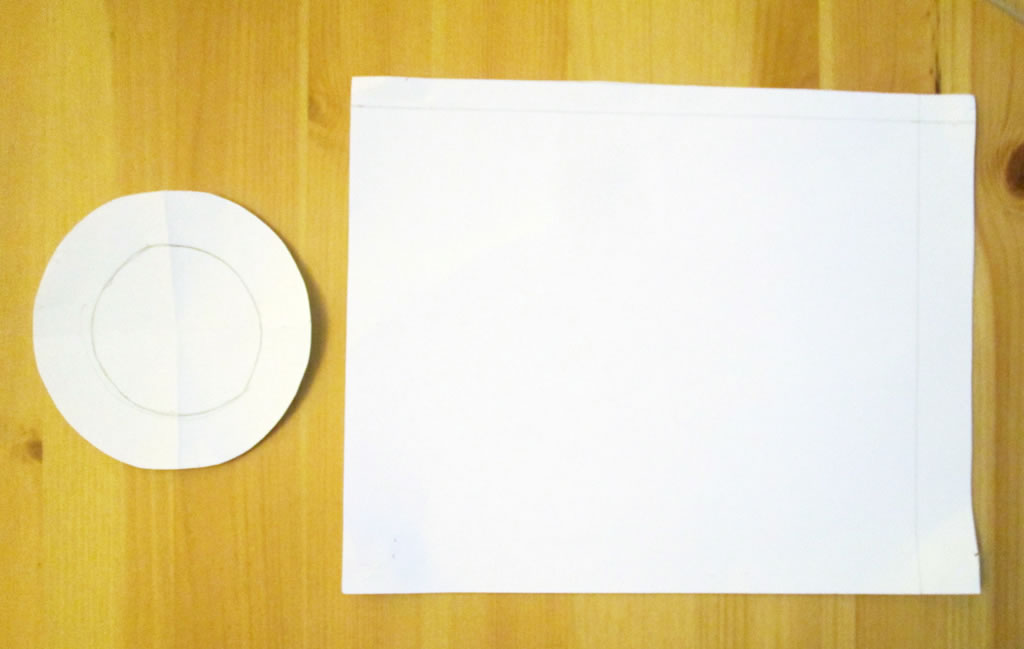
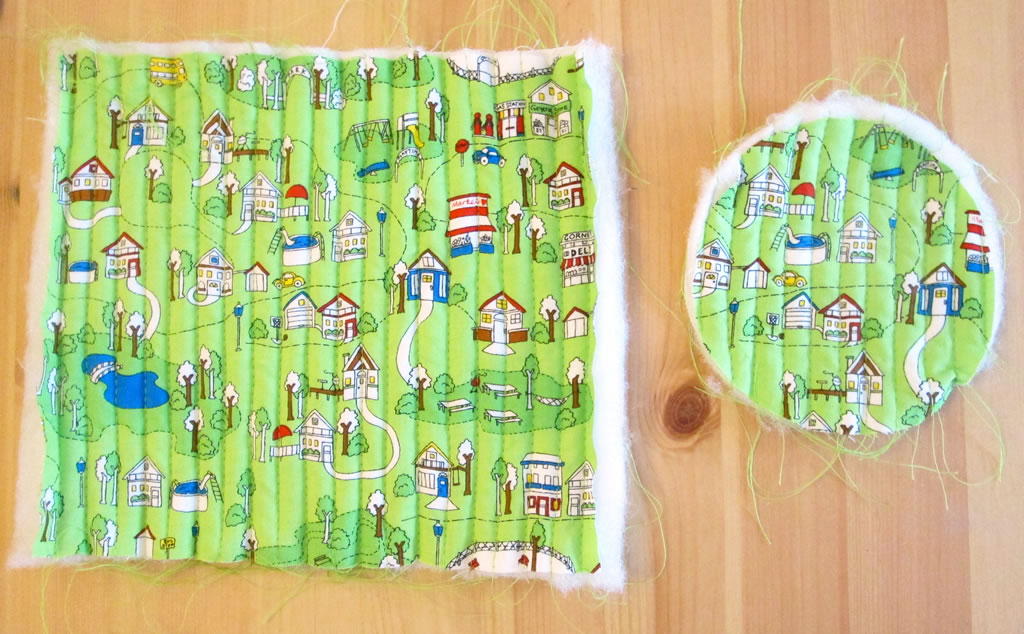
2. Cut 1 rectangle and 1 circle from the main fabric, the wadding and the lining. If you are making a separate lining you will need to cut 2.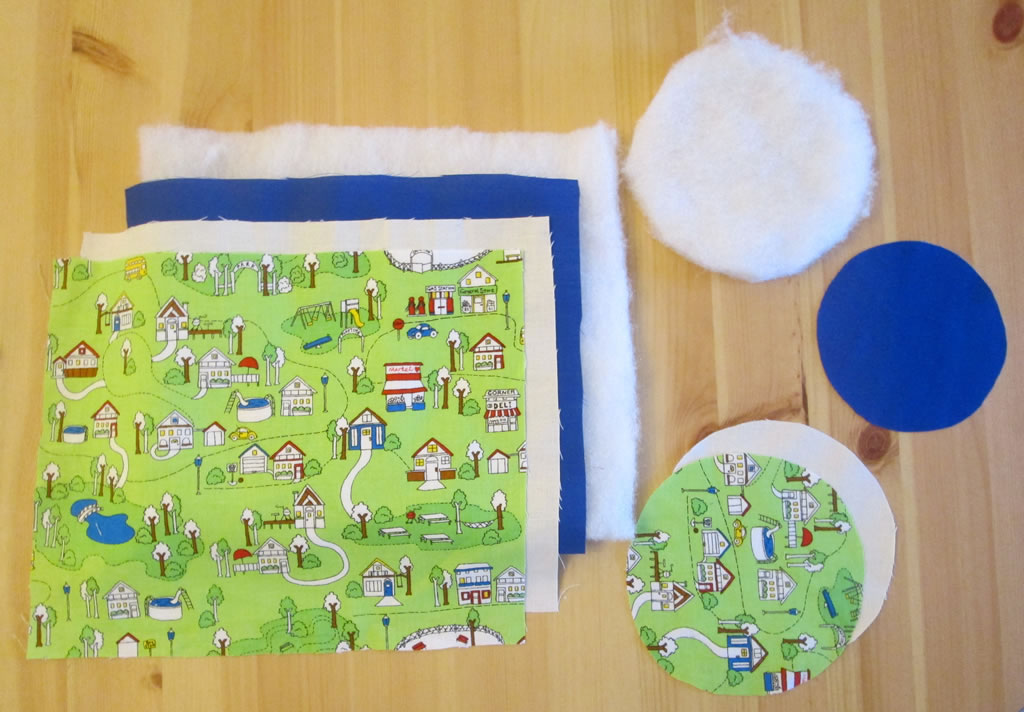
3. Pin the main fabric right side up to the wadding and one of the lining pieces. Use plenty of pins! You should have a kind of sandwich with the wadding in the middle. You will need to do this for the circles as well.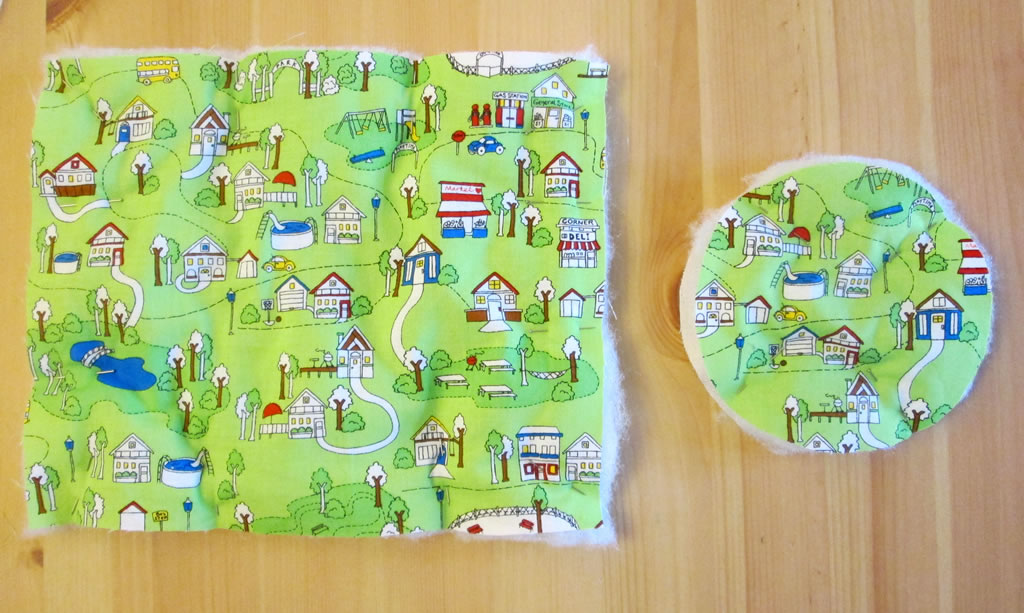
4. Quilt the sandwich. I did this by sewing rows up and down, using the edge of the presser foot as a guide. Switching the direction in which you are sewing causes it all to distort less. When you have finished the rectangle, quilt the circles.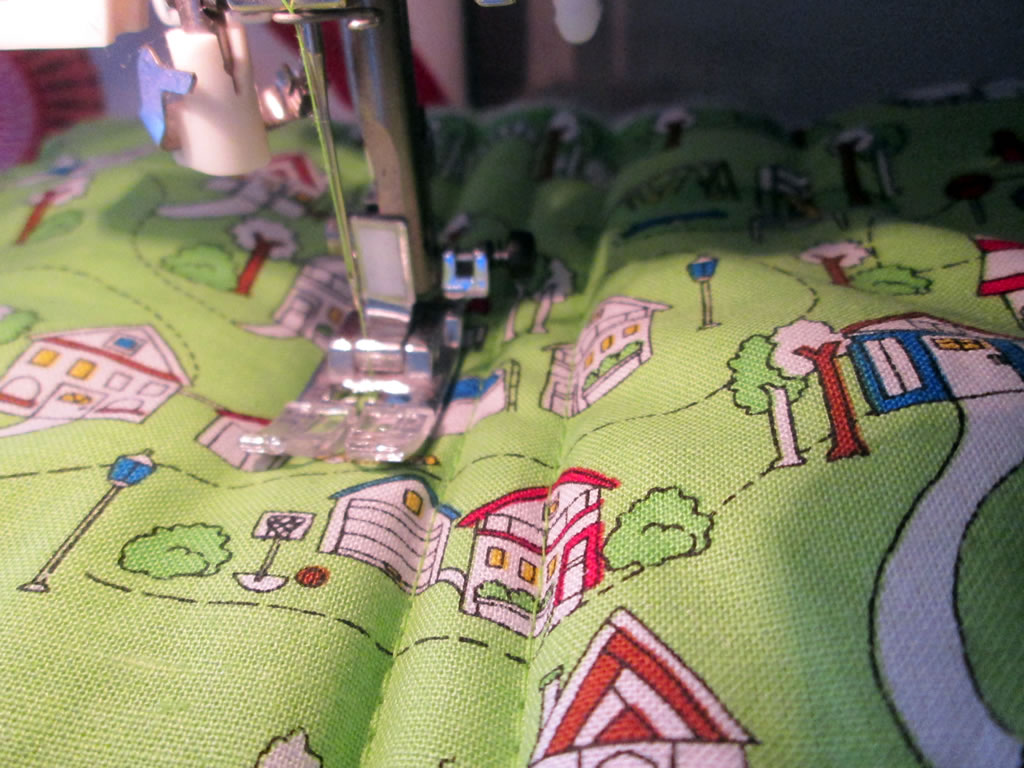
5. From the ribbon or bias binding, cut enough to go length ways across the quilted rectangle. Cut 2 pieces about 5 cm long and fold each one in half width ways. Slip a D ring onto each piece.
6. Lay the pieces of bias tape with the D rings on about a quarter of the way in from each edge. Pin the longer piece over the top. 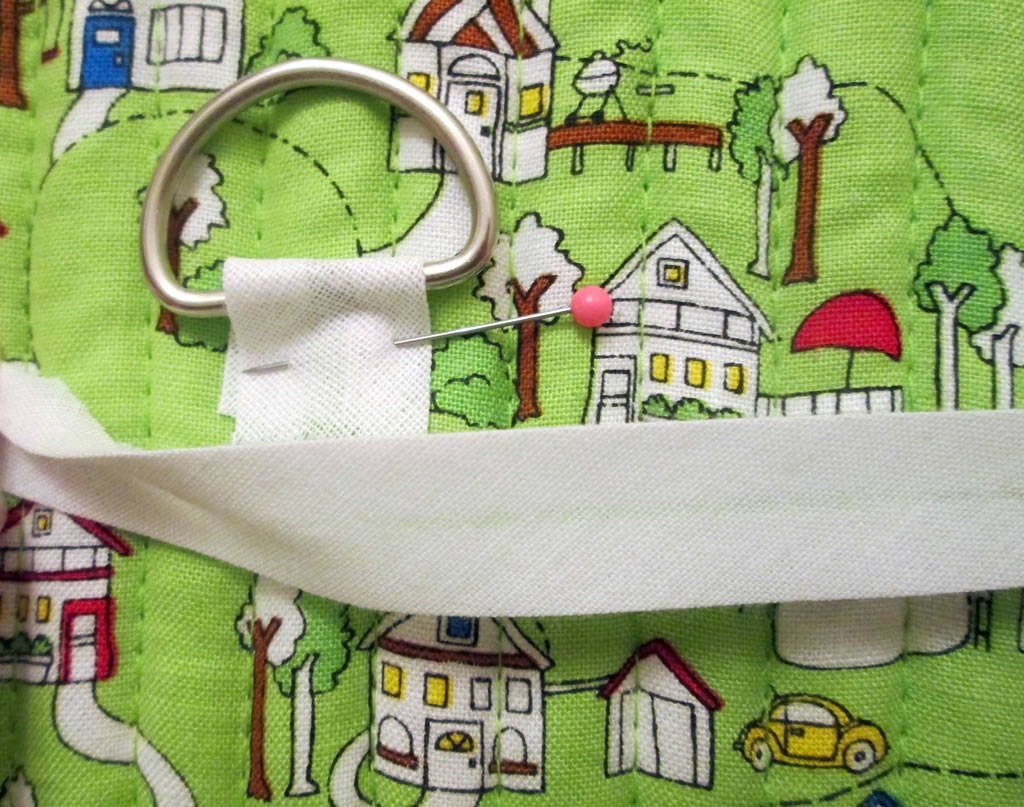 Sew the bias tape in place.
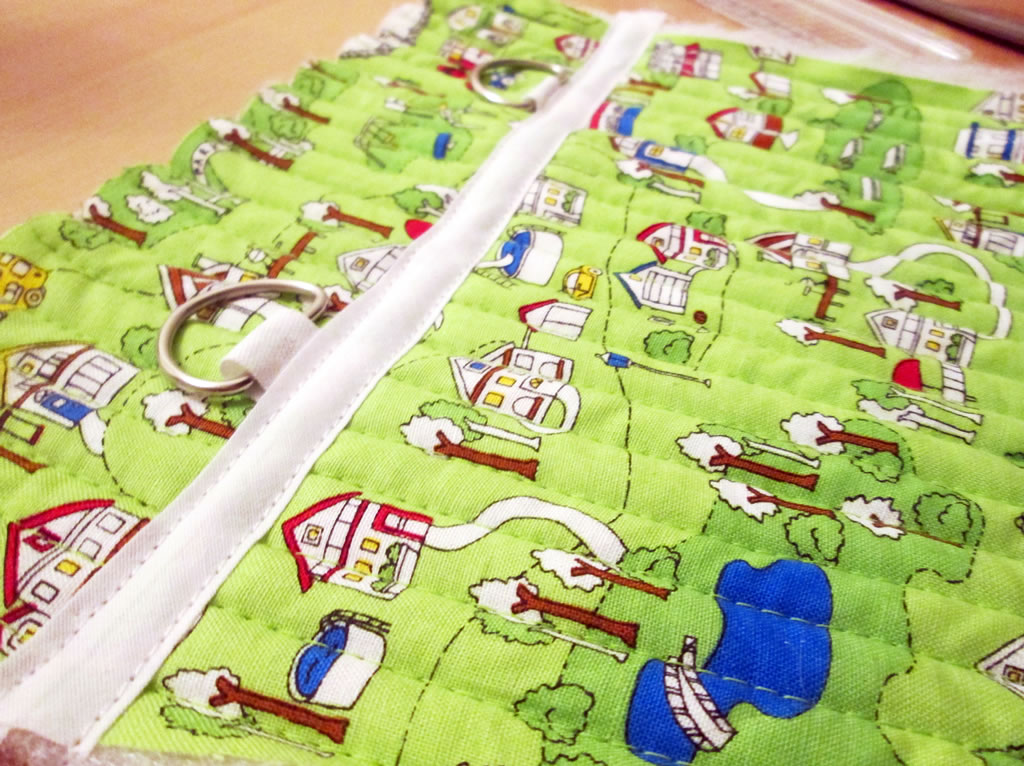
7. Fold the quilted rectangle in half with the right sides together. Sew along the edge opposite the fold.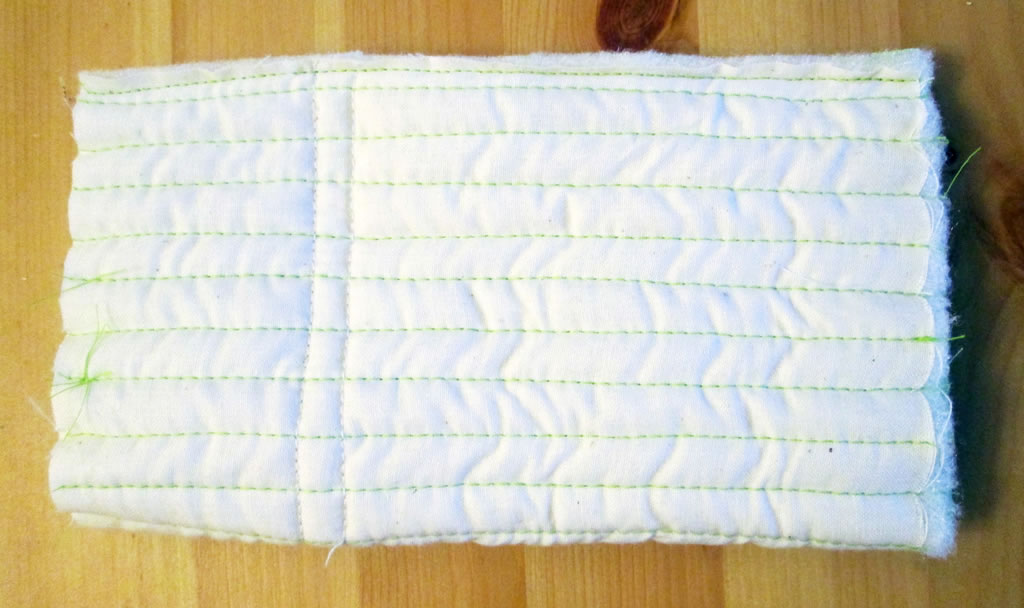
8. Pin the circle to the bottom of the rectangle that is now a cylinder. This is a bit fiddly, but stick with it! It might look like a weird vegetable. 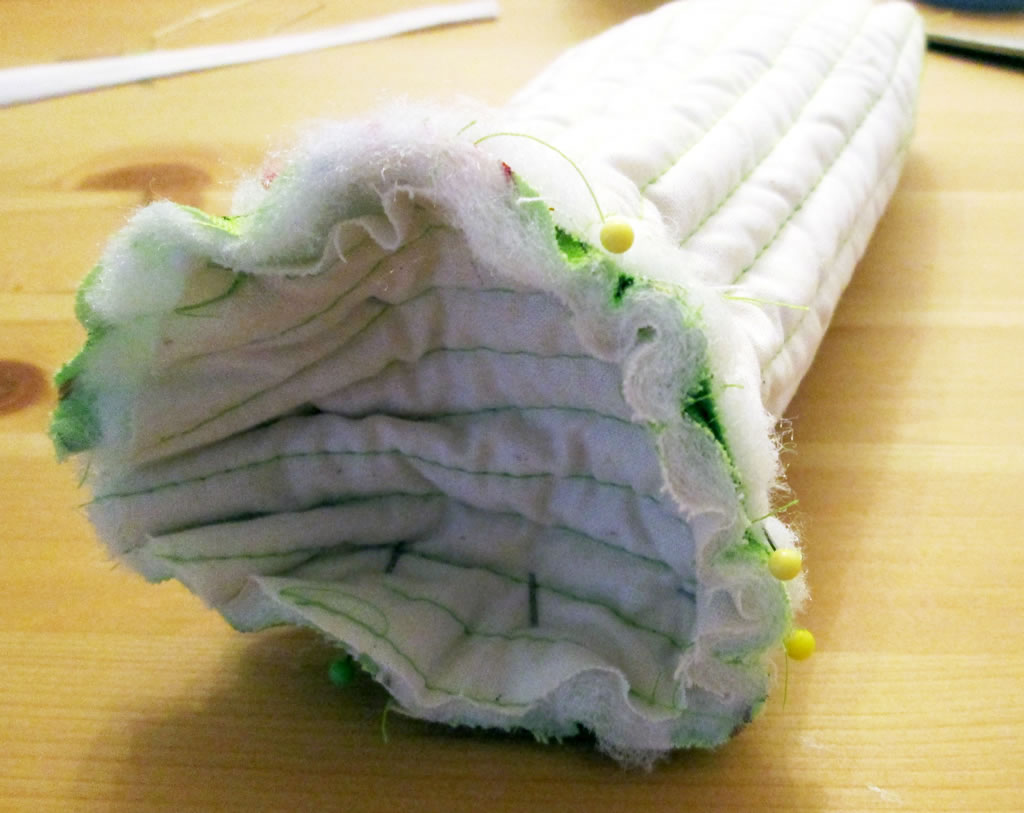 Sew the circle in place.
9. Trim the seams closely and turn out. Sew bias binding to the raw edge to finish it off.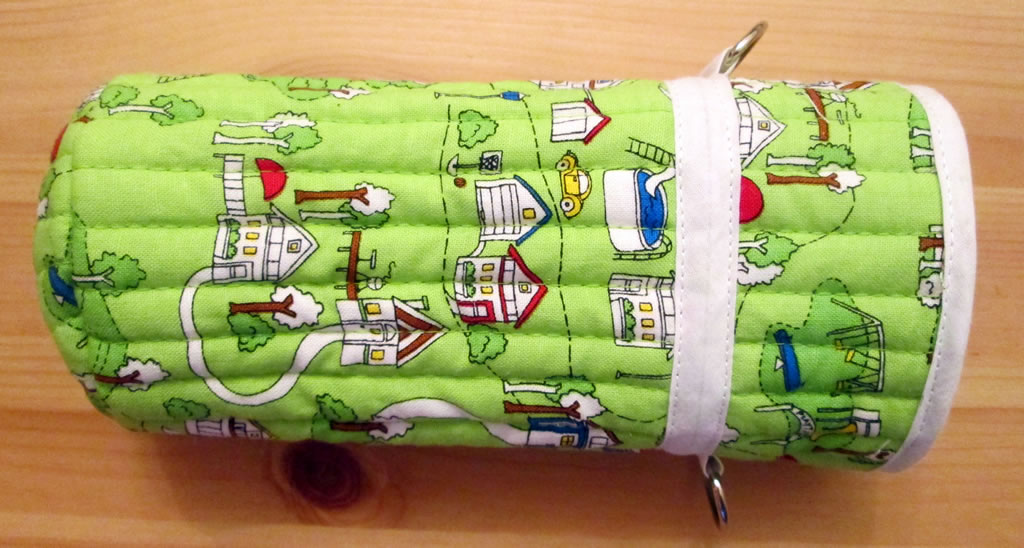
If you want to make a lining for your water bottle holder, repeat steps 7 and 8, then pop it inside the quilted section with the wrong sides together and add the bias binding.
10. To make the strap, cut a strip of fabric 6 – 10 cm wide and long enough to go from your hip, over your shoulder and back to your hip again. Fold in half lengthways to find the centre. Open it out, then fold the raw edges in towards the centre.  Fold in half again so that the raw edges are enclosed inside.
 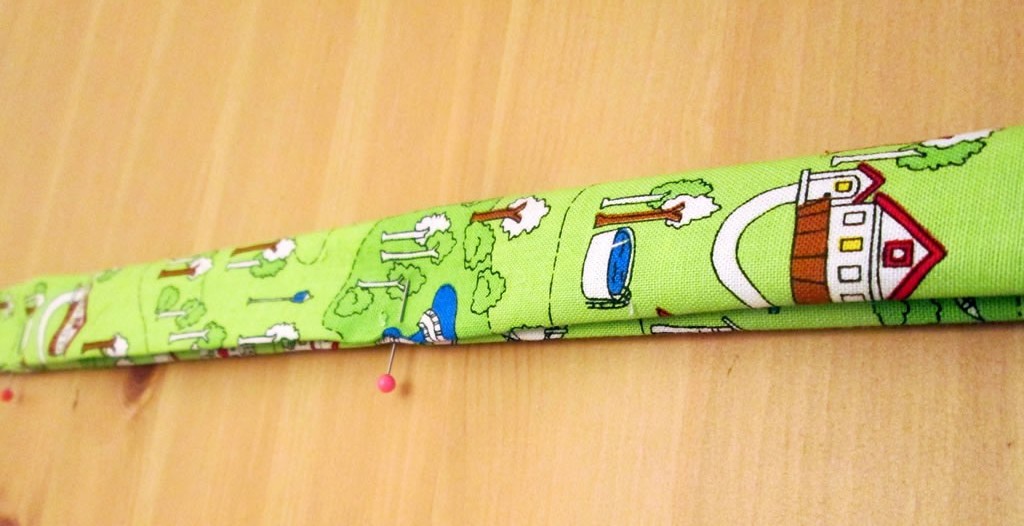 Tuck the raw edges at either end inwards.
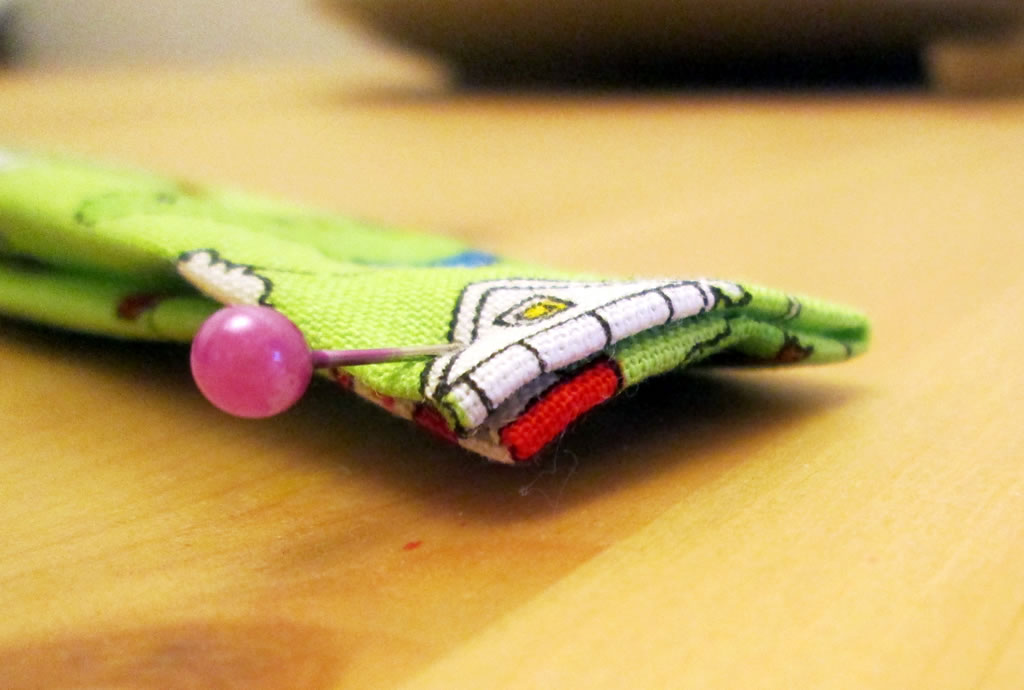 Pin, then sew. I sewed along both the long edges so that it was symmetrical (I have a thing about stuff being symmetrical!).
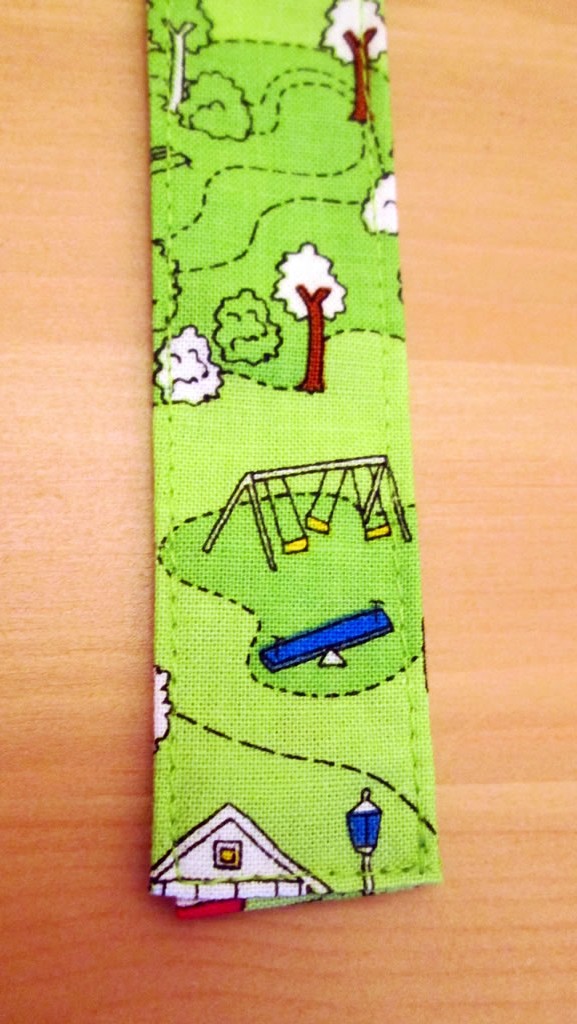
11. Thread one end of the strap through one of the D rings. Fold the edge over and sew in place. I sewed 2 rows of stitches to reduce the chances of the strap breaking.
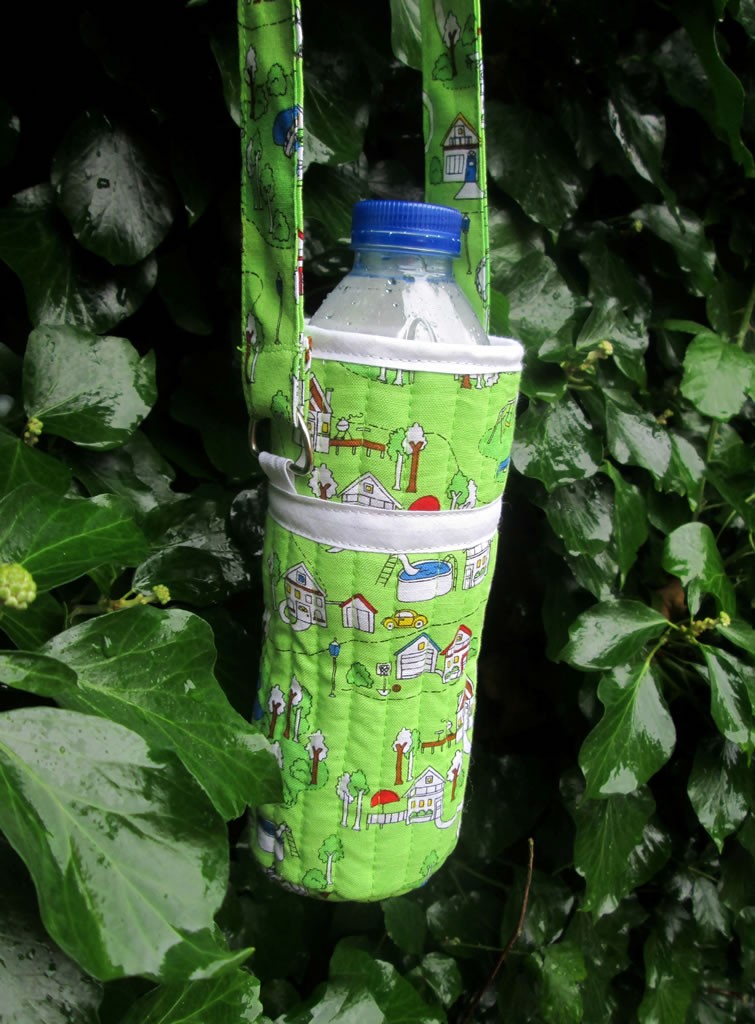
Here is the finished water bottle carrier.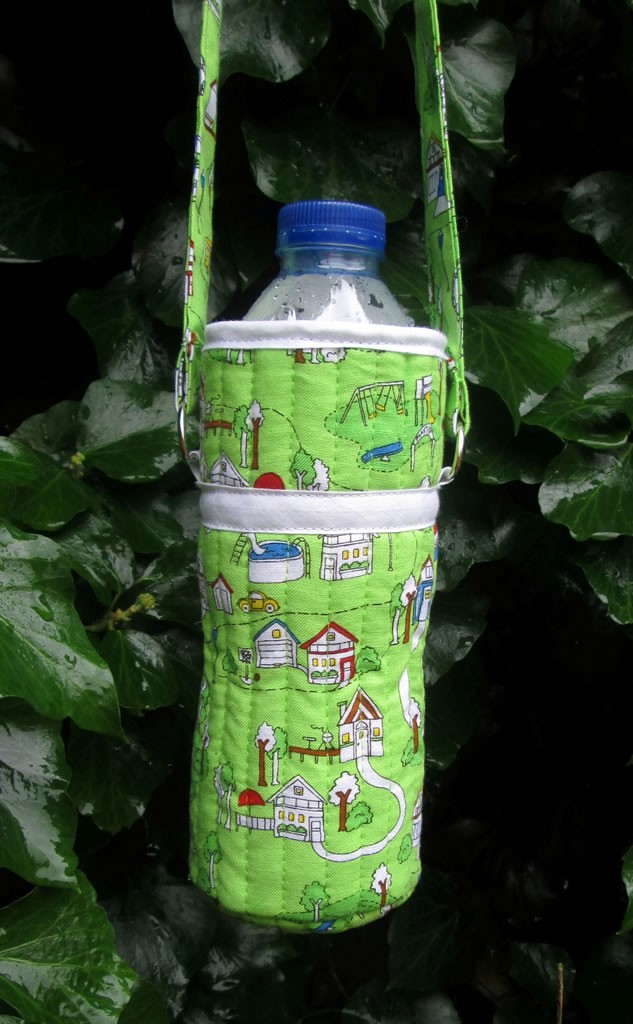

Linking up here.

I have been unsuccessful in printing out your excellent instructions for making the water bottle.
Is this pattern not meant to be printed?
If so how do I go about doing it, every time I try a blank page prints and some advertisements.😀.
Texas girl needs a bottle holder for all the water I drink ..
Hi Ellen, I’ve no idea why it’s doing that! Could you try copying and pasting into Google docs and printing it? That’s what I would do 🙂
I would like to save this tutorial and wondered if you also had it in a pdf format? This is a great tutorial! Thanks!
I don’t at the moment, but that’s a good idea!
This would make a good gift bag for a bottle of wine too!
Good idea!
I need a couple of these. I believe I will be able to make one with your (this) tutorial. On #7 you say, “Fold the quilted rectangle in half with the WRONG sides together.” Isn’t that just a mistake? It looks like the right sides are together. I have not sewn in many years but am attempting to start again. Thank you for this tutorial.
Ann recently posted…Free Crocheted Bunting Pattern
Yes, that should say right sides together! I’ll change it, thank you.
How to Make a Water Bottle Carrier via @ Tea and a Sewing Machine #healthylivingcrafts http://t.co/XORWaz7Gvu http://t.co/GnsLiGPH6G
Great tutorial! The thing I really like about it is how you’ve used strong binding and those metal ringlet thingies for the strap as thats often a weak point with store bought bottle holders.
That’s what I thought, and it will be easier to repair if the strap breaks.
An awesome tutorial, just love it! I think it’s the one that’s hugely popular on Pineterst, too, right? Thank you so much! Damjana
Thank you! There are a lot of them on pintetest, it’s amazing how many different ways there are of making the same thing!