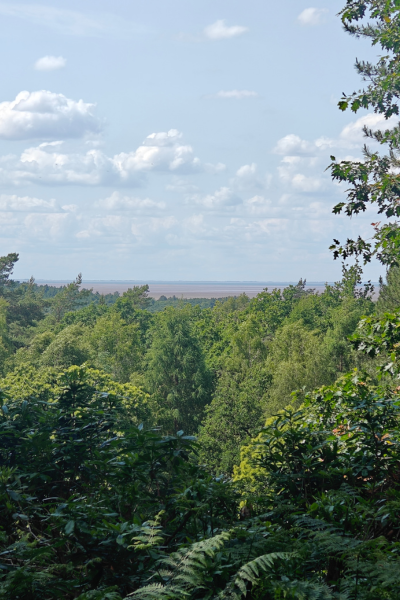
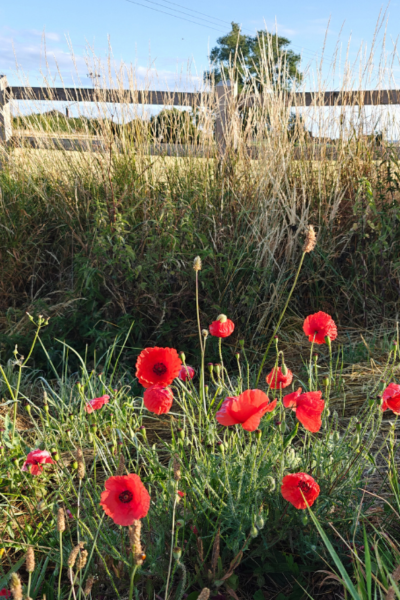
• Home
  • About
  • Blog
  • Ebooks and Printables
  • Etsy
  • Sewing Journal

Make it Yourself. Yes You Can!

  • Sewing Projects
  • Tips and Techniques
  • Embroidery
  • Other Crafts
    • Crochet
    • Felting
    • Jewellery
    • Wreaths
  • Christmas

Granny Square Fingerless Mittens Pattern

November 28, 2020 · 3 Comments

granny square fingerless mittens pattern

Granny Square Fingerless Mittens Pattern

Back in the early autumn when the leaves were first starting to turn, I had an overwhelming desire to crochet things in autumnal colours.

I had some yarn left over from another project which included cream, red and brown. So I used this to make some granny squares.

Unsurprisingly I had lost interest by the time I had made about 10 squares! This was obviously not nearly enough for a blanket, not even a small one, so they’ve been sitting in a pile awaiting their purpose.

When I went out for a walk the other day, I realised that my hands were cold. Then I remembered that I lost my gloves last winter and never got round to replacing them.

granny square fingerless mittens pattern

So I decided that one way to use up some of the granny squares and sort out the chilly hands problem was to make some granny square fingerless mittens.

granny square fingerless mittens pattern

As with anything that doesn’t have proper fingers, the granny square fingerless mittens don’t keep your whole hand warm. But they have the advantage that you can have warmer hands than if you’re not wearing gloves and still use your phone!

If you’re prone to chilliness, you can wear them indoors because they don’t restrict movement of your fingers at all. And if your hands get very cold, you could even wear them over a normal pair of gloves.

granny square fingerless mittens pattern

Fingerless Mittens Pattern

You Will Need

Yarn and a hook. I used this in vanilla cream, wine red and soft fudge. Because the yarn is aran weight, the squares were bigger than if I’d used double knit, but I don’t think it’s worth worrying about. The squares will stretch if they’re smaller.

Making the Mittens

Please note that as I am English I have used British crochet terms!

The first thing to do is to make the granny squares. You’ll need 4 of them.

I used this pattern, but you could make a traditional granny, or any one that you like! The only requirement is that it needs to be a square, otherwise the rest of the pattern won’t work!

Once you have your granny squares, take 2 of them. Join them along one edge. If you don’t know how to do this, there are instructions here. This will be the outside edge of the mitten.

On the opposite side, you’ll need to leave a space for your thumb. So at the top, crochet from the corner down to the bottom of the first cluster. Then from the bottom corner, join together 3 stitches.

Crocheting the Ribbing

granny square fingerless mittens pattern

This is more of a rib effect than actual ribbing!

Around the bottom edge of your now joined granny squares, do 2 rounds of double crochet. Join each round with a ss.

The following rounds will be worked in trebles. But instead of working into the v of the stitch of the previous round, you’ll be crocheting around the post of the stitch. For the first stitch, crochet round the front of the post, then for the second, round the back.

If you haven’t done this before, this is how to do a treble round the front of the stitch post.

granny square fingerless mittens pattern

To crochet round the back of the post, put the hook in the other way, like this.

granny square fingerless mittens pattern

Alternate in this way until you get all the way round, then join with a ss.

You might find that you have an odd number of stitches, in which case you’ll need to have 2 fronts or 2 backs next to each other somewhere. It will be less obvious if it’s on the inside of the mitten cuff.

Work 9 rounds in this way, making sure that you alternate the same each round. This will give the ribbed effect.

If you’d like your mitten cuffs to be longer, then just work more rows!

Mitten Top

Rejoin the yarn at the top of the mitten at one of the side seams. Work 2 rounds in double crochet, joining each round with a ss.

Work a third round of picot edging. If you have your own way of doing a fancy edging, then do that!

Otherwise, this is what I did.

1 ch, then dc into next stitch, then dc into the stitch after that one. 3 ch, then ss through the base of the stitch. 2 dc as before, then 3 ch, ss into base of stitch again. Keep going in this way until you get back where you started.

granny square fingerless mittens pattern

Thumb

Rejoin the yarn at the side seam. Work 3 rounds in double crochet and join each round with a ss.

Work a 4th round of picot edging in the same way as the top.

Weave in all the ends.

Now you need to make another one for the other hand!

granny square fingerless mittens pattern

Share this:

  • Click to email this to a friend (Opens in new window)
  • Click to share on Pinterest (Opens in new window)
  • Click to share on Facebook (Opens in new window)
  • Click to share on Twitter (Opens in new window)
   

Filed In: Blog, Crochet / Tagged: Crochet, granny square, how to, mittens

How To Choose The Best Fabric For Curtains

November 19, 2020 · Leave a Comment

How To Choose The Best Fabric For Curtains

The Best Types of Fabric For Curtains For Your Home

This is a guest post from Yorkshire Fabric Shop.

Choosing the perfect curtain fabric for your home can be overwhelming. There are endless collections to choose from and you might not know the best type of curtain fabric for your house. We’d like to give you the basics of curtain fabric that’s perfect for your home.

Linen

Linen curtain fabrics are one of the leading fabrics for curtains. It drapes beautifully and provides a crisp and fresh look. Linen can let fresh air and light pass through while still giving the privacy a home owner wants.

This type of curtain fabric also gives out a good insulation whatever the season might be. During hot seasons, it does not block air breeze from the outside. While on winter, it traps heat inside which also contributes to decreasing your bills due to heat escaping.

Linen is easy to take care of, and it does not require special cleaning. Linen curtain fabrics can be washed in the washing machine and can also be dry cleaned. After every wash, it will soften while still maintaining its crisp look. It can also be ironed well. Add a dash of fabulous to your home!

Velvet

Want to make your room more elegant and sophisticated? We think velvet is the perfect curtain fabric for you. Velvet is a thick, and soft yet textured curtain fabric that can turn a boring space into a hotel style look. Velvet is perfect for homes with high ceilings. If your walls are not that high, just make sure your rod is set up to the ceiling. That way you’ll get the full benefit of your velvet curtains and it will make your ceiling look higher.

Velvet is also a great curtain fabric to block light from entering your house. If you prefer to have a blackout curtain for your home, then velvet’s the one for you. Too much heat no more!

How To Choose The Best Fabric For Curtains

Polyester

If you’re looking for a curtain fabric that’s budget-friendly and practical, we think polyester is for you. This curtain fabric is mould resistant and is very easy to care for. It’s also durable and won’t wrinkle or stretch easily. Polyester can also last for years if it is cared for and cleaned regularly. Washing polyester is very easy and can be washed in the washing machine. However, it’s a great odour conductor so we suggest not using it in the kitchen.

Polyester fabrics also hold dye and reflect colours well. Great for people who would want to bring out the best colours in their homes!

Curtains are designed not only to block light but also to be aesthetically pleasing. They contribute to the ambiance of our homes. Most homeowners want to use their curtains to give their homes a unique touch.

In addition to the overall feel of the house, it’s necessary to consider the practicalities of each type curtain fabric. If you are looking for curtain fabric, Yorkshire Fabric Shop offers a huge range of colours, fabrics, patterns, and textures.


Share this:

  • Click to email this to a friend (Opens in new window)
  • Click to share on Pinterest (Opens in new window)
  • Click to share on Facebook (Opens in new window)
  • Click to share on Twitter (Opens in new window)
   

Filed In: Blog, Tips and Techniques / Tagged: curtains, how to

Adapting an A Line Skirt Pattern

November 15, 2020 · Leave a Comment

Adapting an A Line Skirt Pattern

The other week I showed how to draft a pattern for an A line skirt. It’s here if you missed it!

Although A line skirts are just fine as they are, I had plans for adapting an A line skirt pattern to make it a little bit different.

My plan was to remove a section of the skirt from the side, and replace it with a pleated section in a contrasting fabric.

I’ve finally finished it and here it is! It was quite windy when we took the pictures!

adapting an a line skirt

It is basically still an A line skirt with a waistband, but with a pleated bit at the side.

adapting an a line skirt pattern

I’m going to walk you through how I did it, and hopefully it will inspire you to take patterns that you have already, and things that you know how to make already, and adapt them to make them into something different.

It’s a little bit easier than designing and making an item of clothing entirely from scratch, but it’s just as much fun!

Adapting the Pattern

The A line skirt pattern that I used had 3 pieces for the skirt (one front and 2 back), plus the waistband.

The only bits I made changes to were the front and the back right sections.

I made a copy of the pattern onto pattern paper. It’s best to do this first rather than immediately hacking away at your fabric! You’re free to experiment as much as you like with the pattern paper, then when you’re happy you can cut out your fabric. There are a lot less tears that way!

I decided where I wanted the pleated section to be, and marked it on the waist of the front and back sections.

Being an A line and because the extra section didn’t take up a whole half of the skirt, it wasn’t as simple as just cutting off a chunk at the side!

The centre front runs up and down on the grain of the fabric. By the time you get to the side seams, it’s slanted like the legs of an A.

So the piece I cut out of the front section needed to be somewhere between the vertical of the centre front and the slanted line of the side seam.

I wanted the contrasting section to start about half way between the centre front and the side, so this is where I marked on the waist. After doing this, I then needed to find the same point on the hemline, half way between the centre front and the side.

adapting an a line skirt

I drew the line here, then cut away the extra bit of the skirt front. Then I did the same with the back right.

To make the pleated section, I cut a piece of pattern paper about 3 times wider than the bit of the skirt that was now missing. I experimented with the pleats until I was happy with them. To begin with, I made them quite narrow. Unfortunately this made it look too much like a kilt, so in the end I made each pleat 4 cm. 4 pleats of this size fitted nicely into the space, with enough for a seam allowance.

adapting an a line skirt

Finishing the Skirt

With the tricky bit done, the next job was to adjust the hem where the seams met. This meant reducing how much the front and back left pieces curved where they met with the pleated bit.

The last thing was to add the waistband. For this I used the original pattern pieces.

Where Next?

I think this has quite a lot of potential. One of the reasons for pleating the contrast section as opposed to gathering it is because I didn’t want to draw attention to the Covid cake baby that has developed around my middle. For a slimmer person, gathers might be fine, especially if the skirt is made from a lighter fabric.

A summery option could be made from cotton, with a gathered or pleated section made from floaty fabric.

Another possibility would be to put the contrast section on the other side. This might feel more “right” if you are left handed. Or you could try pleated bits on both sides.

Something else to consider is adding godets, kick pleats or contrasting sections all the way round.

Or chop a big chunk off the bottom at an angle and make a bit from different fabric.

Collect some ideas and have some fun adapting an a line skirt pattern!

If you like dressmaking, I have a Pinterest board full of ideas here!

You might also be interested to have a look at my ebooks and printables here. I have one in particular about making dresses from you own designs.

Share this:

  • Click to email this to a friend (Opens in new window)
  • Click to share on Pinterest (Opens in new window)
  • Click to share on Facebook (Opens in new window)
  • Click to share on Twitter (Opens in new window)
   

Filed In: Blog, Sewing Projects / Tagged: refashioning

Textile Self Portraits

October 23, 2020 · 4 Comments

The Knitting and Stitching Show is usually held in various locations around the UK.

Obviously it’s not happening this year. But as we’ve found over the last few months, we are fortunate enough to live in an age where we can do things and get together without even having to leave the house!

Instead of hosting a large show in a location that might not be easy to get to anyway depending in where you live, plus the usual stress of parking, public transport and not knowing where the loos are, the Knitting and Stitching Show are hosting an online event instead.

This is going to run for a month in November. There will be online workshops, competitions and shopping discounts From their website, it sounds like they’re still putting it together, but you can sign up for their email newsletter if you’d like to know what’s going on when they’ve sorted it all out.

One thing that is definitely be happening is a textile self portrait competition.

Anna Baptiste, the Event Director of the Knitting and Stitching Show, says, “With the textile community unable to come together in person at our autumn shows this year, we have designed the next best thing – a creative, colourful way to see each others’ faces online. We can’t wait to see crafters sharing their lovely faces and smiles through their favourite textiles and techniques.”

textile self portrait competition knitting and stitching show 2020
Maggie Scott, ICU3, Nuno felted silk chiffon & hand stitch. www.maggiescottonline.com

I’ve included details included rules and things below, but there’s something else I need to say first!

You might not think of yourself as an artist, but if you are here, you are a creative person.

People talking about composition, mastery of techniques and execution and other arty terms always makes me very aware that I wasn’t good at art at school.

But there’s more than one way of doing things, and creativity takes lots of different forms.

textile self portrait competition knitting and stitching show 2020
Joan Eytle Kendall Soulweaving

The first attempt doesn’t have to be perfect. In fact, the finished thing doesn’t have be perfect, because I suspect that it’s the little quirks that give individual artists their style.

I’m hardly an expert in these matters, but I would say that if you want to have a go, then do! The process is fun. Identify what you like to do, choose colours that you like and that reflect who you are. Think about what a self portrait could say about you, even if it’s just that you’re a knitter who likes pink!

Obviously copying another person’s work is never a good idea, but if you have no idea where to even start, looking at what other people have done can be useful. With that in mind, I have started compiling a Pinterest board of textile portraits, which you can find here.

If You’d Like To Enter, Here Are the Rules:

Any textile medium will be accepted. You could use embroidery, cross stitch, make a quilt, knit a jumper, it’s up to you!

Entries need to be 15-20 cm wide and 24-30 cm long. Life sized and 3D pieces are also welcome.

The self portrait can be from any angle, and should be of your face and/ or your head.

Abstract is fine, but it needs to be recognisable as a face.

Entries don’t have to be made specifically for this competition. It’s fine to enter something that you’ve entered previously in another competition or exhibition, as long as you didn’t win. If you have something that you’ve made already, you can enter it if you want to.

textile self portrait competition knitting and stitching show 2020
Cindy Stohn – My Big Face low res

The Judges

Entries will be displayed in an online competition gallery, and the portraits will be judged by Jan Beaney and Jean Littlejohn, who are both textile designers.

There will be a public vote as well for The People’s Choice Award.

What Will the Judges Be Looking For?

A strong visual and aesthetic impact
Appropriate choice of thread, fabric and materials
Use of colour
Composition
Mastery of techniques used
Good execution

What Happens if I Win?

The competition is being sponsored by Pfaff and they’ve donated a prize of £1,000.

There will also be runner up prizes, and prizes for the children’s catgories.

textile self portrait competition knitting and stitching show 2020
Kate Jenkins self portrait

How Do I Enter?

The deadline is Friday 20th November, and you’ll be able to enter from the end of October.

You’ll need to fill in the online form on the Knitting and Stitching Show website.

There’s an entry fee of £10 for adults and children’s entries are free.

The competition gallery will go like on Friday 27th November, and the winners will be announced on Friday 4th December

Full rules and terms of entry can be found here: www.theknittingandstitchingshow.com/self-portrait competition/

Share this:

  • Click to email this to a friend (Opens in new window)
  • Click to share on Pinterest (Opens in new window)
  • Click to share on Facebook (Opens in new window)
  • Click to share on Twitter (Opens in new window)
   

Filed In: Blog, Other Stuff / Tagged: competition

Pattern Drafting: How To Draft an A Line Skirt

October 18, 2020 · Leave a Comment

pattern drafting how to draft an a line skirt

This post contains affiliate links.

One of the things I love to do is make my own clothes, especially making them from my own designs.

There is nothing like trotting off out in an outfit that I’ve made myself. I like knowing that nobody else will be wearing the same as me, and I don’t care if people think I’m mad/ too old to be wearing a pink tutu with pink tights and pink shoes, or if I’ve escaped from a 50s themed tea party.

We’re supposed to pretend that clothes don’t matter and it’s what’s inside that counts. I agree to this up to a point, but remember how happy Anne Shirley was when Matthew sorted her out with a dress with puffed sleeves? I want to feel like that as often as I can!

Using a pattern can sometimes feel a little bit limiting, especially if you have something in particular in mind and you can’t find exactly what you want. One way round this is to adapt a favourite pattern. Another is to start with your own ideas and draft or drape a pattern yourself.

I’ve done this myself lots of times over the years. Sometimes things turned out very well (like this sundress). Other times they turned out less well.

But even with the things that could be labelled as disasters, I still learnt something, which makes it valuable, even if the item in question ended up as a cushion cover instead.

If you’re considering making clothes from your own designs, my advice would be #1 do it, and #2 keep things simple as far as you can.

If you’ve made clothes from commercial patterns, this will help you a lot. You can take a basic sleeve shape for example, and adapt it, or start out with a simple skirt and change it up a bit.

Having a collection of things that you know how to make, an idea of basic pattern shapes and some knowledge of how clothes are put together will help enormously.

One such thing is a basic skirt pattern. If you know how to draft one according to your measurements, you can change it however you like!

In the rest of this post, I’m going to show you how to draft a pattern for an A line skirt.

pattern drafting how to draft an a line skirt

How To Draft an A Line Skirt Pattern

You Will Need

Pattern paper. Any large paper will do, but I recommend using the kind of pattern paper that has a grid marked on it. It costs a bit more but it makes things so much easier!

Tape measure

Pins

Pencil

Any kind of pattern drafting is easier with a dress form, but you can do it on yourself if you don’t have one. Just mind the pins! Alternatively you could use a friend or family member who is a of a similar size.

How On Earth Are We Going To Do This and Not End Up With Something That Looks Awful?

That’s a good question!

This is how.

The first job is to draft a straight skirt. We’ll do the front and back separately, and half of it each time. We can use the halves to draft the other halves. That way the front and the back will both be symmetrical.

Then by messing about with the darts, we can change the shape of the skirt pieces. We can use this to draft the pattern pieces for the A line skirt.

You’ll have pattern pieces for a straight skirt and an a line skirt, and you can use them however you like!

Job 1: Drafting the Straight Skirt

Drafting the Front

We’re going to draft the front and the back separately, and we’re only going to do half.

Starting with the front, pin a large piece of pattern paper at the hips on both sides. It needs to be slightly more towards the back.

If you’re using the paper with the grids on, it will be easy to check whether it is straight. Vertical lines need to be running up and down at the sides and at the centre front.

Pin the paper at the centre front, making sure that you keep the vertical line.

pattern drafting how to draft an a line skirt

There will be a huge amount of bagginess at the waist, which we’re going to fix with a dart.

The dart will probably need to go about half way between the centre front and the side seam, but put it where it naturally wants to go. We’re not following any rules here about how long the dart needs to be either; just make it as long as it needs to be. The purpose of it is to remove the extra at the waist.

When you’ve figured out the dart. fold it and pin it.

pattern drafting how to draft an a line skirt

Now grab a pencil and mark on the centre front and the side seam (this will be half way round your hip).

Draw on the waistline. If you doing this on yourself, you’ll be able to feel it. If you’re using a dress form, you might find it helpful to pin some ribbon or a piece of elastic around the waist.

pattern drafting how to draft an a line skirt

Put it to one side.

Drafting the Back

We’re going to draft the back in the same way that we did the front.

Take another piece of pattern paper and pin it at the hips and round the back. If you are doing this on yourself, you might need somebody to help you.

Check vertical lines at the side and the centre back. Pin the centre back. Fix the bagginess with a dart. Again, this will probably need to go about half way along, but put it where it feels like it needs to go.

For larger ladies, you might find that 2 smaller darts work better.

Mark the side seam and the centre front, and the waist line.

Finishing Off the Straight Skirt Pattern

You’ll need to the following things to both the front and back pattern pieces.

Decide how long you want the skirt to be and measure down from the waist. Draw a straight line to mark the hem.

Draw the centre line and the side down to the hem.

pattern drafting how to draft an a line skirt

Using the fold lines, draw the dart.

pattern drafting how to draft an a line skirt

Job 2: Transforming the Straight Skirt Pattern into an A line skirt

This is where the magic happens!

Draw a vertical line from the point of the dart down to the hem.

Cut out the dart.

pattern drafting how to draft an a line skirt

From the hem, cut along the line that you drew from the point of the dart. Don’t cut the whole way! Leave half a cm or so. I managed to cut right through it, hence the tape.

Now move the edges of the dart so that they are together. You could tape it so that it stays put.

pattern drafting how to draft an a line skirt

You’ll notice that a huge kind of anti dart has opened up in the skirt. By closing up the dart, you’ve made the skirt fuller and it will still fit!

Draw round this to make the pattern piece for the a line skirt. I extended the waist by 2 cm and drew another line from this point down to the hem. Then I used a French curve to join the inside line to the outside one. A dinner plate will do if you don’t have a French curve.

pattern drafting how to draft an a line skirt

You can use the plate/ curve to join the points of the anti dart too, or leave them straight for a different kind of hemline.

The waistline will need to curve a little bit too, upwards from the dart to the side seam by 1-2 cm.

Job 3: Draft the waistband and add a seam allowance to the pattern pieces.

Drafting the Waistband

This is optional! You might decide to line your skirt instead, in which case all you’ll need to do is make a second skirt the same as the first, just a bit shorter, and join them at the waist.

Alternatively, you could use the waistband pieces as facings instead.

Take your skirt front piece (A line version) and lay it on top of a piece of pattern paper. Trace the waist line, then the side seam about 4 cm and the same down the centre front.

Join the lower line so that it follows the shape of the waistline.

pattern drafting how to draft an a line skirt

Add a 2 cm seam allowance along the top, the bottom and at the side. You won’t need one at the centre front because you’ll cut in on the fold so that it’s one piece.

pattern drafting how to draft an a line skirt

When cutting out, you’ll need two.

The waistband for the back is made in the same way. The only difference here is that you’ll need a waistband for each half of the back. So when adding the seam allowance, add on 2 cm at the centre as well.

When cutting the waistband for the back out, you’ll need two left hand pieces and two right hand pieces.

Adding a Seam Allowance to the Skirt Front and Back

The skirt front will be in one piece cut on the fold, so add a 2 cm seam allowance to the side and the bottom hem.

The skirt back will be made from 2 pieces, cut on folded fabric. To this section, add a 2 cm seam allowance to both sides and the bottom hem.

So now you have a pattern for a straight skirt and an A line skirt!

There will be another post about assembling your A line skirt in a couple of weeks. Or you could give it a go yourself!

Share this:

  • Click to email this to a friend (Opens in new window)
  • Click to share on Pinterest (Opens in new window)
  • Click to share on Facebook (Opens in new window)
  • Click to share on Twitter (Opens in new window)
   

Filed In: Blog, Sewing Projects / Tagged: pattern drafting

  • Newer Entries
  • 1
  • 2
  • 3
  • 4
  • …
  • 87
  • Previous Entries
I'm Anna and I live in rural Norfolk in the UK. My mum taught me how to use a sewing machine when I was 10 and I haven't looked back! I love making all sorts of things and I hope you find inspiration here.

Join the list

Join the mailing list to receive updates, useful and interesting links and free pages from the Sewing Journal.

My New Ebook

things to male and do in the autumn

Bunting Makes Everything Better Tote Bag

Featured Kit

The Sewing Journal

My Kits and Patterns on Etsy

Shop the Christmas Shop at Sew and So


Join the List

Join the mailing list to receive updates, useful and interesting links and free pages from the Sewing Journal.

Privacy Policy

For information about cookies and Tea and a Sewing Machine's privacy policy, please click here.

Instagram

Instagram Widget by SnapWidget


UK Sewing Blogs

Theme by 17th Avenue · Powered by WordPress & Genesis

loading Cancel
Post was not sent - check your email addresses!
Email check failed, please try again
Sorry, your blog cannot share posts by email.
We use cookies to ensure that we give you the best experience on our website. If you continue to use this site we will assume that you are happy with it.Ok