Top
Skip to main content
Skip to footer
Home
About
Contact
Free Course: Crafted Colours
Etsy
Login
Search this website
Wild Blossom Life
Offering gentle, low risk ways to explore what it means to be a creative person
Embroidery
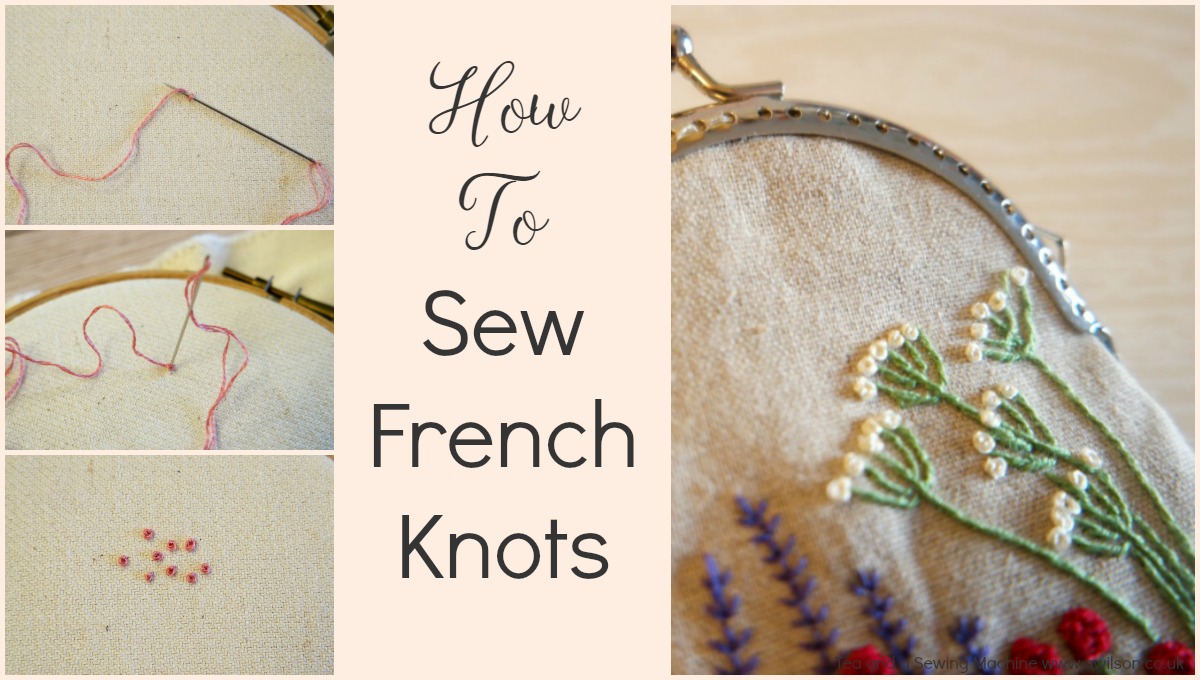
How to Sew French Knots
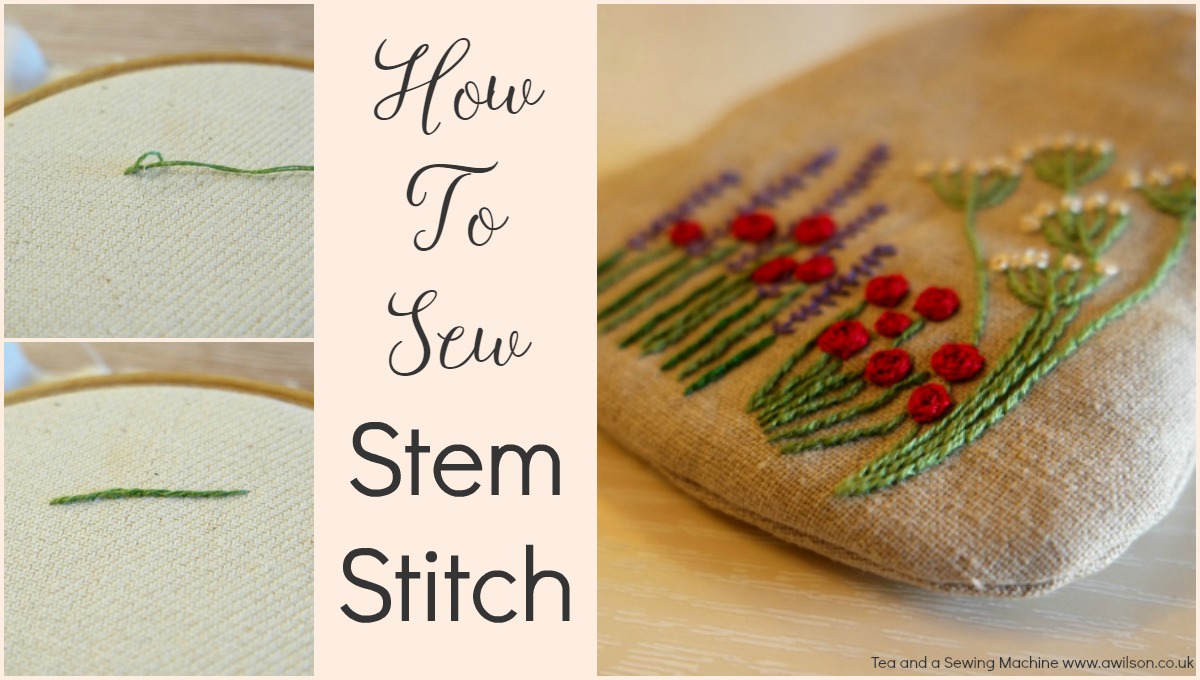
Stem Stitch: Hand Embroidery
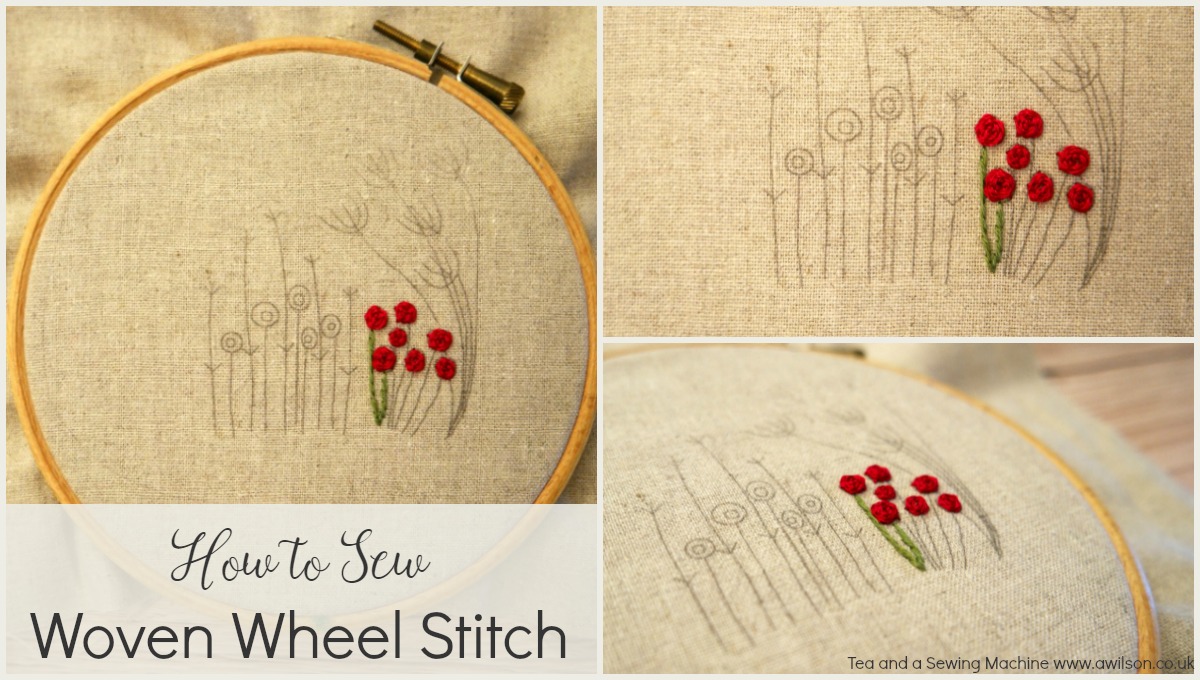
Woven Wheel Stitch: Hand Embroidery
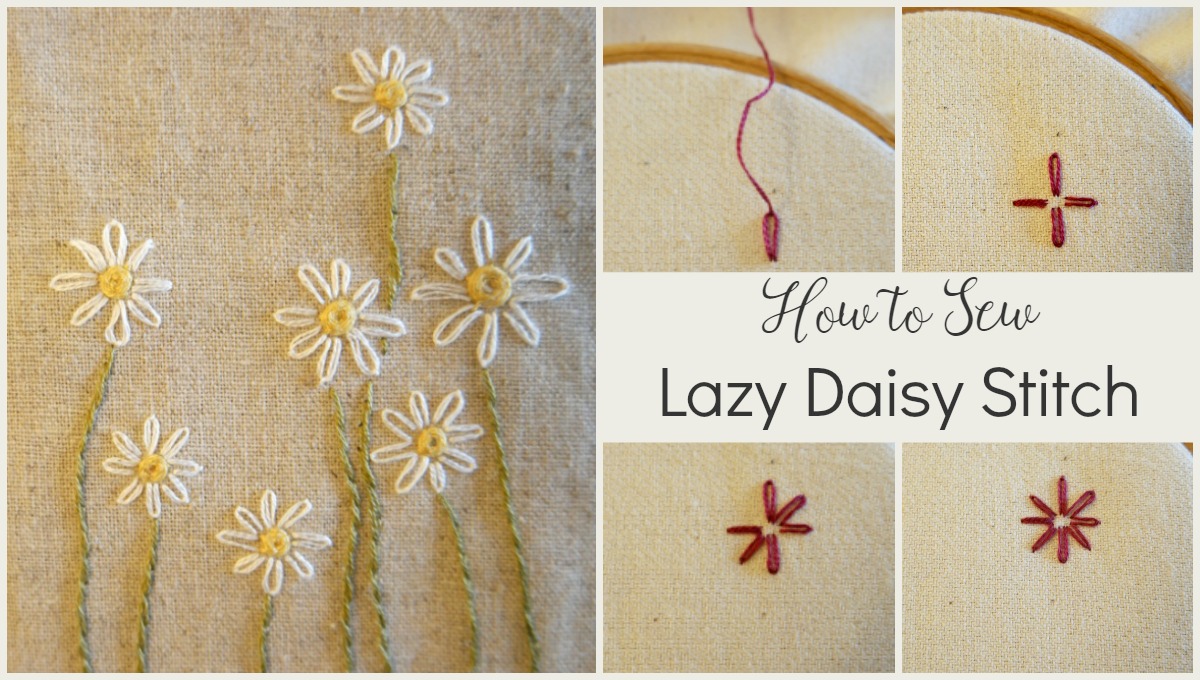
How To Sew Lazy Daisy Stitch
«
Go to
Previous Page
Page
1
Page
2
Page
3
We use cookies to ensure that we give you the best experience on our website. If you continue to use this site we will assume that you are happy with it.
Ok
No