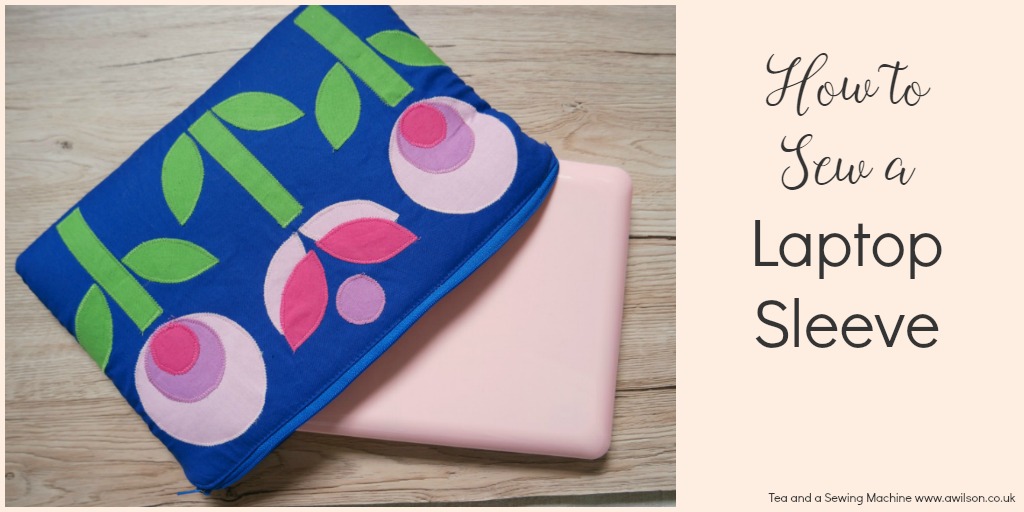
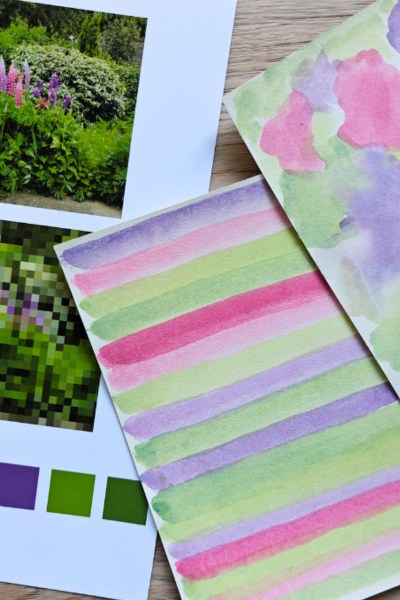
• Home
  • About
  • Blog
  • Ebooks and Printables
  • Etsy
  • Sewing Journal

Make it Yourself. Yes You Can!

  • Sewing Projects
  • Tips and Techniques
  • Embroidery
  • Other Crafts
    • Crochet
    • Felting
    • Jewellery
    • Wreaths
  • Christmas

Easy DIY Felt Flower Wreath

February 8, 2018 · 2 Comments

Easy DIY Felt Flower Wreath

Since my Christmas wreath came down, my poor front door has been left without a wreath.

I’ve got plans to cheer it up by painting it a pretty shade of green, but the weather’s been either too cold or too wet!

Until spring turns up (hopefully soon, so bored of winter now!), my door needs something.

Inspired by so many beautiful felt flowers on Pinterest, I decided to have a go at making some, which I could then use to make a felt flower wreath.

Making the felt flowers was surprisingly easy! The best kind of crafts are the sort when you can get good results easily, and these felt flowers definitely fall into that category.

I bought some buttons to put in the centre of the flowers, but in the end I decided they were pretty enough for a felt flower wreath without them!easy diy felt flower wreath

How to Make Felt Flowers

I have included some affiliate links.

You Will Need

Felt (I used these felt sheets from Minerva Crafts), a glue gun, items to make the circle templates, a willow or grapevine wreath.

Making the Templates

I made three templates by drawing round a bowl, the lid of a tin and a mug. This gave me templates that were 16 cm across, 12 cm and 9 cm.

In the end I decided that the largest flowers were a little bit too big, so I didn’t use them. I might glue them to hair clips and wear them in my hair instead!

Making the Flowers

1. Cut circles from felt.easy diy felt flower wreath

For the wreath I used 3 of the middle sized flowers and 9 smaller flowers.

2. Cut a spiral into the circle. As the centre of the circle will form the outside of the flower, the spiral will need to get wider towards the middle.easy diy felt flower wreath

3. Starting at the outside, carefully roll the spiral up. To start with, the bit you cut will be the bottom of the flower.easy diy felt flower wreath

4. Keep rolling! When you’ve rolled up the whole spiral, you might like to put a pin through the flower to hold it.easy diy felt flower wreath easy diy felt flower wreath easy diy felt flower wreath

5. Using the glue gun, put a blob of glue on the bottom of the flower. Stick the end of the spiral over the base of the flower.easy diy felt flower wreath easy diy felt flower wreath

You could probably sew them if you prefer, or use PVA glue or fabric glue, but I’d recommend using the glue gun. I’d actually not used one before, but it was very easy, the things stuck very well and the glue dried nice and quickly.easy diy felt flower wreath

6. To make the leaves, cut a strip of green felt, then cut it into rectangles. easy diy felt flower wreath easy diy felt flower wreath Cut a curved bit away from corner to corner, then do the same on the other side. easy diy felt flower wreath easy diy felt flower wreath Don’t worry about getting them all the same size. You can use smaller leaves with the smaller flowers, and anyway in nature leaves are usually different, even on the same plant!

7. Stick 2 leaves to the base of each flower.easy diy felt flower wreath

Attaching the Flowers to the Wreath

I apologise for the lack of photos for the steps here, I got so carried away I kept forgetting to take pictures!

1. Take the 3 middle sized flowers and glue them to the wreath. I put the top and bottom flowers closer to the inside edge of the wreath with the leaves pointing inwards, in the middle flower closer to the outside edge with the leaves pointing outwards.

2. Take 3 of the smaller flowers and arrange them around one of the larger flowers.easy diy felt flower wreath

Then do the same with the other 2 larger flowers and the rest of the smaller ones. Don’t worry if there’s some wreath showing. You might want to cover it completely, but I think that being able to see wreath in between breaks it up a bit, like silences in music.easy diy felt flower wreath

3. Thread a piece of ribbon through the felt flower wreath and hang it up!easy diy felt flower wreath easy diy felt flower wreath

If you enjoy making door wreaths, you might like to have a look at my wreaths page!


Share this:

  • Click to email this to a friend (Opens in new window)
  • Click to share on Pinterest (Opens in new window)
  • Click to share on Facebook (Opens in new window)
  • Click to share on Twitter (Opens in new window)

Filed In: Blog, Wreaths / Tagged: decor, felt, flowers, how to, spring crafts, wreath

How To Make Felt Poinsettias

November 30, 2017 · 4 Comments

How To Make Felt Poinsettias

A splash of red is always lovely at Christmas. Poinsettias offer that splash of red, but unfortunately for any plants that enter my house, the chances of them lasting more than a week are slim.

Thankfully there is an alternative for those of us who do not have green fingers!

I’ve been amazed at the beautiful flowers some people are able to make just from a simple medium like felt. And once the flowers are made, they can be used in all sorts of ways, including ways that might not be possible with real flowers.

So here’s a tutorial showing how to make felt poinsettias!

I have included some affiliate links.how to make felt poinsettias

How To Make Felt Poinsettias

You Will Need

Red felt (you can buy it by the sheet at Minerva Crafts and at Hobbycraft), needle and thread, buttons or sequins and beads, template (download it here or you could make your own).

If you use my template, the finished flowers will be approximately 8 cm across.

Instructions

1. Make your template, or print and cut out the one I used. If you’re making your own, the template will need to be a symmetrical leaf shape.

2. Cut leaf shapes from red felt. You will need 8 for each of the felt poinsettias you want to make.how to make felt poinsettias

3. Take one of the felt shapes and fold it in half lengthways. Sew a couple of stitches up from the point to hold the shape. Do this for the other 7.how to make felt poinsettias how to make felt poinsettias

4. With the thread doubled, thread the petals onto the needle near where you sewed in the previous step. Pull the thread through, leaving a tail. how to make felt poinsettias When you have threaded all the petals, pull both ends and tie them together in a knot. how to make felt poinsettias

5. Arrange the petals, then sew a sequin and a bead to the centre of the flower. Pass the thread from the back of the flower to the front, then through the sequin. Pass the needle through the bead, then back through the sequin and through to the back of the flower. Tie off the thread. You could sew a button instead if you wanted to, or even glue a sparkly thing to the centre.how to make felt poinsettias how to make felt poinsettias

6. Use one of the tails to sew a couple of loops to the back of the flower. You can then use these loops to sew the flowers to something, or thread a piece of wire or a pipe cleaner through the loops to attach the felt poinsettias.

If you make some felt poinsettias I’d love to see! Share them on Tea and a Sewing Machine’s Facebook page!

Share this:

  • Click to email this to a friend (Opens in new window)
  • Click to share on Pinterest (Opens in new window)
  • Click to share on Facebook (Opens in new window)
  • Click to share on Twitter (Opens in new window)

Filed In: Blog, Christmas / Tagged: decor, felt, flowers, how to

How to Sew a Laptop Sleeve

June 24, 2017 · 11 Comments

How to Sew a Laptop Sleeve

I like my stuff pretty.

Not over the top pretty, everything pink and endless ruffles. But I do like pretty things, fabric boxes, cushions that I’ve made myself and I wear dresses for the school run.

Laptops generally are not pretty. Neither are sewing machines, although I have seen some pretty ones!

We don’t usually make these purchasing decisions based on how the things look. We need them to work properly, to not eat our sewing or our blog posts, so we buy them based on those things instead.

An easy way of making these functional machines prettier is to make them cover or case.

My sewing machine already has a pretty cover. So here’s a tutorial showing how to sew a laptop sleeve!how to sew a laptop sleeve

I love retro flowers with their geometric designs, and for inspiration I used the flowers on this top that I turned into a dress.

If you would like the templates for the flowers, these are available as a content upgrade at the bottom of the post.

Instructions

You Will Need

To sew a laptop sleeve, you will need some scraps of cotton fabric for the stems and the flowers (4 different colours), fusible interfacing, sew in interfacing or batting to give it a squidgy quality (I used Soft and Stable. This is an affiliate link), a zip and cotton fabric for the outer and the lining.

For a netbook, 1 fat quarter of each will be enough.

For a laptop, you’ll need more, maybe half a metre, so check when you’ve measured!

The zip will need to be long enough to go around the corners of the sleeve, so how long you need it to be will again depend on the size of your laptop.

Measuring Your Laptop

Take your tape measure and measure around your laptop, both the width and the length. Measuring like this will allow you to take into account the depth of the laptop as well.

Take each measurement and divide it in half. Now add a seam allowance and another couple of cm so that the sleeve is not too snug!

This gives you the size of the rectangle you need for the main pieces of the sleeve.

Cutting Out

You might want to make yourself a template first from paper.

Cut 2 rectangles from the outer fabric, 2 from the lining and 2 from the batting or sew in interfacing.

Cutting Out the Flowers

This design uses 3 circles of different sizes, 1 leaf/ petal shape and a long rectangle for the stems.

To get the circles, I drew around some cookie cutters! Once I’d worked out the size of the rectangle, I chose the largest circle that would fit comfortably 3 times on the rectangle.

For the smallest circle, I drew round the inside of a roll of washi tape.

To cut the leaf/petal shape, I started with the largest circle and divided it into 4. I used the curved edge of 1 quarter, then drew the opposite edge to match.

If you don’t want to draw your own, you can use the templates I made. You can get these at the bottom of the post.

I made 3 of each type of flower so that the back and the front of the laptop sleeve are different. If you want them to be the same, you’ll need to cut 1 more larger circle, 1 more middling sized circle and 4 less petals. You’ll also need to swap one of the small circles in flower colour 2 for a small circle in flower colour 3.how to sew a laptop sleeve

Once you have your templates, you will need to cut:
3 large circles from flower colour 1
3 middling sized circles from flower colour 2
3 small circles from flower colour 3 and 3 more from flower colour 2
6 stems in green
12 leaf/ petals in green
6 leaf/ petals in flower colour 1 and 6 more in flower colour 3

Appliqueing the Flowers

Before appliqueing the flowers to the outer of the sleeve, arrange the pieces on to get an idea of how close together they need to be. The sleeve I’ve made is for my little netbook. If you’re making a sleeve for a laptop, you’ll be able to spread them out a bit more.

Starting with the flower pieces that will be at the bottom, applique them in place. Add the overlapping pieces as you go. The pictures below show you how!how to sew a laptop sleeve how to sew a laptop sleeve how to sew a laptop sleevehow to sew a laptop sleevehow to sew a laptop sleevehow to sew a laptop sleeve

Sewing the Up the Laptop Sleeve

1. Make the covered ends for the zip. You don’t have to do this, it just makes it look a bit neater!

Cut 2 rectangles of fabric about 5 cm wide and 8 cm long.

Take one of the rectangles and fold it in half width ways. Fold the ends inwards about 1 cm.

Pop the folded rectangle over the end of the zip and pin. Sew across the folded edges.how to sew a laptop sleeve how to sew a laptop sleeve how to sew a laptop sleeve

Cover the other end of the zip in the same way.

The open end of the zip can be tricky. To make it easier, pull the zip slider thing back and pin the ends together, then make the covered end as in the steps above.

2. Take one of the outer sections and a piece of interfacing. Put the interfacing underneath, then the zip on the top. The zip needs to be face down, in the centre and with the edge aligned with the top edge of the outer and the interfacing.how to sew a laptop sleeve

You’ll need to clip the sides of zip to get it to curve round at the corners.how to sew a laptop sleeve

Once you’ve pinned the zip in place, pop the lining on the top, right side down and pin it to the zip, outer and interfacing.how to sew a laptop sleeve

3. Sew the zip together with the lining, outer and interfacing. I started in the centre and sewed outwards, then did it again going the other way.

4. Do the same with the other outer, lining and interfacing pieces and the other side of the zip. This is a bit fiddly!

5. Now open the zip at least 10 cm. It’s important to remember to do this otherwise you’ll have issues turning it the right way out.

Separate the lining and the outer. Leaving a gap in the bottom for turning out, sew the bottom and the sides of the lining up as far as the zip.how to sew a laptop sleeve

6. Now sew the outer in the same way, but without leaving a gap at the bottom. Trim the seams.

7. Turn the sleeve the right way out. This is where you’ll be glad you remembered to open the zip! Hand stitch the opening in the lining.

I found that the seam with the zip wouldn’t sit flat. Soft and Stable is quite bulky, but I didn’t want to trim the seams to closely in case the cotton frayed.

So I top stitched around the zip. This will also help to prevent the lining from becoming caught up in the zip!how to sew a laptop sleeve

Having said that laptops are not pretty, I actually managed to find a pink netbook!how to sew a laptop sleeve how to sew a laptop sleeve how to sew a laptop sleeve

If you want to sew a laptop sleeve and you’d like the templates I used for the flowers, please enter your email address in the form below.

Please note that by doing this, you will be added to the Tea and a Sewing Machine email list. I will send you regular emails, usually once a week, containing sewing tips, links, updates and free stuff. If you do not wish to receive these emails, you can unsubscribe at any time.

Linking up here.

Share this:

  • Click to email this to a friend (Opens in new window)
  • Click to share on Pinterest (Opens in new window)
  • Click to share on Facebook (Opens in new window)
  • Click to share on Twitter (Opens in new window)

Filed In: Blog, Sewing Projects / Tagged: applique, craft fair, flowers, gift, how to, retro

How To Sew Lazy Daisy Stitch

February 7, 2017 · 3 Comments

How To Sew Lazy Daisy Stitch

This post contains affiliate links.

As the name suggests, lazy daisy stitch is useful for when you want to embroider the petals of flowers.

It’s a stitch you often see on vintage table cloths where flowers have been embroidered by hand.

They can be grouped in 3s or 5s to give the idea of a closed flower, or embroidered around the centre of a flower, like a daisy.how to sew lazy daisy stitch

To embroider these flowers, I used a medium weight cotton linen blend and DMC embroidery thread. how to sew lazy daisy stitchFor the tutorial, I used a scrap of calico that I had left over from another project. You can use pretty much anything, but if the fabric is very light you will need to use a lighter thread (or just one strand if you are using embroidery thread), and possibly fuse some interfacing to the back.

I also used an embroidery hoop, which makes everything stay nice and taut. It’s not essential but definitely a “nice to have”.

If you like these daisies, keep reading to the end of the post! There’s a link to where you can get the design, plus another one that I’ll be showing you in a couple of weeks!

how to sew lazy daisy stitchSewing Lazy Daisy Stitch

1. Find where you want to start the stitch. This will be the bottom of the petal, nearest to the centre of the flower. Bring the needle up to the right side of the fabric.how to sew lazy daisy stitch

2. Make a loop and take the needle back through to the wrong side, next to where it came out.how to sew lazy daisy stitch

3. Bring the needle back up through the fabric where you want the other end of the petal to be. Catch the loop and pull it taut.how to sew lazy daisy stitch

4. Take the needle back through to the wrong side, sewing over the end of the loop.how to sew lazy daisy stitchhow to sew lazy daisy stitch

You’ve now sewn one petal! Keep going like this until you’ve finished your flower.

If you don’t have a good eye for this kind of thing (I don’t! ), to avoid things turning out wonky you could sew the opposite petal, then the petal halfway between those 2, then the one opposite. So on the face of a clock, you would sew one at 12.00, then one at 6.00. Next you would sew one at 3.00, then one at 9.00. Keep going to until the flower is done!how to sew lazy daisy stitchhow to sew lazy daisy stitchhow to sew lazy daisy stitchhow to sew lazy daisy stitchhow to sew lazy daisy stitch

Alternatively you could mark your fabric with either a pencil or a fabric pen with disappearing ink.

If you would like the flower design pictured above, plus another one, you can get it here.

Embroidery stuff on Hobbycraft

DMC thread

DMC Moulin‚ Special 25 Variegated Cotton Thread Colour Code 52

Anchor thread
Anchor Stranded Cotton Thread

Embroidery hoops
Wooden Embroidery Hoop 5 Inches

Needles

Prym No. 5 to 10 Fine Embroidery Needles 16 Pack

Linking up here.

Share this:

  • Click to email this to a friend (Opens in new window)
  • Click to share on Pinterest (Opens in new window)
  • Click to share on Facebook (Opens in new window)
  • Click to share on Twitter (Opens in new window)

Filed In: Blog, Embroidery / Tagged: craft fair, decor, embroidery, flowers, gifts, hand sewing

Crocheted Flower Necklace Tutorial

August 9, 2015 · 4 Comments

A few months ago I made these crocheted flower earrings. crocheted flower earringsI have worn them a few times and people have remarked on how unusual they are. I’ve also found that despite them being quite long, they are very light and don’t pull on my ear.

So I decided to make a matching necklace!crocheted flower necklace tutorial

If you are a crocheter and you have never tried jewellery making, don’t be put off! They are easy to make. You will need some round nosed pliers though in addition to a 2 mm crochet hook.

I have also decided to start selling kits for some of my tutorials, so if you like the necklace (and the earrings), you might like to buy a kit so that you can make them without the trouble of hunting down the materials to make them! Here is the link to the craft kits page. Otherwise you can find the link in the navigation bar at the top. The kit for the necklace is £5 and the kit for the earrings is £3 🙂

I’ll be adding more kits over the next few months, so don’t forget to check back!

How to Make a Crocheted Flower Necklace

You will need: thread and a crochet hook (I used Anchor Pearle and a 2 mm hook), 11 jump rings, 1 head pin, 5 eye pins, 6 chip beads, round nosed pliers, ordinary pliers or wire cutters.

1. Make 5 crocheted flowers. The pattern is the same as for the crocheted hair bobble, which can be found here. Using lighter thread and a smaller hook will produce much smaller flowers!crocheted flower necklace tutorial

2. Attach jump rings to either side of 4 of the flowers. crocheted flower necklace tutorialFor the fifth flower, you will need to attach 3 jump rings evenly spaced around the flower.crocheted flower necklace tutorial

3. Thread a chip bead onto an eye pin and bend the other end into a loop. crocheted flower necklace tutorialcrocheted flower necklace tutorialDepending on the length of the eye pins, you might need to cut off some of the excess first. If you are new to making jewellery, practise making some loops first you have an idea of how much you need to make a loop. You will need to make 5 of these.crocheted flower necklace tutorial

4. Using the jump rings already attached to the flowers, join the flowers together using the bead eye pin things you made in the previous step. The flower with 3 jump rings will need to be in the middle.crocheted flower necklace tutorial

5. Add the last eye pin and chip bead from step 3 to the 3rd jump ring on the middle flower. Thread a chip bead onto the head pin and make a loop. Using a jump ring, attach the head pin with a bead to the eye pin with a bead.crocheted flower necklace tutorialcrocheted flower necklace tutorial

6. Take a length of chain and attach to one end of the flowers using the jump ring. Try it on to determine how long you need the chain to be. Cut the chain using pliers. Attach the other end on the chain to the other end of the flowers.crocheted flower necklace tutorial

7. Find the centre of the chain and break one of the links. crocheted flower necklace tutorialUse jump rings to attach a lobster clasp.crocheted flower necklace tutorial

Now wear it out and wait for people to admire it! crocheted flower necklace tutorialDon’t forget, if you want buy a kit to make this necklace, you can do so here!

If you haven’t already, you might also like to have a look at the tutorial for the matching earrings, which can be found here!

Linking up at these parties:

Behind the Seams Sewingclairejustine “HM" Amy

Live Randomly SimpleSuper Busy MumSincerely, PaulaCraftyAllieCreativeHump Day HappeningsVIEW FROM THE FRIDGEDear Creatives

Seasons of a Homemaker

Craft DictatorLink PartySew-Many_Ways
Inspire Me Monday
Show and Tell

Do Tell Tuesday

Tuesday Pintorials

Create, Link, Inspire

Create It Thursday
Seasons On Saturday
Skip The Housework Saturday

Share this:

  • Click to email this to a friend (Opens in new window)
  • Click to share on Pinterest (Opens in new window)
  • Click to share on Facebook (Opens in new window)
  • Click to share on Twitter (Opens in new window)

Filed In: Crochet, Jewellery, Other Crafts / Tagged: craft fair, flowers, how to, necklace

  • 1
  • 2
  • Previous Entries
I'm Anna and I live in rural Norfolk in the UK. My mum taught me how to use a sewing machine when I was 10 and I haven't looked back! I love making all sorts of things and I hope you find inspiration here.

Join the list

Join the mailing list to receive updates, useful and interesting links and free pages from the Sewing Journal.

My New Ebook

things to male and do in the autumn

Bunting Makes Everything Better Tote Bag

Featured Kit

The Sewing Journal

My Kits and Patterns on Etsy

Shop the Christmas Shop at Sew and So


Join the List

Join the mailing list to receive updates, useful and interesting links and free pages from the Sewing Journal.

Privacy Policy

For information about cookies and Tea and a Sewing Machine's privacy policy, please click here.

Instagram

Instagram Widget by SnapWidget


UK Sewing Blogs

Theme by 17th Avenue · Powered by WordPress & Genesis

loading Cancel
Post was not sent - check your email addresses!
Email check failed, please try again
Sorry, your blog cannot share posts by email.
We use cookies to ensure that we give you the best experience on our website. If you continue to use this site we will assume that you are happy with it.Ok