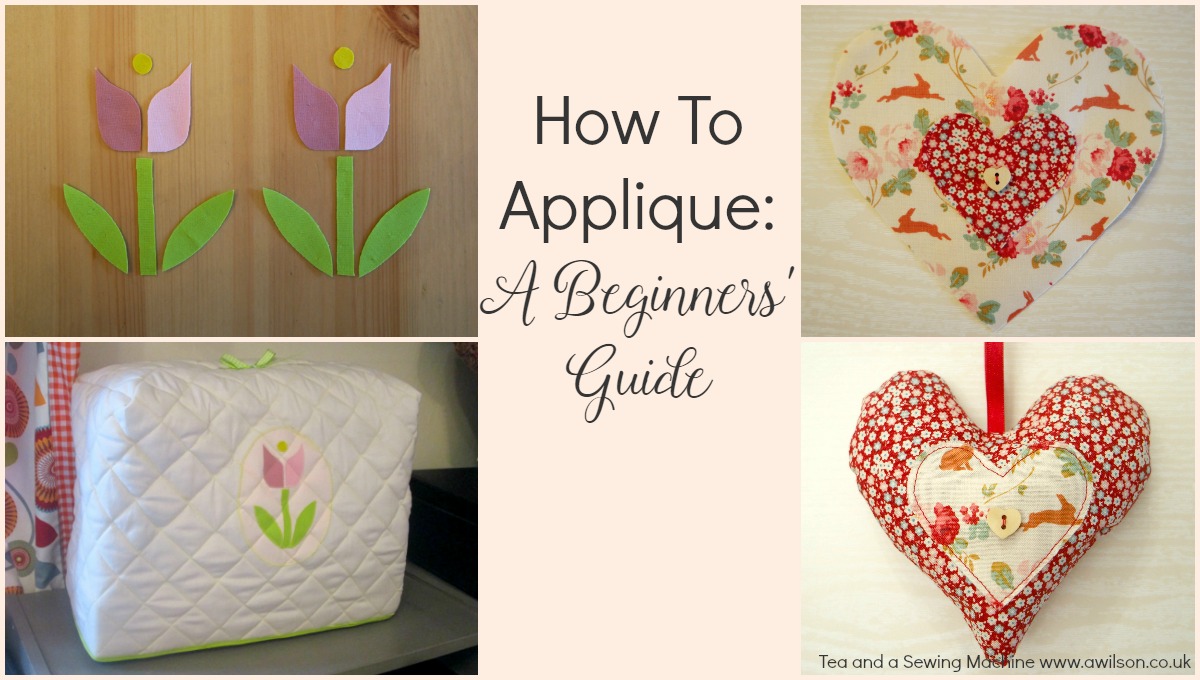
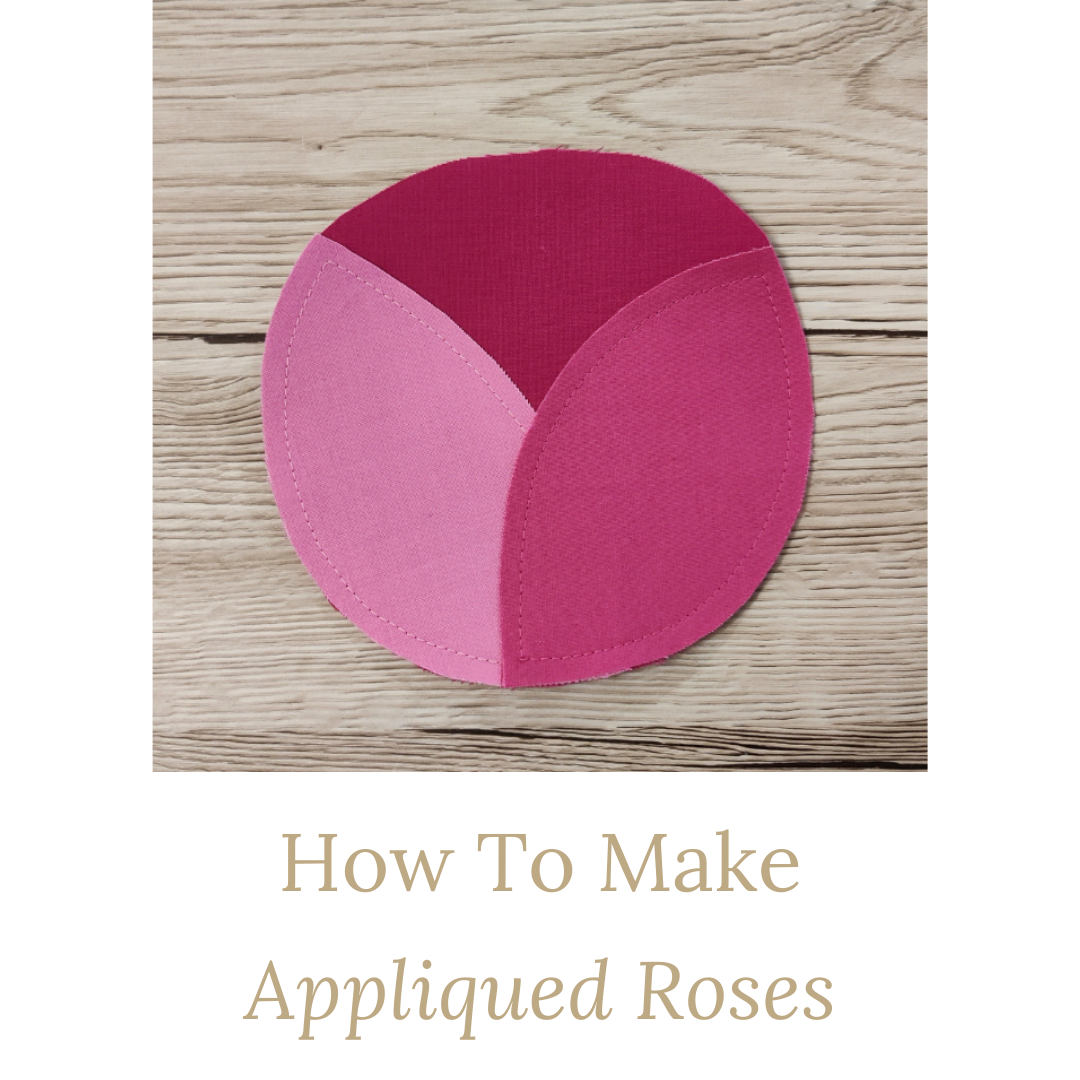
• Home
  • About
  • Blog
  • Ebooks and Printables
  • Etsy
  • Sewing Journal

Make it Yourself. Yes You Can!

  • Sewing Projects
  • Tips and Techniques
  • Embroidery
  • Other Crafts
    • Crochet
    • Felting
    • Jewellery
    • Wreaths
  • Christmas

DIY Winter Dress Tutorial

October 30, 2018 · Leave a Comment

DIY Winter Dress Tutorial

DIY Winter Dress Tutorial

It always makes me a little bit sad at the end of the summer when I have to put away my pretty dresses and dig out my dreary, sensible winter things instead.

This year has been a good year for the pretty dresses. Not only did I manage to make 4 dresses and 2 skirts, it’s actually been warm enough to wear them. So wear them I did. Lots. I spent most of the summer galumphing around my little corner of Norfolk looking as though I was on my way either to a 50s themed tea party or an event for overgrown, elderly fairies.

Now I’m in saggy, dreary things that don’t fit, but I have plans to change this one new outfit at a time! I can still wear pretty things even though it’s autumn. They just need to be warm pretty things I can wear with tights and leggings, boots and warm cardis.

So here is DIY winter dress number 1!DIY Winter Dress Tutorial

The fabric I used for my DIY winter dress is a bright blue wool that I was sent ages ago by the people at AW Hainsworth. They make woollen cloth for all kinds of things and the stuff they sent me is specifically for making clothes.

It’s beautiful, kind of like felt but it drapes nicely and isn’t too thick. I’d never made clothes from anything like felt before, and I’m hoping it’s going to be lovely and warm when the cold weather arrives!

I didn’t want to hem it or use facings because I was concerned about bulk. It doesn’t fray at all so I could have left them as they were, but I wanted to make them actually look finished! So I used so satin bias binding to finish the raw edges.

It’s very similar to the dresses I made in the summer. The main differences, apart from the fabric, are that the armholes are bigger and I allowed more ease for wearing, as I would be wearing a long sleeved top underneath it. The skirt is also half a circle rather than a full circle, so it uses quite a lot less fabric.

Here’s the tutorial if you want to make a DIY winter dress for yourself! If you’d like the templates for the flowers, you can have them in exchange for an email address. There’s also a free printable for recording your measurements. The details are at the bottom of the post.

Making a DIY Winter Dress

You will need:

Some big bits of paper (pattern paper is ideal)
Pencil
Tape measure
A French curve (or a plate)
Ruler
Wool or wool blend dress fabric. Small prints are fine but big prints and large checks and stripes are probably best avoided! I used 2 metres of fabric 145 cm wide.
Felt or other fabric for the applique.
Bias binding for finishing the raw edges.
A 20 cm (8 inch) zip.
Usual sewing supplies.

Taking Measurements

Before you start on your DIY winter dress, you’ll need to take some measurements.

You will need to measure:

Nape of your neck to your waist
Across your collarbone where it meets your shoulders
Across your shoulders
Bust
Waist
From your shoulder to where you measured your bust
Waist to knee (or where you want the hem to be)

If you’d like some tips for taking measurements, you can read this post here.

Drafting the Pattern

You’ll need a piece of pattern paper or similar, larger than your largest dimensions. Mine was 50 cm (20 inches) square.

Draw a vertical line the same length as the distance from the nape of your neck to your waist (or the top of your your shoulder if you don’t have somebody to help you!).

Find your waist measurement and divide it by 4. Add a couple of cm to allow for the darts, a couple more for the seam allowance and a little bit more for ease, especially if you’re planning on wearing it over something else.

Draw a horizontal line of this length at the bottom of the vertical line.

Now take your collar bone measurement. Divide this by 2 and draw a line this length at the top of the vertical line.

Divide your shoulder to shoulder measurement by 2 and draw a horizontal line of that length a couple of cm (an inch) below the collarbone line.

Find your shoulder to bust line measurement and mark it on the vertical line. Divide your bust measurement by 4, plus a 3-4 cm for a seam allowance and ease (1 1/2 inches). Draw a horizontal line where you marked on the vertical line.

Now join the lines up! To get the shape of the armhole, you could use a French curve if you have one, or a plate if you don’t.

To draw the neckline, mark down from the top of the vertical line about 15 cm (6 inches). Using the French curve (or the plate), join this point to the end of the collarbone line.

To add the side darts, mark a point about 8 cm (3 inches) in from the side and just below the bust line. At the side mark a point about 2 cm (3/4 inch) below the bust line. Draw a line from the first point to a cm above the point at the side, and another from the first point to a cm below the point at the side.

Draw the waist darts in the same way. Draw a line about 10 cm upwards from the centre of the waist edge of your pattern piece. From the top point, draw 2 more lines that end a cm either side at the waist.diy winter dress tutorial

To draft the back piece, redraw the pattern piece without the extra at the waist that you added to allow for the darts. To draw the neckline, mark a point 10 cm down the vertical line and join it to the collarbone line.diy winter dress tutorial

Working out the Skirt

When I was making my summer dresses, I didn’t bother with making a pattern piece first. Instead I cut it directly from the fabric.

For this DIY winter dress, the skirt is half a circle but the grain still needs to be running up and down the centre.

This means cutting it out at an angle, which is possible, but it’s easier and there’s less measuring if you have a pattern piece.

Take your waist measurement plus 4 cm seam allowance and a couple of cm for ease (2 1/2 inches). Divide this by 3 and add it to your waist to knee measurement. I’m going to refer to this as your total length measurement!

Cut a square with sides as long as your total length measurement. From one corner, measure across from one side to the other, marking off with a pen as you go. You should have a quarter of a circle.

From the same corner, measure down your waist measurement divided by three, across from one side to the other. You’ll now have a quarter of a circle with a chunk missing from the centre, like a quarter of a doughnut.

Unfortunately I forgot to take any pictures while I was cutting out the skirt! There are some pictures in this tutorial here if you need some.

Cutting Out

Cut one of each of the bodice sections, on the fold with the grain running up and down.

Cut 2 skirt pieces with the centre of each piece running parallel with the grain.

For the appliqued flowers, cut 6 of each circle, 6 stems and 12 leaves.

Sewing Up

1. If you want the appliqued flowers on your DIY winter dress, you’ll need to do those first. Position them on the dress, pin, then sew them in place. Start with the stems and the leaves, then the circles. I sewed the circles together then appliqued them to the dress. This was probably easier, but I had to be careful when sewing them on because I didn’t want pink stitching on the brown circles!diy winter dress tutorial

diy winter dress tutorial

2. Sew the darts. Start at the edge and sew towards the point. Don’t sew right up to the point, stop just before to avoid bumpiness. If you need more of a tutorial, there’s one here.diy winter dress tutorial

3. Sew the skirt to the bodice. Take one of the bodice pieces and one of the skirt pieces. With the right sides together, pin them at the waist. Sew. Repeat for the other bodice and skirt piece.diy winter dress tutorial

4. With the right sides together, sew the shoulder seams. Now try the dress on. Check that the darts are where you want them and that the waistline is actually on your waist! If they’re not, you might need to adjust the shoulder seams or the waist. When you are happy that it fits, trim the seams and press.

5. Sew the side seams. Pop your dress on inside out. Match the waist, then pin the side seams of the bodice. On one side, mark where you’ve pinned with chalk. Unpin that side and take the dress off. Repin the seam.

Starting at the waist, sew the side seams of the bodice on both sides. Don’t worry, putting the zip in is the next step and it’s easier to do when you’ve already sewn the side seam!

You might need to trim the armholes a bit so that they match.

Starting at the waist again, sew the side seams of the skirt.

6. Install the zip. Decide which side you want the zip to be on. For right handed people this is likely to be the left hand side. If you’re left handed you might prefer the zip to be on the other side. Remember that when the dress is inside out the left hand side is on the right!

Pin the zip over the seam and tack in place. When you’re pinning, keep checking that the teeth of the zip are over the seam. Sew the zip in place. This is easiest to do with a zip foot, but it’s fine if you don’t have one.diy winter dress tutorial

Once you’ve sewn the zip in, unpick the seam to expose the teeth of the zip.

If you need a more detailed tutorial, there’s one here.

7. Finish the raw edges with bias binding. For sewing the hem, it’s best to leave it on the roll. Unroll some of it and open it out. Pin one end of the bias binding to the skirt with the right sides together so that the edge of the bias binding is aligned with the raw edge of the skirt. Sew the bias binding to the skirt, keeping close to the folded edge.diy winter dress tutorial

Fold the bias binding over so that the binding is on the wrong side of the skirt. Sew the other edge of the binding to the skirt.diy winter dress tutorial

Finish the neckline and the armholes in the same way.

I’m very happy with my DIY winter dress! It might need some more flowers though. What do you think?DIY Winter Dress Tutorial

diy winter dress tutorial

Don’t forget your flower templates and your measurements printable for your DIY winter dress!

Please note that although these are free and I’m happy for you to have them, I do ask for an email address and you will be added to the Tea and a Sewing Machine Machine mailing list. You can unsubscribe from these emails at any time. If you’d like to know why I do this, you can find out here.


diy winter dress tutorial

Share this:

  • Click to email this to a friend (Opens in new window)
  • Click to share on Pinterest (Opens in new window)
  • Click to share on Facebook (Opens in new window)
  • Click to share on Twitter (Opens in new window)

Filed In: Blog, Sewing Projects / Tagged: applique, dress, how to, making clothes without a pattern, winter

How to Sew a Laptop Sleeve

June 24, 2017 · 11 Comments

How to Sew a Laptop Sleeve

I like my stuff pretty.

Not over the top pretty, everything pink and endless ruffles. But I do like pretty things, fabric boxes, cushions that I’ve made myself and I wear dresses for the school run.

Laptops generally are not pretty. Neither are sewing machines, although I have seen some pretty ones!

We don’t usually make these purchasing decisions based on how the things look. We need them to work properly, to not eat our sewing or our blog posts, so we buy them based on those things instead.

An easy way of making these functional machines prettier is to make them cover or case.

My sewing machine already has a pretty cover. So here’s a tutorial showing how to sew a laptop sleeve!how to sew a laptop sleeve

I love retro flowers with their geometric designs, and for inspiration I used the flowers on this top that I turned into a dress.

If you would like the templates for the flowers, these are available as a content upgrade at the bottom of the post.

Instructions

You Will Need

To sew a laptop sleeve, you will need some scraps of cotton fabric for the stems and the flowers (4 different colours), fusible interfacing, sew in interfacing or batting to give it a squidgy quality (I used Soft and Stable. This is an affiliate link), a zip and cotton fabric for the outer and the lining.

For a netbook, 1 fat quarter of each will be enough.

For a laptop, you’ll need more, maybe half a metre, so check when you’ve measured!

The zip will need to be long enough to go around the corners of the sleeve, so how long you need it to be will again depend on the size of your laptop.

Measuring Your Laptop

Take your tape measure and measure around your laptop, both the width and the length. Measuring like this will allow you to take into account the depth of the laptop as well.

Take each measurement and divide it in half. Now add a seam allowance and another couple of cm so that the sleeve is not too snug!

This gives you the size of the rectangle you need for the main pieces of the sleeve.

Cutting Out

You might want to make yourself a template first from paper.

Cut 2 rectangles from the outer fabric, 2 from the lining and 2 from the batting or sew in interfacing.

Cutting Out the Flowers

This design uses 3 circles of different sizes, 1 leaf/ petal shape and a long rectangle for the stems.

To get the circles, I drew around some cookie cutters! Once I’d worked out the size of the rectangle, I chose the largest circle that would fit comfortably 3 times on the rectangle.

For the smallest circle, I drew round the inside of a roll of washi tape.

To cut the leaf/petal shape, I started with the largest circle and divided it into 4. I used the curved edge of 1 quarter, then drew the opposite edge to match.

If you don’t want to draw your own, you can use the templates I made. You can get these at the bottom of the post.

I made 3 of each type of flower so that the back and the front of the laptop sleeve are different. If you want them to be the same, you’ll need to cut 1 more larger circle, 1 more middling sized circle and 4 less petals. You’ll also need to swap one of the small circles in flower colour 2 for a small circle in flower colour 3.how to sew a laptop sleeve

Once you have your templates, you will need to cut:
3 large circles from flower colour 1
3 middling sized circles from flower colour 2
3 small circles from flower colour 3 and 3 more from flower colour 2
6 stems in green
12 leaf/ petals in green
6 leaf/ petals in flower colour 1 and 6 more in flower colour 3

Appliqueing the Flowers

Before appliqueing the flowers to the outer of the sleeve, arrange the pieces on to get an idea of how close together they need to be. The sleeve I’ve made is for my little netbook. If you’re making a sleeve for a laptop, you’ll be able to spread them out a bit more.

Starting with the flower pieces that will be at the bottom, applique them in place. Add the overlapping pieces as you go. The pictures below show you how!how to sew a laptop sleeve how to sew a laptop sleeve how to sew a laptop sleevehow to sew a laptop sleevehow to sew a laptop sleevehow to sew a laptop sleeve

Sewing the Up the Laptop Sleeve

1. Make the covered ends for the zip. You don’t have to do this, it just makes it look a bit neater!

Cut 2 rectangles of fabric about 5 cm wide and 8 cm long.

Take one of the rectangles and fold it in half width ways. Fold the ends inwards about 1 cm.

Pop the folded rectangle over the end of the zip and pin. Sew across the folded edges.how to sew a laptop sleeve how to sew a laptop sleeve how to sew a laptop sleeve

Cover the other end of the zip in the same way.

The open end of the zip can be tricky. To make it easier, pull the zip slider thing back and pin the ends together, then make the covered end as in the steps above.

2. Take one of the outer sections and a piece of interfacing. Put the interfacing underneath, then the zip on the top. The zip needs to be face down, in the centre and with the edge aligned with the top edge of the outer and the interfacing.how to sew a laptop sleeve

You’ll need to clip the sides of zip to get it to curve round at the corners.how to sew a laptop sleeve

Once you’ve pinned the zip in place, pop the lining on the top, right side down and pin it to the zip, outer and interfacing.how to sew a laptop sleeve

3. Sew the zip together with the lining, outer and interfacing. I started in the centre and sewed outwards, then did it again going the other way.

4. Do the same with the other outer, lining and interfacing pieces and the other side of the zip. This is a bit fiddly!

5. Now open the zip at least 10 cm. It’s important to remember to do this otherwise you’ll have issues turning it the right way out.

Separate the lining and the outer. Leaving a gap in the bottom for turning out, sew the bottom and the sides of the lining up as far as the zip.how to sew a laptop sleeve

6. Now sew the outer in the same way, but without leaving a gap at the bottom. Trim the seams.

7. Turn the sleeve the right way out. This is where you’ll be glad you remembered to open the zip! Hand stitch the opening in the lining.

I found that the seam with the zip wouldn’t sit flat. Soft and Stable is quite bulky, but I didn’t want to trim the seams to closely in case the cotton frayed.

So I top stitched around the zip. This will also help to prevent the lining from becoming caught up in the zip!how to sew a laptop sleeve

Having said that laptops are not pretty, I actually managed to find a pink netbook!how to sew a laptop sleeve how to sew a laptop sleeve how to sew a laptop sleeve

If you want to sew a laptop sleeve and you’d like the templates I used for the flowers, please enter your email address in the form below.

Please note that by doing this, you will be added to the Tea and a Sewing Machine email list. I will send you regular emails, usually once a week, containing sewing tips, links, updates and free stuff. If you do not wish to receive these emails, you can unsubscribe at any time.

Linking up here.

Share this:

  • Click to email this to a friend (Opens in new window)
  • Click to share on Pinterest (Opens in new window)
  • Click to share on Facebook (Opens in new window)
  • Click to share on Twitter (Opens in new window)

Filed In: Blog, Sewing Projects / Tagged: applique, craft fair, flowers, gift, how to, retro

Quilted Sewing Machine Cover Tutorial

May 11, 2017 · 10 Comments

Quilted Sewing Machine Cover Tutorial

The best thing about having my own little sewing corner is that I can leave my sewing machine out. One of the drawbacks with doing this though is that it gets dusty. Too much dust and fluff in a sewing machine can cause it to stop working. If you leave it out it needs to have a cover.

My sewing machine actually came with a cover, which I have used when I’ve remembered!

Unfortunately it is not very nice. It’s made of some weird grey stuff and I don’t like it.

The answer to being both fussy and forgetful is to make my own! My theory is that if I have a pretty sewing machine cover, I will be more likely to remember to use it.

So far, my theory has proved correct 🙂

The cover is quilted, with an appliqued Scandi style flower on the front and the back. I used a print for the inside, because I like to know that the inside is pretty if even nobody sees it! The bottom edge is finished with bias binding, that I made myself so that it would match the stems of the flowers.

The construction is very simple. It’s basically a rectangle with the sides sewn up and boxed corners.

As I had no intention of carrying the sewing machine around, I didn’t need access to the handle, so there’s no opening for it. You could probably make one if you needed to but this tutorial doesn’t show how to do this. I put a pretty green bow on the top instead.

Here is my quilted sewing machine cover tutorial.quilted sewing machine cover tutorial

How to Make a Quilted Sewing Machine Cover

You Will Need

1 metre  of cotton fabric for the outer,1 metre of cotton fabric for the lining, 1 metre of wadding, scraps of contrasting cotton for the applique, bias binding (or a bias binding tool plus fabric if you want to make your own), a scrap of ribbon for the top.

There might be a fair bit of fabric left over, but half a metre will not quite be enough.

You will also need templates for the appliqued flower. You could either make your own (I have a Pinterest board of inspiration here) or you can download the ones I used for free here.

Cutting Out

You will need to cut out out 2 lots of the flower pieces. If you are using my template, you will need to cut:
4 leaves
2 stems
4 halves of the flower (2 in each colour)
2 circles
2 ovals

For the cover itself, you will need to measure your sewing machine. Measure up the front of the machine, over the top and down the back. This will give you the length. For the width, measure around the bottom and divide it by 2. Don’t forget to add a seam allowance and a few cm extra cm. Some will be lost in the quilting and you also need it to be fairly loose over the sewing machine. I would add probably about 8-10 cm extra in total.

Using these measurements, you will need to cut a rectangle from the outer fabric, lining and wadding.

Sewing Up

1. Arrange the flower pieces onto the ovals and then pin them on. If you don’t want to pin them, you could hold each piece in place with a dab of a glue stick. It might not hold all the pieces in place while you sew, so, you’ll need to stick each piece down and then sew, rather than stick them all down and sew them all at once.

Applique the flowers to the ovals.quilted sewing machine cover tutorialquilted sewing machine cover tutorialquilted sewing machine cover tutorialquilted sewing machine cover tutorialquilted sewing machine cover tutorial

2. Position one of the ovals onto the outer so that it is in the centre and 10 cm up from the bottom. Pin it in place, then applique it to the outer.

Do the same with the other oval on the other side of the outer.

3. Pin the outer to the wadding and the interlining (if you’re using it). Using a long ruler or a tape measure and pins, mark the first line of diagonal quilting stitches.quilted sewing machine cover tutorial

If you’re worried about getting the angle right, take a square of paper and fold it in half diagonally. Line the edge of the square up with the bottom of the fabric. Where the folded diagonal edge is, you will need to pin your line for sewing.

4. Sew the first line of quilting stitches using a long, straight stitch.

5. To work out where the rest of the lines of quilting will need to go, use the first line as a guide. Measure 4 cm away from it, and 4 cm on the other side. Sew them, then measure the next line.

Keep going like this until you have completed the quilting in this direction. Don’t forget to turn your fabric each time!quilted sewing machine cover tutorial

6. Make the lines of quilting in the other direction in the same way.quilted sewing machine cover tutorial

7. When you have completed the quilting, trim your outer so that the fabric and the wadding are the same size and the whole thing is a neat rectangle.

Check it against your lining piece. You might need to trim the lining down so that it is the same size.

8. Take your outer piece and with the wrong sides together, fold it in half widthways. Pin, then sew up the sides.

9. Squash the corners flat so that the side seams are next to the fold at the top. Measure 8 cm up from the corner and pin. quilted sewing machine cover tutorialSew across the corner, then cut the corner off.quilted sewing machine cover tutorial

10. Repeat steps 8 and 9 with the lining.

11. Pop the lining inside the outer so that the wrong sides are together. Pin.

12. If you’re making your own bias binding you will need to do that now. There’s a tutorial here if you need one. Sew the bias binding to the bottom edge, taking care to enclose the raw edges on both sides. More detailed instructions for doing this can be found here.

Make a bow and sew it to the top. Now you have a sewing machine cover your machine can stay dust free!quilted sewing machine cover tutorial quilted sewing machine cover tutorial

Linking up here.

Share this:

  • Click to email this to a friend (Opens in new window)
  • Click to share on Pinterest (Opens in new window)
  • Click to share on Facebook (Opens in new window)
  • Click to share on Twitter (Opens in new window)

Filed In: Blog, Sewing Projects / Tagged: applique, begiiners, boxed corners, decor, easy, how to, quilting, sewing machine

Sewing a Tea Mat: A Pretty Way to Catch Tea Stains

April 21, 2017 · 13 Comments

Sewing a Tea Mat

In February we embarked on a diy project that was overdue by 14 years. We ripped out our old kitchen and put in a new one. We managed to get most of the new one in the week that hubby had taken off work to do it, and over the last few weeks we’ve been finishing it off. It’s still not quite finished, but enough of it’s done to start making some things for it!


One of the things that I absolutely love about it are the beautiful wooden worktops. The only issue is I’m worried about ruining them!

In the old kitchen I got the tea stains out of the laminate worktops with bicarb and vinegar, but I don ‘t want to use anything that harsh on the wooden ones.

So I had plans to make a pretty cloth to line a tray.

Unfortunately, all the trays in my house currently contain half finished lego models and I didn’t get round to buying another one.

So the tea tray cloth has become a tea mat instead!how to sew a tea mat tea tray cloth

To make it I used some linen (tea coloured already so the stains won’t show!) and some pretty floral fabric. I also used some sew in interfacing to give it some more weight.

I used machine embroidery to applique the teapot and embroider the letters. It was the first time I’d tried machine embroidering letters, and I’m happy with how it’s turned out! I went over the letters twice as they looked spidery after the first time.

Having an embroidery foot really helped as it allowed me to see what I was sewing! If you read the post I wrote about sewing machine feet, you’ll know that I don’t believe that having lots of feet is necessary. However it can be useful to have particular feet for certain tasks, and using an embroidery foot definitely made it easier.how to sew a tea mat tea tray cloth

You can find the full tutorial for the tea mat here on the Minerva Crafts Bloggers Network. There are free templates for the teapot and the lettering too.

These are affiliate links for the stuff I used to make the tea mat.

Linen

how to sew a tea mat tea tray cloth

Floral fat quarter pack

how to sew a tea mat tea tray cloth

Sew in interfacing

how to sew a tea mat tea tray cloth

Fusible interfacing

how to sew a tea mat tea tray cloth

Linking up here.

how to sew a tea mat tea tray liner

Share this:

  • Click to email this to a friend (Opens in new window)
  • Click to share on Pinterest (Opens in new window)
  • Click to share on Facebook (Opens in new window)
  • Click to share on Twitter (Opens in new window)

Filed In: Blog, Sewing Projects / Tagged: applique, bias binding, craft fair, decor, easy, gift, how to, kitchen, machine embroidery

How To Applique: A Beginners’ Guide

April 1, 2017 · Leave a Comment

How To Applique: A Beginners’ Guide

Applique is a a french word that means apply. It’s generally used to describe the technique of sewing pieces of fabric to something to decorate it.

There are lots of uses for applique, and lots of fun, easy projects you can try. It’s great for decorating cushions and tea towels, bags and purses, you can even applique clothes if you want to!

You don’t even need to make something new. Applique can be added to things you have already as a way of personalising them.

If you’ve never tried applique before, it’s easy to do and the possibilities are endless! You don’t need anything special, just some fabric and some fusible interfacing. You can use your sewing machine, or you can applique by hand.

Here’s a beginners’ guide showing how to applique!

There are affiliate links included in this post.how to applique

Making Your Shapes

When planning your project, remember that simple shapes are easiest to sew. Avoid anything too fiddly or complicated and you stand more chance of ending up with something that looks lovely that you’re happy with.

If you need more detail on your applique, consider what you could do to achieve it. Embroidery, by hand or machine, or you could sew on buttons, beads or sequins.how to applique

If you have difficulty drawing freehand, there are plenty of places where you can find shapes for applique. In addition to free templates and tutorials on the internet, you can try stencils, clipart, precut paper shapes and cookie cutters.

Preparing Your Fabric

Applique works best with fabrics that are similar in weight. Appliqued shapes cut from lighter fabric sewn onto something heavier, like denim or canvas, is also usually fine. Try to avoid appliqueing heavier fabrics to lighter ones.

If the fabric being appliqued to is lighter, the lighter fabric is more likely to pucker, especially if you are using a zigzag stitch.

If this happens (or if you think it might happen), use some fusible interfacing to give the bottom fabric a bit more weight.

If you haven’t used interfacing before, it’s easy to identify which side is sticky. It’s usually the side that is either shiny or has raised bumps. Put the sticky side next to the fabric, then iron with a warm (not hot!) iron. To prevent sticky from ending up all over your iron, either iron on the fabric side (ie not the interfacing side), or use a tea towel over the top.

Fraying can be an issue with applique. This is also solved by adding some fusible interfacing to the wrong side of the fabric. If the fabric frays a lot, then fuse the interfacing to the fabric before cutting out the shapes.how to applique

Bondaweb can be used as an alternative to fusible interfacing for the shapes.More about that in a minute!

Appliqueing Your Shapes to Your Fabric

Once your shapes are cut out and you’ve put some fusible interfacing on that back, you can sew it to your fabric!

All you have to do is pin your shapes on, then sew around them.

Using bondaweb is an easy alternative to pins. This stuff is like fusible interfacing, but it’s sticky on both sides.

Just iron it on as you would with fusible interfacing, then peel the backing off. Put it onto your fabric, then iron it again and it will stick. This holds it in place nicely while you sew it on. It’s especially useful if you’re appliqueing tiny pieces where a pin would get in the way.

Which Stitch to Use?

It’s up to you!

Traditionally applique is sewn on using a satin stitch, which is basically a lot of zigzags all close together. This gives a nice, neat finish.

However, it’s perfectly fine to use a standard zigzag or even a straight stitch.

A straight stitch is a good choice, especially if you are planning to do some machine embroidery over the top. You might have a bit of an issue if the fabric frays as the straight stitches won’t cover the raw edges. As I mentioned before, bondaweb or fusible interfacing will help with fraying, but you might decide that the frayed edges actually give it a kind of charm that you like!Appliqued Flower Purse quick and easy handmade gift ideas how to applique

Zigzags are half way between a satin stitch and a straight stitch. The raw edges are sewn over, but they’re not completely covered. You could sew around your appliqued pieces once, or more if you want to.how to applique

Experiment with the size of stitches before you start. In theory, stitches that are visible should be longer. However, if you are sewing something small, using small stitches will be easier.

Depending on your sewing machine, you will be able to control the width of the zigzag stitches as well as the distance between them. Just have a bit of a practise first!

You can also applique by hand. For these felt birds, I appliqued the hearts using blanket stitch.felt bird christmas decoration 12 things to sew in the autumn how to applique

Do I Need a Special Foot For My Sewing Machine?

Apparently there are feet for applique. I have never used one.

If you have a fondness for sewing machine feet, here is an affiliate link for an applique foot. If your sewing machine came with one, you might fancy trying it out. But no, you don’t need one. It’s perfectly possible to applique without a special foot. However, if you have an embroidery foot with a transparent bit at the front, you might find this easier if you are appliqueing little bits of fabric.

If you are interested in finding out more about sewing machine feet, you might like to read this post here.

Some Applique Projects You Might Like to Try

Now that you know how to applique, you need a project!

Shopping bag with appliqued buntinghow to applique

Reindeer cushionhow to applique

Flower Pursehow to appliqueBunting Cushionhow to applique

Linking up here.

Share this:

  • Click to email this to a friend (Opens in new window)
  • Click to share on Pinterest (Opens in new window)
  • Click to share on Facebook (Opens in new window)
  • Click to share on Twitter (Opens in new window)

Filed In: Blog, Tips and Techniques / Tagged: applique, beginners, craft fair, decor, gift ideas, how to

I'm Anna and I live in rural Norfolk in the UK. My mum taught me how to use a sewing machine when I was 10 and I haven't looked back! I love making all sorts of things and I hope you find inspiration here.

Join the list

Join the mailing list to receive updates, useful and interesting links and free pages from the Sewing Journal.

My New Ebook

things to male and do in the autumn

Bunting Makes Everything Better Tote Bag

Featured Kit

The Sewing Journal

My Kits and Patterns on Etsy

Shop the Christmas Shop at Sew and So


Join the List

Join the mailing list to receive updates, useful and interesting links and free pages from the Sewing Journal.

Privacy Policy

For information about cookies and Tea and a Sewing Machine's privacy policy, please click here.

Instagram

Instagram Widget by SnapWidget


UK Sewing Blogs

Theme by 17th Avenue · Powered by WordPress & Genesis

loading Cancel
Post was not sent - check your email addresses!
Email check failed, please try again
Sorry, your blog cannot share posts by email.
We use cookies to ensure that we give you the best experience on our website. If you continue to use this site we will assume that you are happy with it.Ok