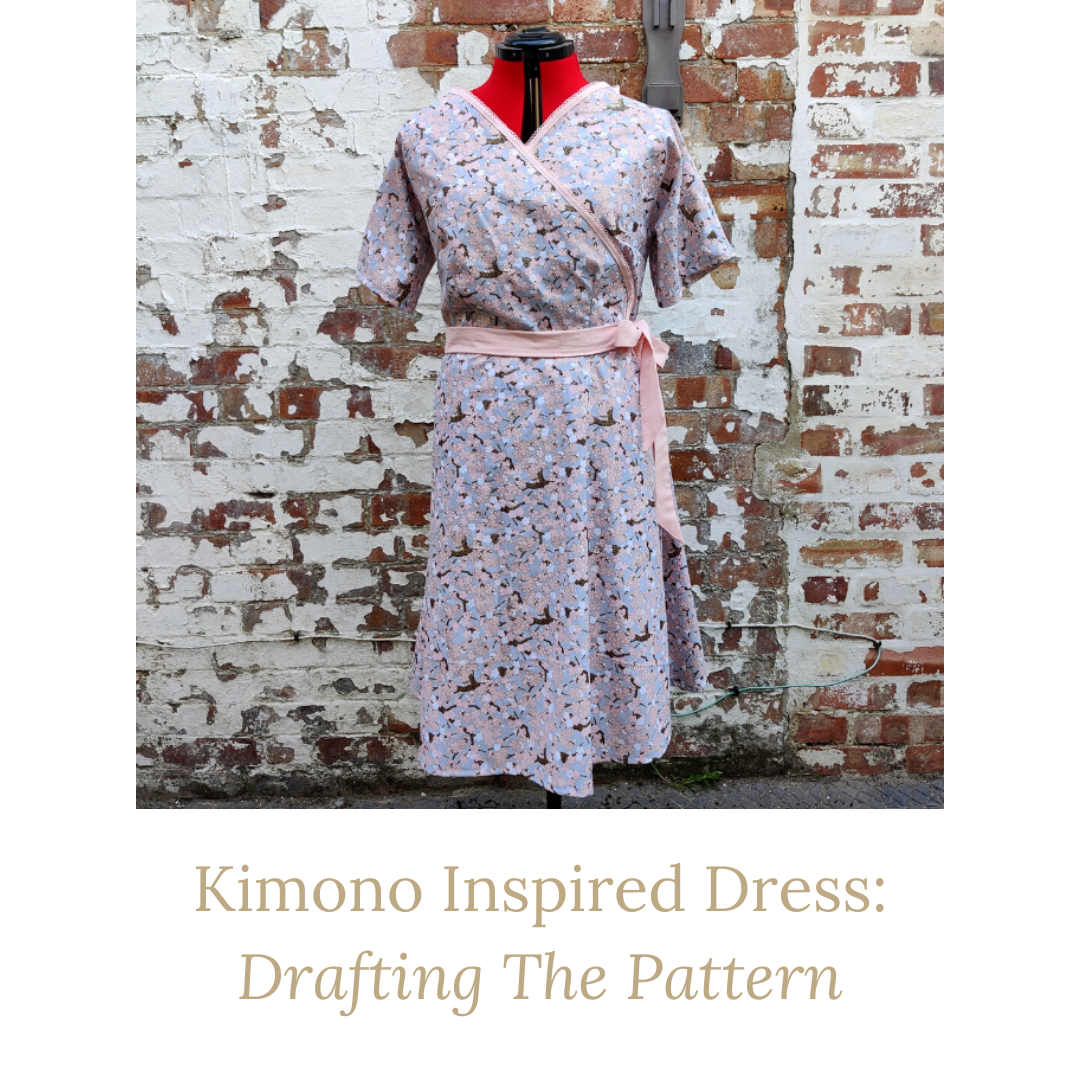
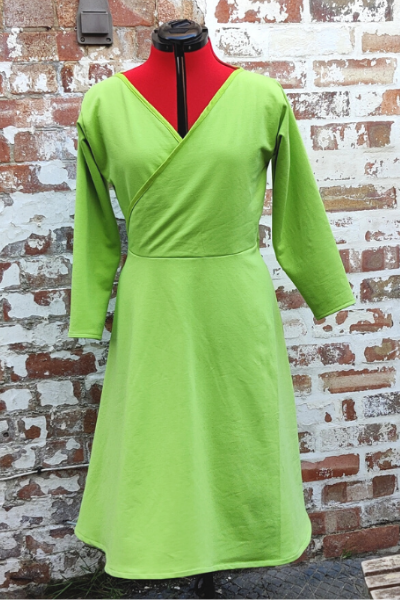
• Home
  • About
  • Blog
  • Ebooks and Printables
  • Etsy
  • Sewing Journal

Make it Yourself. Yes You Can!

  • Sewing Projects
  • Tips and Techniques
  • Embroidery
  • Other Crafts
    • Crochet
    • Felting
    • Jewellery
    • Wreaths
  • Christmas

Pattern Drafting: How To Draft an A Line Skirt

October 18, 2020 · Leave a Comment

pattern drafting how to draft an a line skirt

This post contains affiliate links.

One of the things I love to do is make my own clothes, especially making them from my own designs.

There is nothing like trotting off out in an outfit that I’ve made myself. I like knowing that nobody else will be wearing the same as me, and I don’t care if people think I’m mad/ too old to be wearing a pink tutu with pink tights and pink shoes, or if I’ve escaped from a 50s themed tea party.

We’re supposed to pretend that clothes don’t matter and it’s what’s inside that counts. I agree to this up to a point, but remember how happy Anne Shirley was when Matthew sorted her out with a dress with puffed sleeves? I want to feel like that as often as I can!

Using a pattern can sometimes feel a little bit limiting, especially if you have something in particular in mind and you can’t find exactly what you want. One way round this is to adapt a favourite pattern. Another is to start with your own ideas and draft or drape a pattern yourself.

I’ve done this myself lots of times over the years. Sometimes things turned out very well (like this sundress). Other times they turned out less well.

But even with the things that could be labelled as disasters, I still learnt something, which makes it valuable, even if the item in question ended up as a cushion cover instead.

If you’re considering making clothes from your own designs, my advice would be #1 do it, and #2 keep things simple as far as you can.

If you’ve made clothes from commercial patterns, this will help you a lot. You can take a basic sleeve shape for example, and adapt it, or start out with a simple skirt and change it up a bit.

Having a collection of things that you know how to make, an idea of basic pattern shapes and some knowledge of how clothes are put together will help enormously.

One such thing is a basic skirt pattern. If you know how to draft one according to your measurements, you can change it however you like!

In the rest of this post, I’m going to show you how to draft a pattern for an A line skirt.

pattern drafting how to draft an a line skirt

How To Draft an A Line Skirt Pattern

You Will Need

Pattern paper. Any large paper will do, but I recommend using the kind of pattern paper that has a grid marked on it. It costs a bit more but it makes things so much easier!

Tape measure

Pins

Pencil

Any kind of pattern drafting is easier with a dress form, but you can do it on yourself if you don’t have one. Just mind the pins! Alternatively you could use a friend or family member who is a of a similar size.

How On Earth Are We Going To Do This and Not End Up With Something That Looks Awful?

That’s a good question!

This is how.

The first job is to draft a straight skirt. We’ll do the front and back separately, and half of it each time. We can use the halves to draft the other halves. That way the front and the back will both be symmetrical.

Then by messing about with the darts, we can change the shape of the skirt pieces. We can use this to draft the pattern pieces for the A line skirt.

You’ll have pattern pieces for a straight skirt and an a line skirt, and you can use them however you like!

Job 1: Drafting the Straight Skirt

Drafting the Front

We’re going to draft the front and the back separately, and we’re only going to do half.

Starting with the front, pin a large piece of pattern paper at the hips on both sides. It needs to be slightly more towards the back.

If you’re using the paper with the grids on, it will be easy to check whether it is straight. Vertical lines need to be running up and down at the sides and at the centre front.

Pin the paper at the centre front, making sure that you keep the vertical line.

pattern drafting how to draft an a line skirt

There will be a huge amount of bagginess at the waist, which we’re going to fix with a dart.

The dart will probably need to go about half way between the centre front and the side seam, but put it where it naturally wants to go. We’re not following any rules here about how long the dart needs to be either; just make it as long as it needs to be. The purpose of it is to remove the extra at the waist.

When you’ve figured out the dart. fold it and pin it.

pattern drafting how to draft an a line skirt

Now grab a pencil and mark on the centre front and the side seam (this will be half way round your hip).

Draw on the waistline. If you doing this on yourself, you’ll be able to feel it. If you’re using a dress form, you might find it helpful to pin some ribbon or a piece of elastic around the waist.

pattern drafting how to draft an a line skirt

Put it to one side.

Drafting the Back

We’re going to draft the back in the same way that we did the front.

Take another piece of pattern paper and pin it at the hips and round the back. If you are doing this on yourself, you might need somebody to help you.

Check vertical lines at the side and the centre back. Pin the centre back. Fix the bagginess with a dart. Again, this will probably need to go about half way along, but put it where it feels like it needs to go.

For larger ladies, you might find that 2 smaller darts work better.

Mark the side seam and the centre front, and the waist line.

Finishing Off the Straight Skirt Pattern

You’ll need to the following things to both the front and back pattern pieces.

Decide how long you want the skirt to be and measure down from the waist. Draw a straight line to mark the hem.

Draw the centre line and the side down to the hem.

pattern drafting how to draft an a line skirt

Using the fold lines, draw the dart.

pattern drafting how to draft an a line skirt

Job 2: Transforming the Straight Skirt Pattern into an A line skirt

This is where the magic happens!

Draw a vertical line from the point of the dart down to the hem.

Cut out the dart.

pattern drafting how to draft an a line skirt

From the hem, cut along the line that you drew from the point of the dart. Don’t cut the whole way! Leave half a cm or so. I managed to cut right through it, hence the tape.

Now move the edges of the dart so that they are together. You could tape it so that it stays put.

pattern drafting how to draft an a line skirt

You’ll notice that a huge kind of anti dart has opened up in the skirt. By closing up the dart, you’ve made the skirt fuller and it will still fit!

Draw round this to make the pattern piece for the a line skirt. I extended the waist by 2 cm and drew another line from this point down to the hem. Then I used a French curve to join the inside line to the outside one. A dinner plate will do if you don’t have a French curve.

pattern drafting how to draft an a line skirt

You can use the plate/ curve to join the points of the anti dart too, or leave them straight for a different kind of hemline.

The waistline will need to curve a little bit too, upwards from the dart to the side seam by 1-2 cm.

Job 3: Draft the waistband and add a seam allowance to the pattern pieces.

Drafting the Waistband

This is optional! You might decide to line your skirt instead, in which case all you’ll need to do is make a second skirt the same as the first, just a bit shorter, and join them at the waist.

Alternatively, you could use the waistband pieces as facings instead.

Take your skirt front piece (A line version) and lay it on top of a piece of pattern paper. Trace the waist line, then the side seam about 4 cm and the same down the centre front.

Join the lower line so that it follows the shape of the waistline.

pattern drafting how to draft an a line skirt

Add a 2 cm seam allowance along the top, the bottom and at the side. You won’t need one at the centre front because you’ll cut in on the fold so that it’s one piece.

pattern drafting how to draft an a line skirt

When cutting out, you’ll need two.

The waistband for the back is made in the same way. The only difference here is that you’ll need a waistband for each half of the back. So when adding the seam allowance, add on 2 cm at the centre as well.

When cutting the waistband for the back out, you’ll need two left hand pieces and two right hand pieces.

Adding a Seam Allowance to the Skirt Front and Back

The skirt front will be in one piece cut on the fold, so add a 2 cm seam allowance to the side and the bottom hem.

The skirt back will be made from 2 pieces, cut on folded fabric. To this section, add a 2 cm seam allowance to both sides and the bottom hem.

So now you have a pattern for a straight skirt and an A line skirt!

There will be another post about assembling your A line skirt in a couple of weeks. Or you could give it a go yourself!

Share this:

  • Click to email this to a friend (Opens in new window)
  • Click to share on Pinterest (Opens in new window)
  • Click to share on Facebook (Opens in new window)
  • Click to share on Twitter (Opens in new window)

Filed In: Blog, Sewing Projects / Tagged: pattern drafting

How to Draft a Trouser Pattern

June 30, 2017 · 26 Comments

How to Draft a Trouser Pattern

One of the things I love about sewing for little ones is that they don’t care about what other people think!

My youngest boy, Cosmo, is 4. He doesn’t think in terms of some things being for boys and other things being for girls, he just thinks about whether he likes them. His favourite colour is pink.

With Cosmo starting school in September, I know that these days of him being free to be just who he is in the way that only small children are are coming to an end, and try as I might to keep him this way, he will be dictated to a bit by other kids at school.

So when I had to go into King’s Lynn to rescue a pair of shoes that got left on the bus, I jumped at the chance to take my little lamb to the fabric shop and let him chose something that I could make into a pair of trousers.

Cosmo chose some fabric with the bees on, which I think will make a lovely pair of trousers for the rest of the summer!

I didn’t have a pattern and last time I made trousers, I drew round a pair of trackie bottoms. This worked out ok, but they were a bit baggy around the top.

So this time, I decided to draft a trouser pattern properly so my little boy will have a pair of gorgeous bumble bee trousers that fit his sweet little self perfectly!how to draft a trouser pattern

How to Draft a Pair of Trousers

It’s easier than you might think to draft a trouser pattern! Although this was a pair for a little boy, the same principles apply whatever the size of the person.

You Will Need

Pattern paper or greaseproof paper, a pencil, a ruler and a tape measure. A French curve is useful but you could use a plate instead if you don’t have one. These are affiliate links.

Taking Measurements

The key to sewing clothes that fit properly is taking accurate measurements.

To draft a trouser pattern, you will need to measure:

Waist to ankle (the easiest way to do this is to dangle the tape measure upside down)
Waist to knee
Waist to hips (at the widest point)
Rise (sit on a chair, then measure from your waist to where your butt meets the chair)

Around your waist
Around the front of your hips at the widest point
Around the back of your hips
Around your knee

You’ll also need to decide how wide you want the trousers to be at the bottom.

Drafting the Pattern

The pattern will be drafted in 2 sections. There’ll be one section for the back, and one for the front. These sections will then be cut on doubled fabric, so you’ll have 2 back pieces and 2 front pieces.

Trouser Front

1. Take your pattern paper and down one edge, draw a vertical line the same length as the distance from your waist to your ankle. If you are making trousers for yourself, you might need to stick pieces of paper together.

2. On that vertical line, mark on your waist (that’s at the top), distance from waist to hips, your rise, and waist to knee.

3. Now you’re going to draw on the horizontal lines. These will go where you marked on the vertical line.

Take your waist measurement and divide it by 4. Add 1 cm for ease and draw that line at the top of the vertical line.how to draft a trouser pattern

4. Take your front hip measurement and divide it by 2. Add 1 cm, then draw that horizontal line where you marked your hips.

5. Underneath that, where you marked your rise, draw another horizontal line the same length as your front hip measurement. how to draft a trouser patternThis line will need to be longer, so we have to calculate the crotch extension (I wish they’d call it something else!). How long was the line you just drew? Multiply that by 0.25, then extend the rise line by that amount.how to draft a trouser pattern

6. Now find where you marked your waist to knee measurement on the vertical line. Divide your knee measurement in half, and 1 cm for ease and draw it on.

7. At the bottom of the line, draw a last horizontal line. This will be the width you want the trousers to be at the bottom.

8. Now join the lines up! The waist to hip line will be straight.how to draft a trouser patternThe next part, the hip to rise, will need to be curved. For this you can use a French curve, or a plate will do if you don’t have one. how to draft a trouser patternThe rise to ankle will also be a straight line.how to draft a trouser pattern

Don’t worry about joining it to the knee line. Just make sure that you don’t go through that line, or you’ll have issues getting your trousers on!

Drafting the Trouser Back

Drafting the back section is done in exactly the same way as the front, with 2 exceptions.

The first is that where you draw you hip line, you will need to use the measurement you took around the back of your hips, divided by 2, plus 1 cm for ease of wearing.

The other exception is that to work out the crotch extension, you will need to multiply the hip line by 0.3.

Adding the Seam Allowance

You will need to add a seam allowance to your pattern pieces. You can either draw around your pattern piece to add a seam allowance, or you could just add it in when you’re cutting out. how to draft a trouser pattern

It’s a good idea to write on your pattern pieces whether you’ve added in the seam allowance or not to avoid causing yourself confusion if you decide to make yourself another pair at a later date.

Next week I’ll be showing you how to sew the pieces together to make the trousers!

Linking up here.

Share this:

  • Click to email this to a friend (Opens in new window)
  • Click to share on Pinterest (Opens in new window)
  • Click to share on Facebook (Opens in new window)
  • Click to share on Twitter (Opens in new window)

Filed In: Blog, Sewing Projects, Tips and Techniques / Tagged: dressmaking, how to, pattern drafting

How to Draft a Sleeve Pattern Piece

June 20, 2017 · Leave a Comment

How to Draft a Sleeve Pattern Piece

Last week I showed how to draft a simple bodice pattern piece.

Once you have your pattern piece drafted, there are lots of possibilities for what you could make with it. You could add a skirt and turn it into a dress, change the neckline or make it into a top.

Sleeveless is fine, but depending on what you’re making, you might want to add some sleeves.

The good news is that it is easier and quicker to draft a sleeve pattern piece than a bodice!how to draft a sleeve pattern piece block sloper

Once you have the piece made, you can alter the length, the style and the shape of the sleeve to fit with the garment that you are making.

Drafting a Sleeve

Sleeves are an odd shape. They look nothing at all like how you would expect!how to draft a sleeve pattern piece

The top part needs to be curved to fit into the armhole, which is also curved.

In the past I have drawn sleeves free hand, just using a piece of string to get the size of the curved top part correct.

Unfortunately this is not very accurate and I have on occasion ended up with sleeves that were a bit of a snug fit!

Thankfully with a little bit of measuring it’s possible to get sleeves that fit your arm and fit the armhole of the thing you’re making!

You Will Need

To draft a sleeve pattern piece, you will need some large sheets of paper (pattern paper is best but you could use greaseproof paper or newspaper), a pencil and eraser and a long ruler. A French curve is also useful. These are affiliate links.

1. Draw a vertical line the same length as the distance from your shoulder to just below your armpit.

2. At the bottom of the line, draw a horizontal line the same length as the distance around the top of your arm.how to draft a sleeve pattern piece sloper block

3. Use a French curve to join to the top of the vertical  line to the ends of the horizontal line.how to draft a sleeve pattern piece

4. To draw the rest of the sleeve, extend the first line. This will determine the length of the sleeve, so you will need to measure from your armpit to where you want the sleeve to end.

5. At the bottom, draw another line at right angles. This will need to be the total distance around the opening of the sleeve.Then join up the lines.

how to draft a sleeve pattern piece block sloper

A tapered piece will give a more fitted sleeve. If it is less tapered the sleeve will be looser.

To make shorter sleeves, just measure around your arm higher up and adjust the length accordingly.

If you like to make clothes without a pattern, you might enjoy these posts:

Circle skirt without a pattern

Cherry blossom dress without a pattern

Blue and white dress without a pattern

25 tips for sewing clothes without a pattern

Little boy’s shirt without a pattern

Linking up here.

Share this:

  • Click to email this to a friend (Opens in new window)
  • Click to share on Pinterest (Opens in new window)
  • Click to share on Facebook (Opens in new window)
  • Click to share on Twitter (Opens in new window)

Filed In: Blog, Tips and Techniques / Tagged: dressmaking, how to, pattern drafting, sewing clothes without a pattern

I'm Anna and I live in rural Norfolk in the UK. My mum taught me how to use a sewing machine when I was 10 and I haven't looked back! I love making all sorts of things and I hope you find inspiration here.

Join the list

Join the mailing list to receive updates, useful and interesting links and free pages from the Sewing Journal.

My New Ebook

things to male and do in the autumn

Bunting Makes Everything Better Tote Bag

Featured Kit

The Sewing Journal

My Kits and Patterns on Etsy

Shop the Christmas Shop at Sew and So


Join the List

Join the mailing list to receive updates, useful and interesting links and free pages from the Sewing Journal.

Privacy Policy

For information about cookies and Tea and a Sewing Machine's privacy policy, please click here.

Instagram

Instagram Widget by SnapWidget


UK Sewing Blogs

Theme by 17th Avenue · Powered by WordPress & Genesis

loading Cancel
Post was not sent - check your email addresses!
Email check failed, please try again
Sorry, your blog cannot share posts by email.
We use cookies to ensure that we give you the best experience on our website. If you continue to use this site we will assume that you are happy with it.Ok