
How to Crochet Fringed Edging
How to Crochet Fringed Edging
How to Crochet Fringed Edging is the last in a little series of posts I’ve been writing about pretty edgings you can crochet.
Most of them are very easy. They can be used to give a pretty detail to bags, purses, hair bands, blankets, throws and shawls. The can be also added to non crocheted things like towels and napkins.
If you missed the previous tutorials, then can be found here:

If you would like a free printable of instructions for crocheting all 4 of these edgings, plus 2 extra ones, the link is at the bottom of the post!
Fringed edging is also very easy. Of course, you could make a fringe in the usual way, but it’s nice to have a choice and to be able to do things differently sometimes.
Please be warned that I am using British crocheting terms!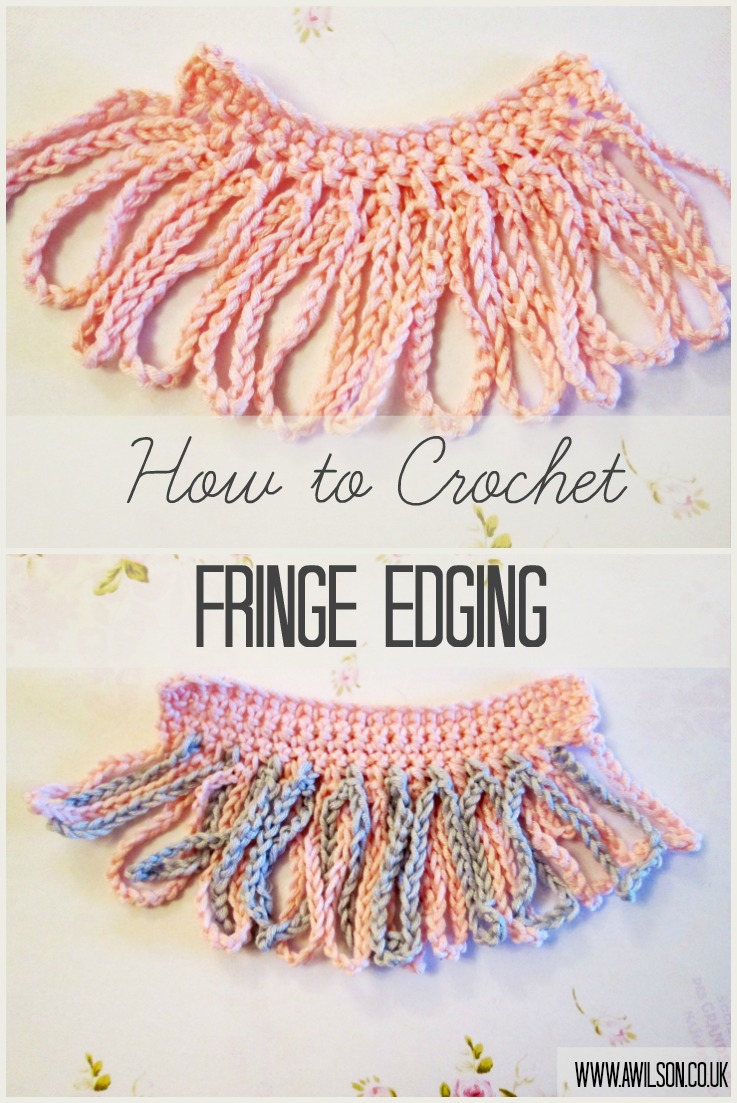
Instructions for Crocheting Fringed Edging
This is very easy to do. All you have to do is make lots of chains joined to the edge you are working on with double crochet.
It will turn out a little bit neater if you start with an odd number of sttiches. It doesn’t make that much of a difference though, so don’t worry if you don’t.
1. 1 ch, miss one stitch, double crochet into the next stitch.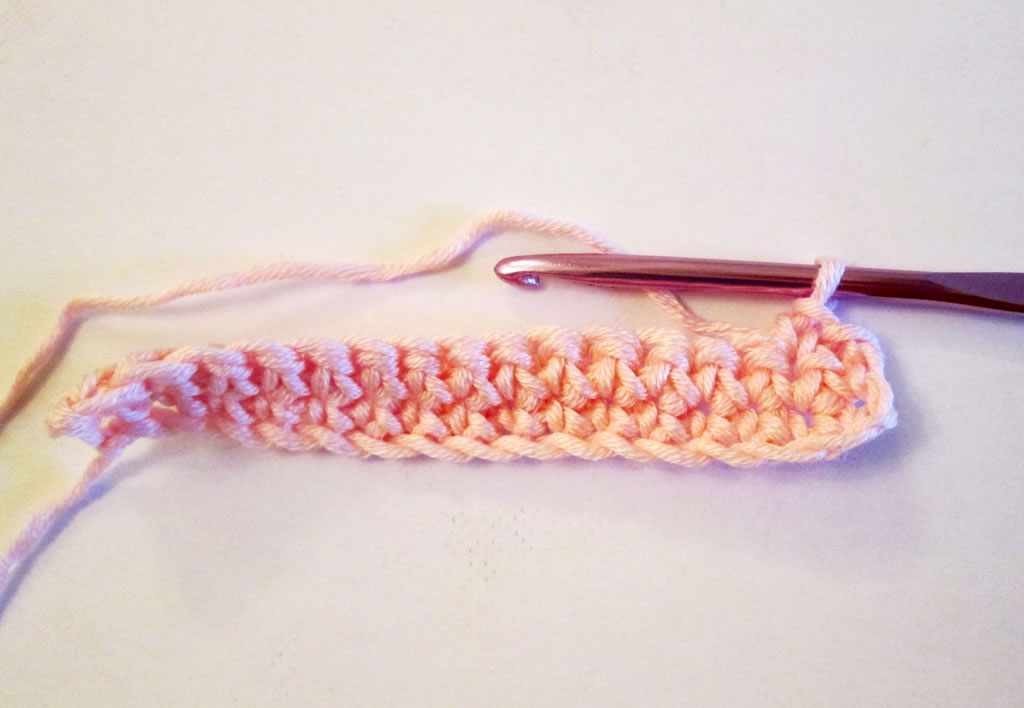
2. Make 25 ch.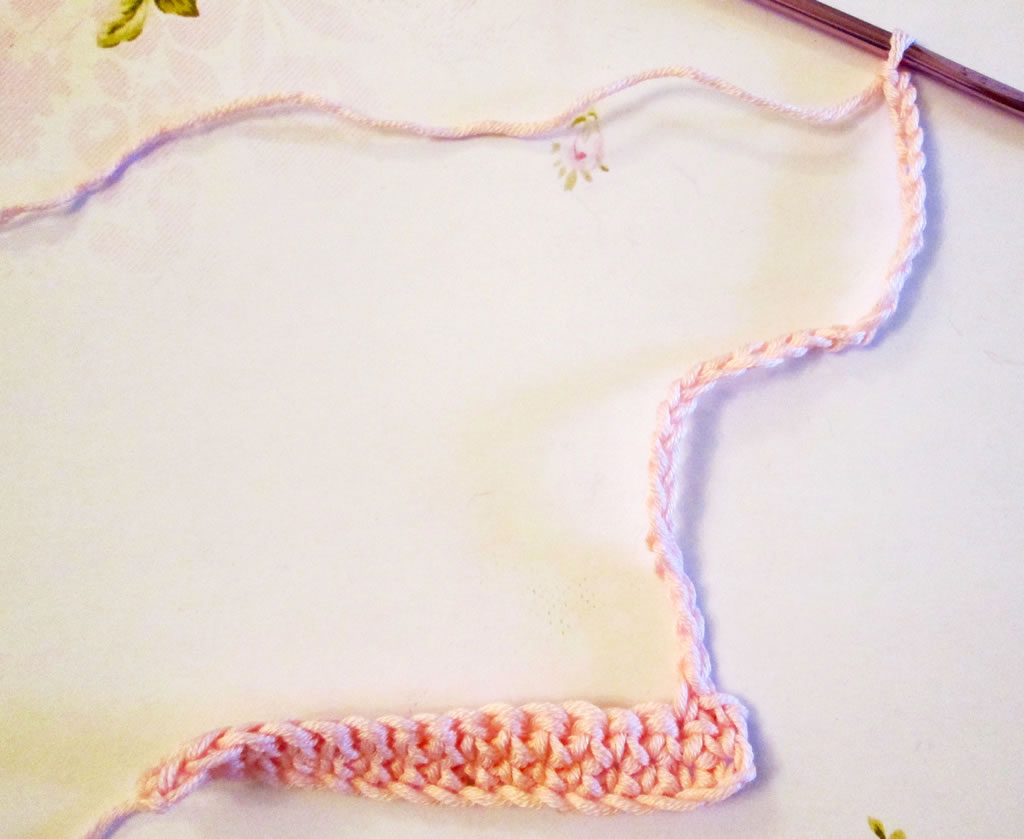
3. Dc into the next stitch.
4. 25 ch again.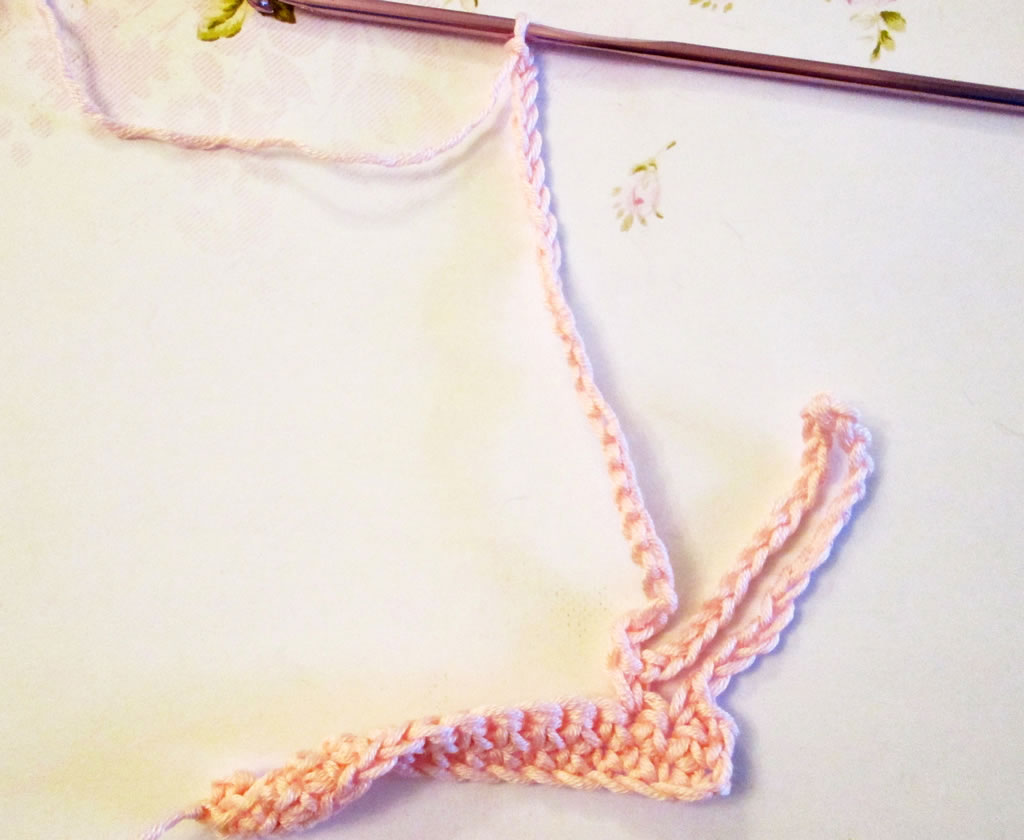
5. Dc into the next stitch.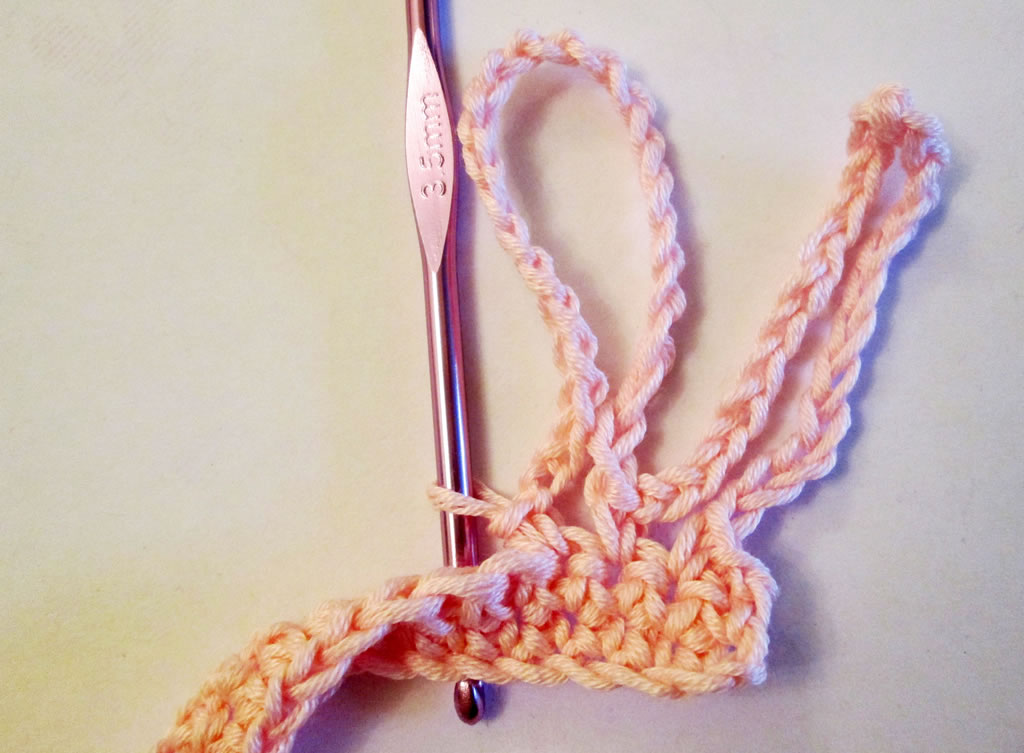
Keep going until you reach the end of the row. That really is all there is to it!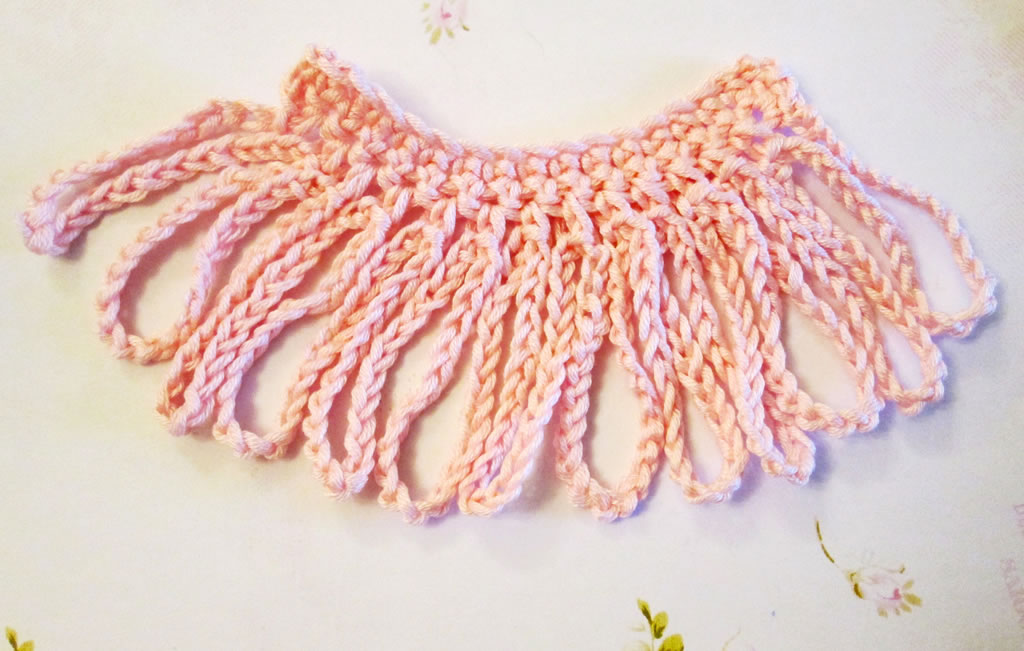
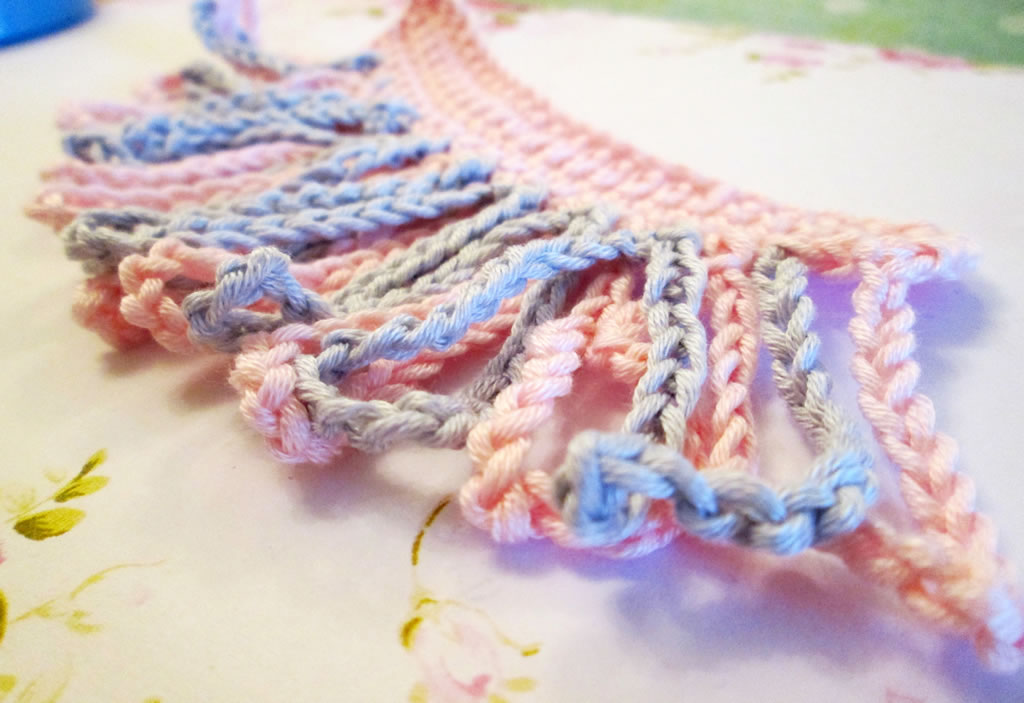
It’s also possible to crochet a fringed edging using 2 colours.
1. In the original colour, 1 ch, miss one stitch, dc into next stitch.
2. 25 ch
3. Miss 1 stitch, dc into next stitch
4. 25 ch
5. Miss 1 stitch, dc into next stitch.
Keep going like this until you reach the end of the row.
Then with your 2nd colour:
6. Join yarn at the first free dc. It will be between the 2 ends of the first fringe loop you made.
7. 25 ch
8. dc into next free stitch. So you will miss out 1 stitch (it will already have been worked!).
Keep going to the end of the row.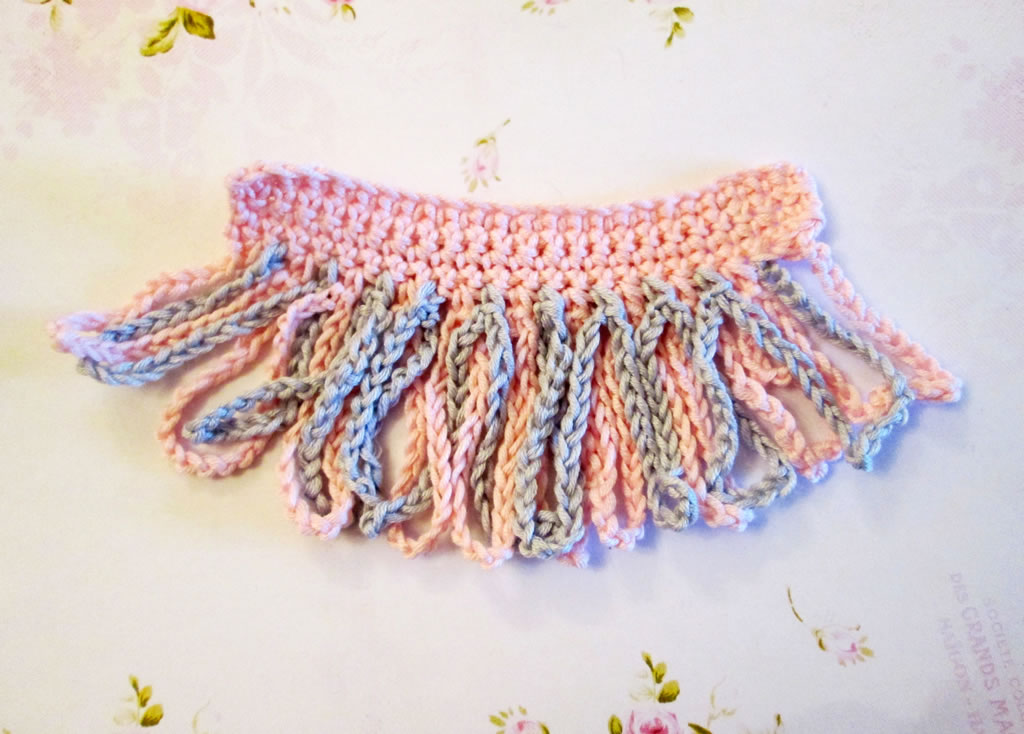
To get your free printable of this and 5 other crocheted edgings, the link is here.
Happy Crocheting! xx
I am confused as to why the pattern is different in this post to that on the pdf, yet the pictures on the pdf match the pattern given here. Which method is the correct one, or could both be used?
Hi Anna , unfortunately the link to the crochet edgings patterns doesn’t work anymore. Do you think you could send me the pdf? You see, you just saved my life because I was looking for crochet edgings patterns I could understand and found yours and it worked very well. Thank you! And as you say you have some more patterns written down in the pdf I would like to see them. Perhaps I could try those too.
Hi Claudia, it’s here: https://www.awilson.co.uk/wp-content/uploads/2022/11/Crocheted-Edgings.pdf Have fun!
What size hook and string do you use? And how do you do the base that the fringe comes from?
Hi Diane, I used double knit and a 3.5 mm hook. To do the base I did a row of chains, then a couple of rows of double crochet. If you need more help, let me know.
These are so bautiful and add so much to any piece of fabric or garment. If only I could crochet.
It’s quite easy Mary 🙂
Fabulous tutorial :o)
Thank you x
Tracey V recently posted…I Do Love Denim :o)
Thanks 🙂
a very useful tutorial, thank you for sharing at The Really Crafty Link party this week! pinned!
Teresa recently posted…Welcome to The Really Crafty Link Party #9!
Thank you xx
Very pretty. Thanks for the tutorial.
Thank you xx
So pretty and ideal for the bottom of scarves
Thank you xx
This is lovely, I am already thinking of things that could do with a little fringe. Thanks
All kinds of things could do with a little fringe 🙂
I’m a complete novice, but.your instructions are very clear and easy to follow. You answered my questions before I could ask them! Thank you for sharing.
Glad you found them useful 🙂
#new How To Crochet Fringed Edging https://t.co/8XL8aDgG6C https://t.co/9AQyAhf0Vw