
Interactive DIY Christmas Jumper
With Christmas Jumper Day fast approaching, I thought it would be fun to make a Christmas jumper for Boy 4.
I had an idea for making something with an interactive element. I didn’t want anything too complicated, perhaps something involving a pocket.
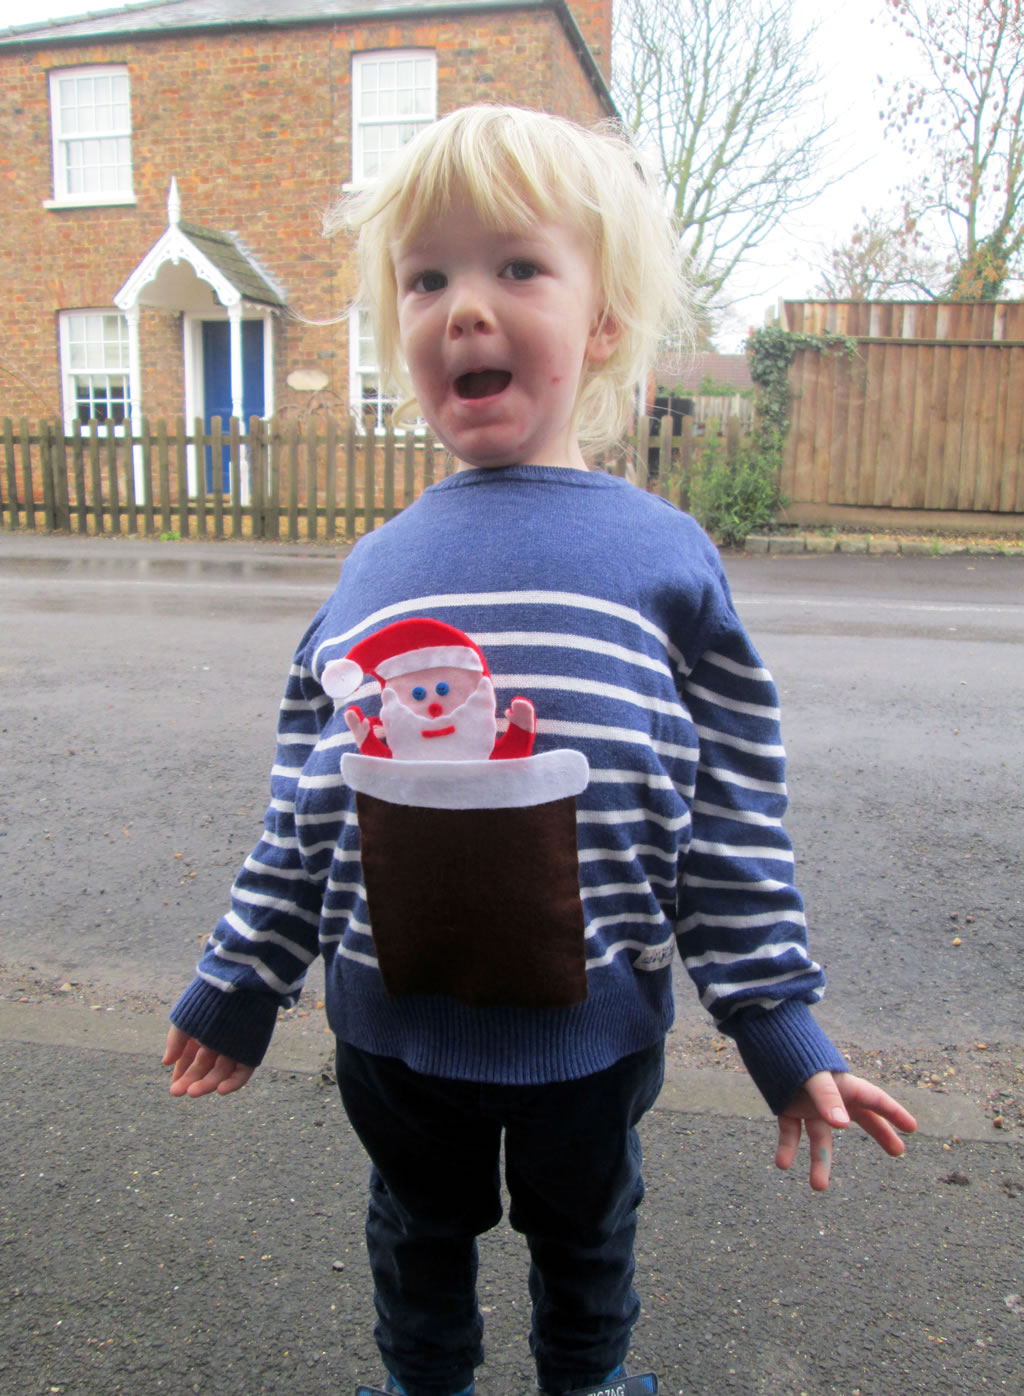
So here we have Santa and a chimney!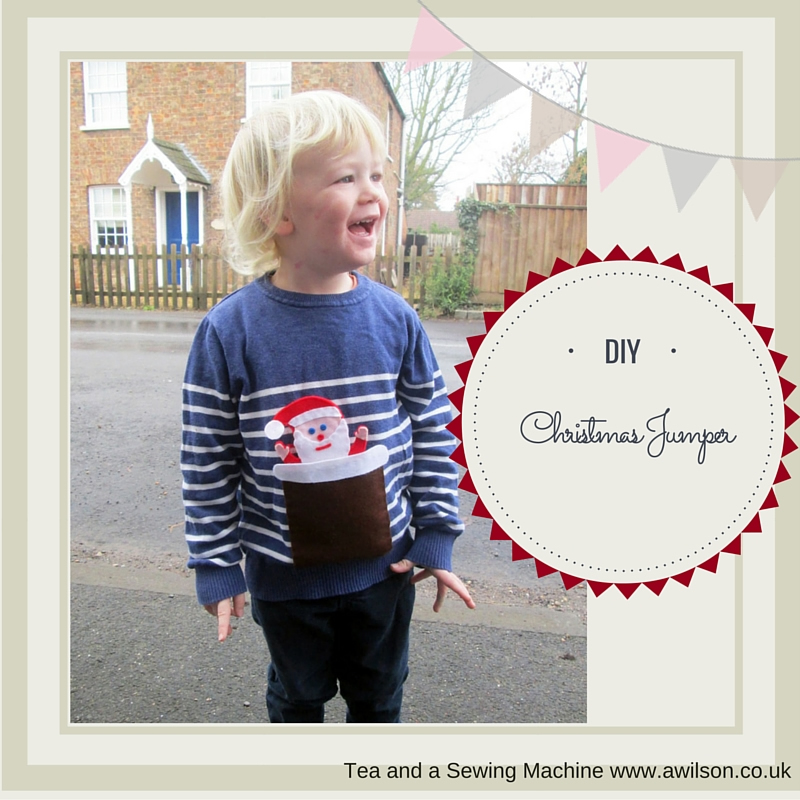
The Santa is attached to the inside of the chimney with a ribbon so that he doesn’t get lost.  He can go into the chimney feet first…
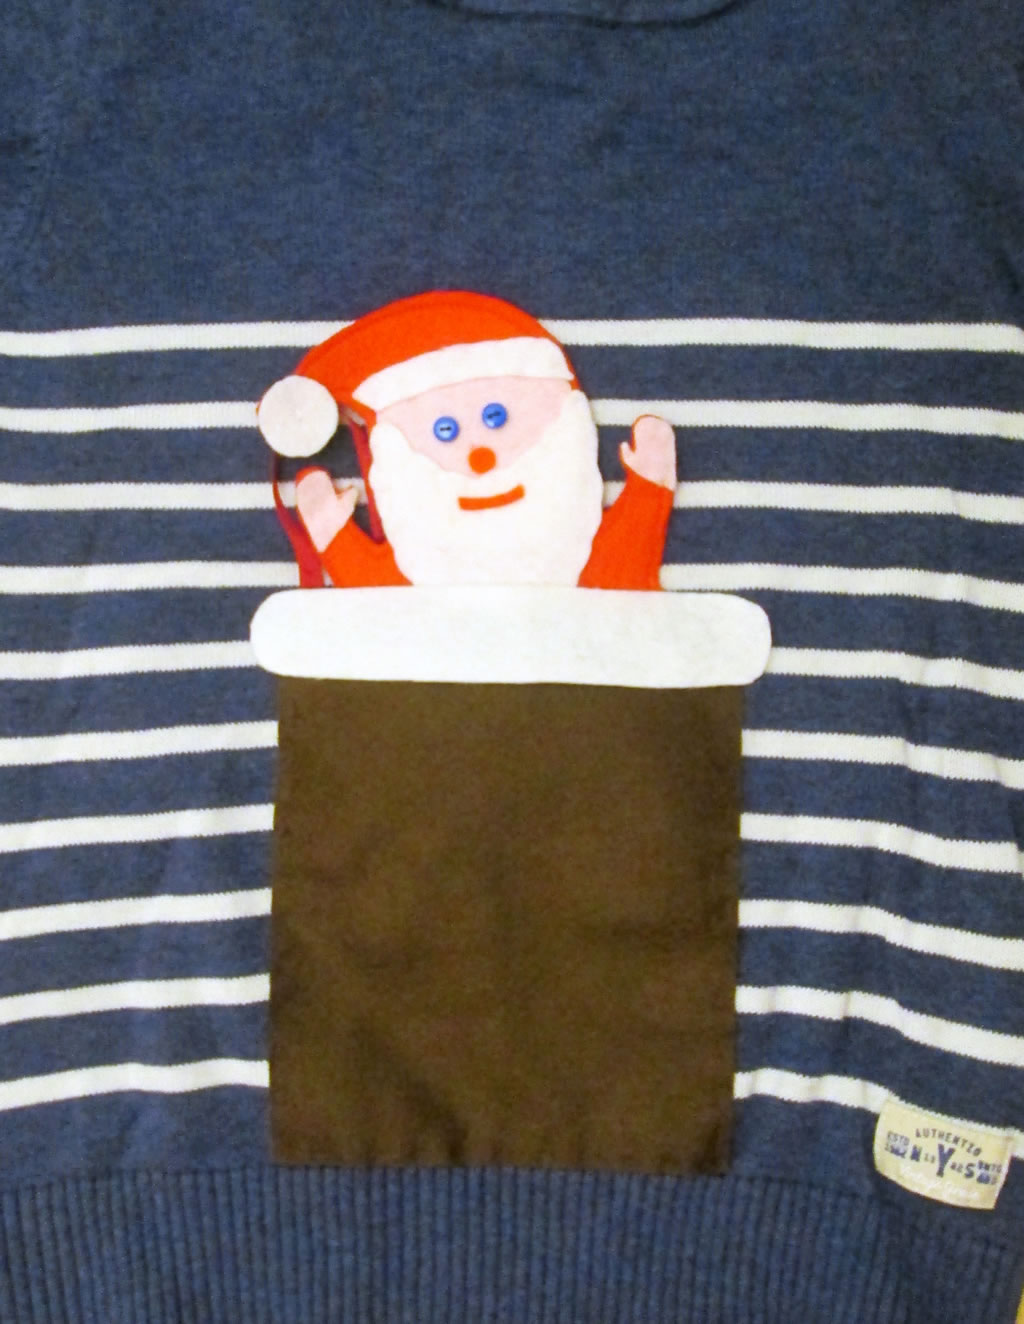 …or head first.
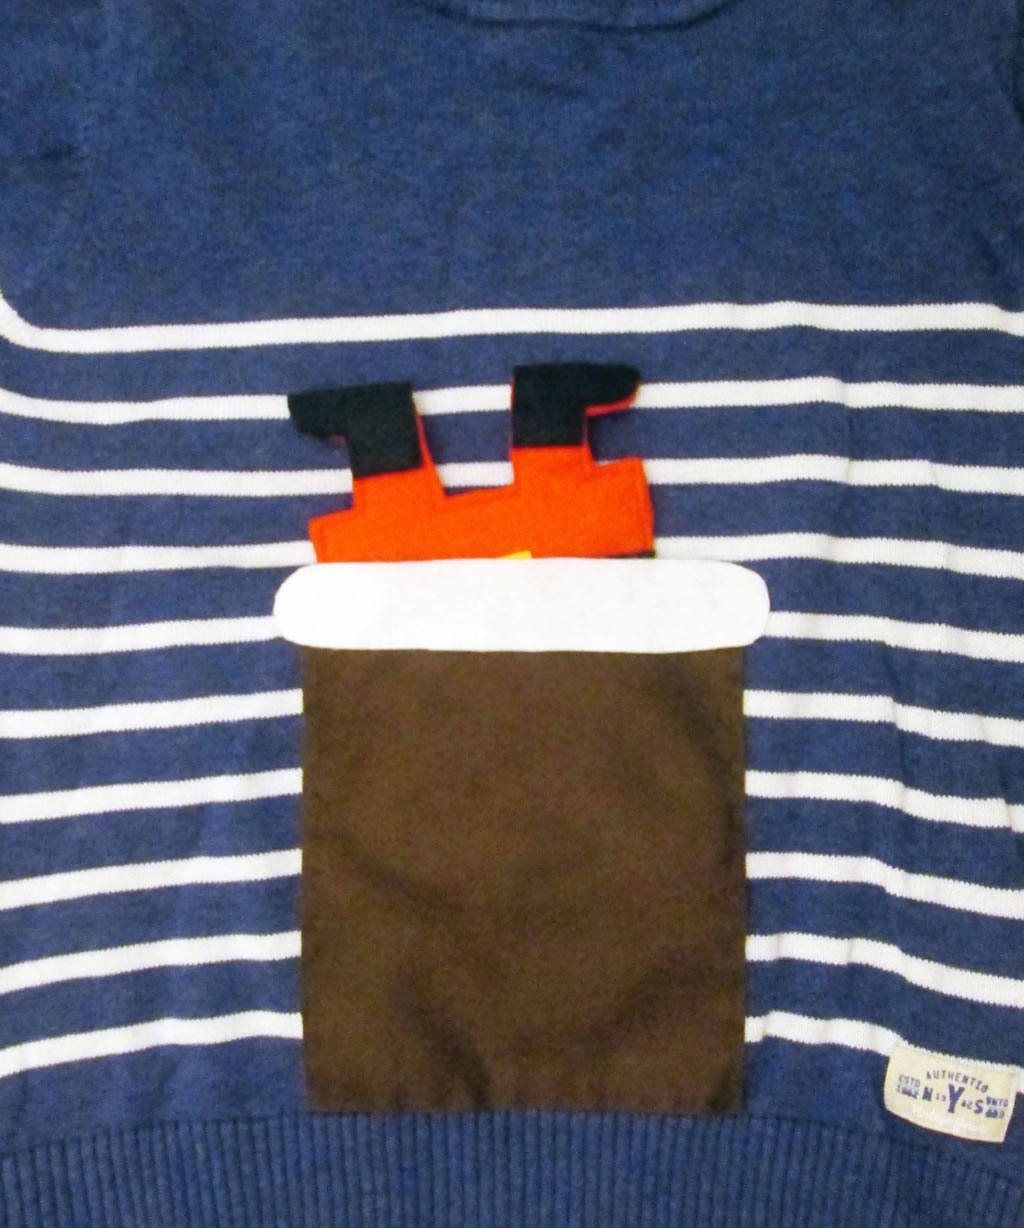
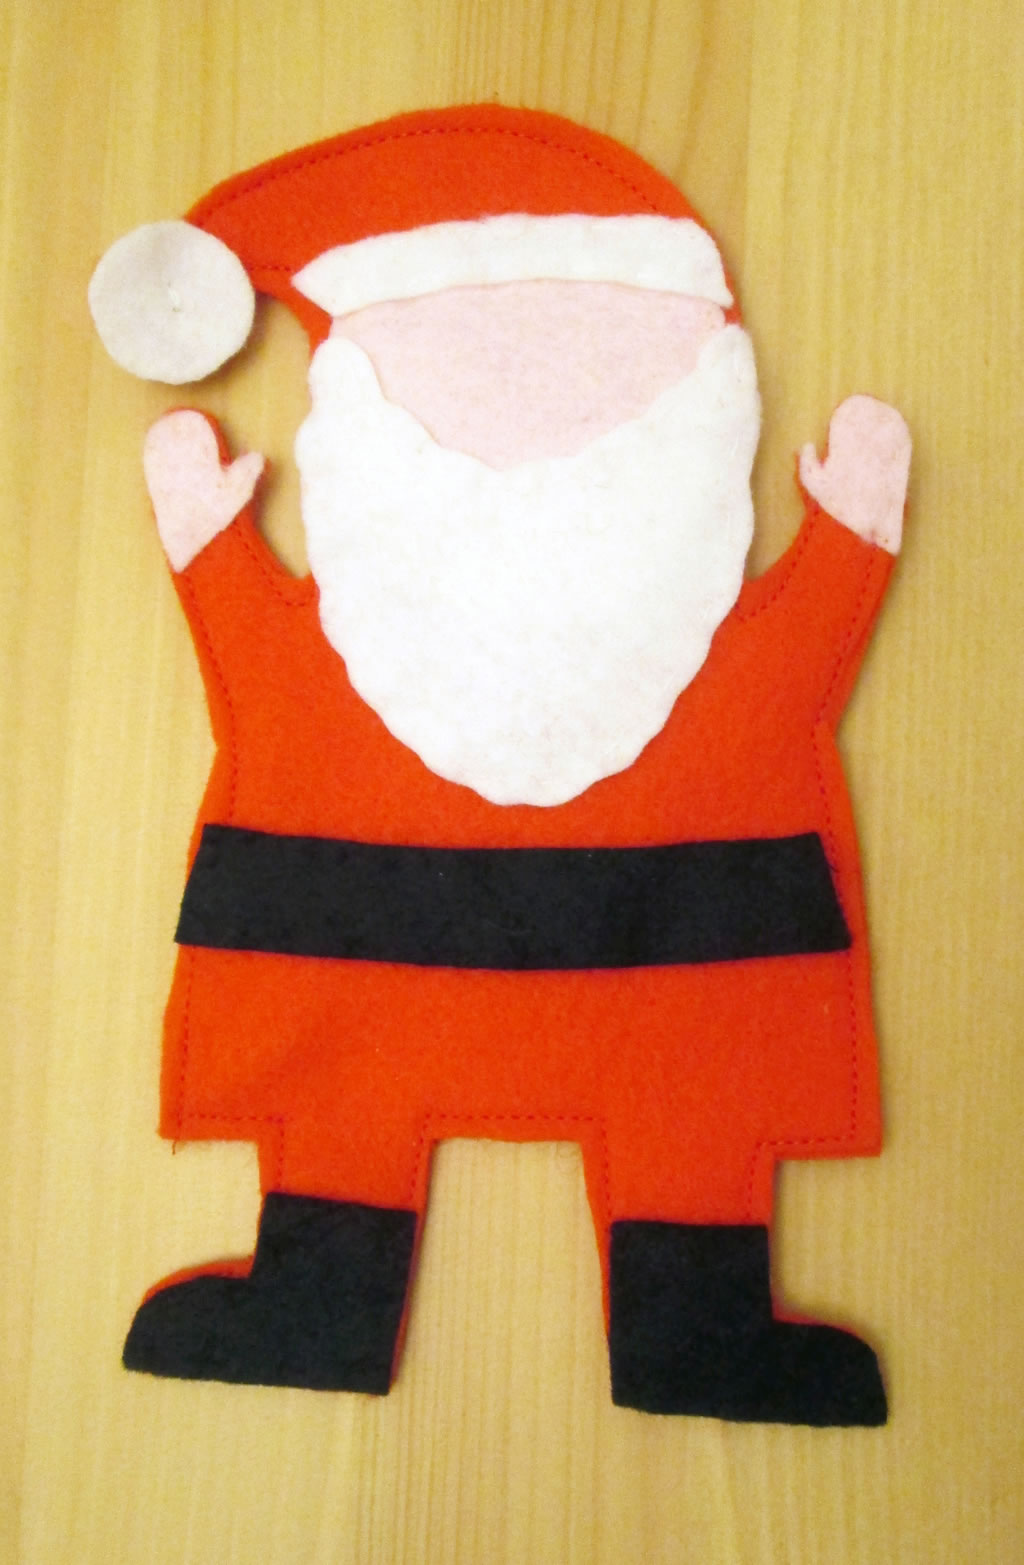
I used felt so that I woudn’t have to worry about it fraying and the picture elements disintegrating.
How to Make an Interactive Christmas Jumper
You will need: a plain, long sleeved t shirt or a jumper (You could make one, buy one or use one you have already), felt, a template for your design (if you don’t want to make your own, you can buy the one I used here), ribbon, buttons for eyes (or you could use felt).
1. Make your template. If drawing is not your thing, simple shapes work best. Use the top as a guide so that the finished design isn’t too big.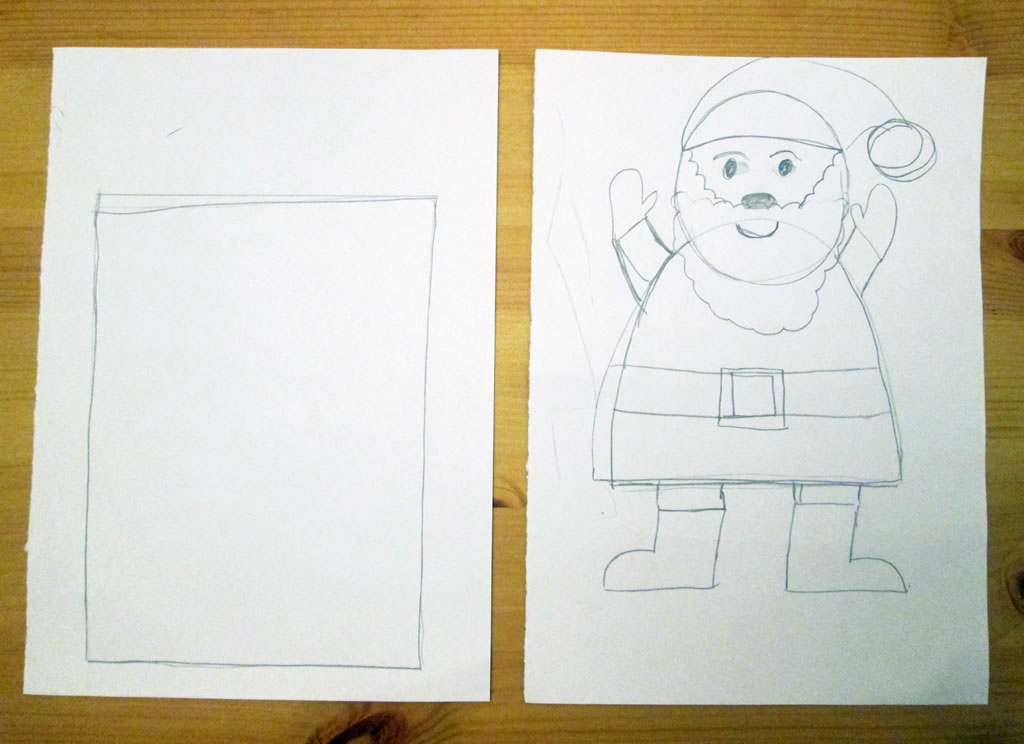
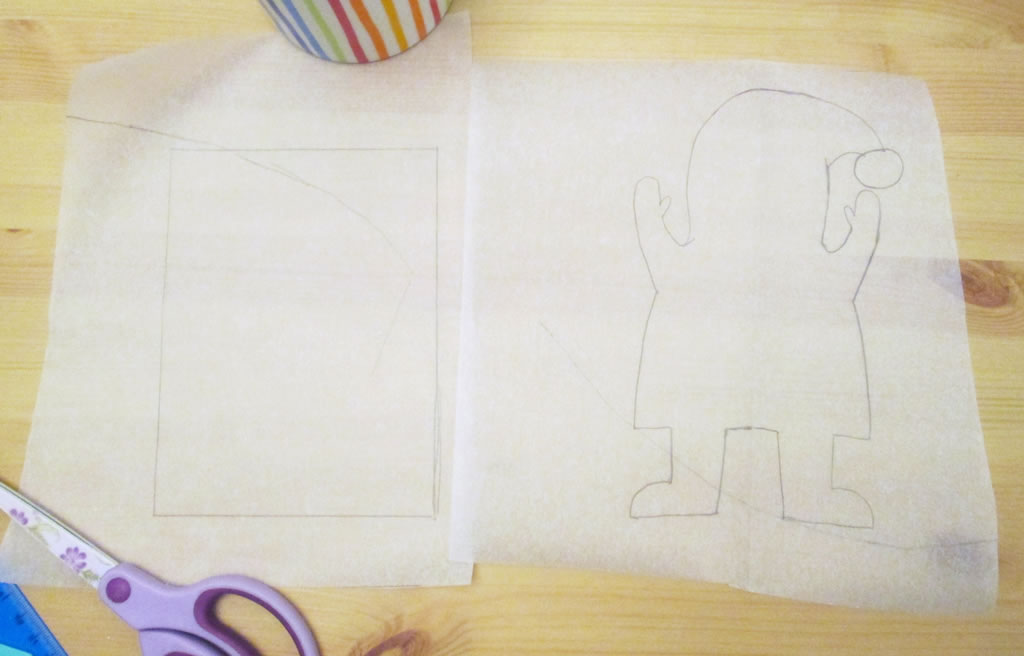
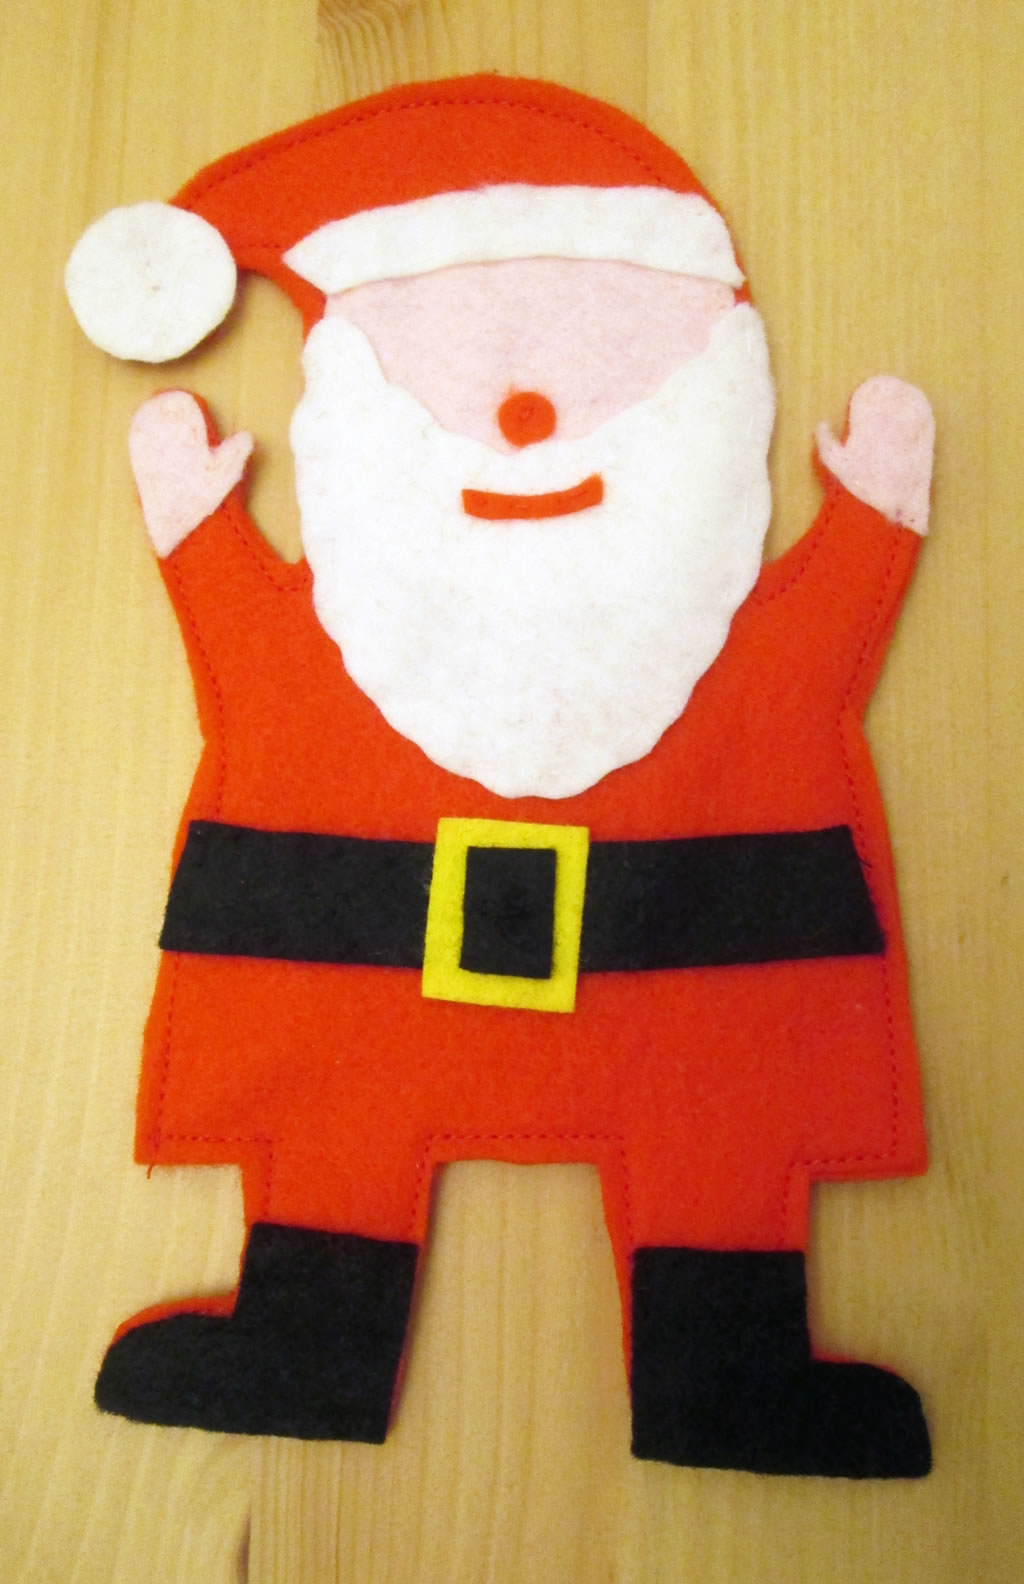
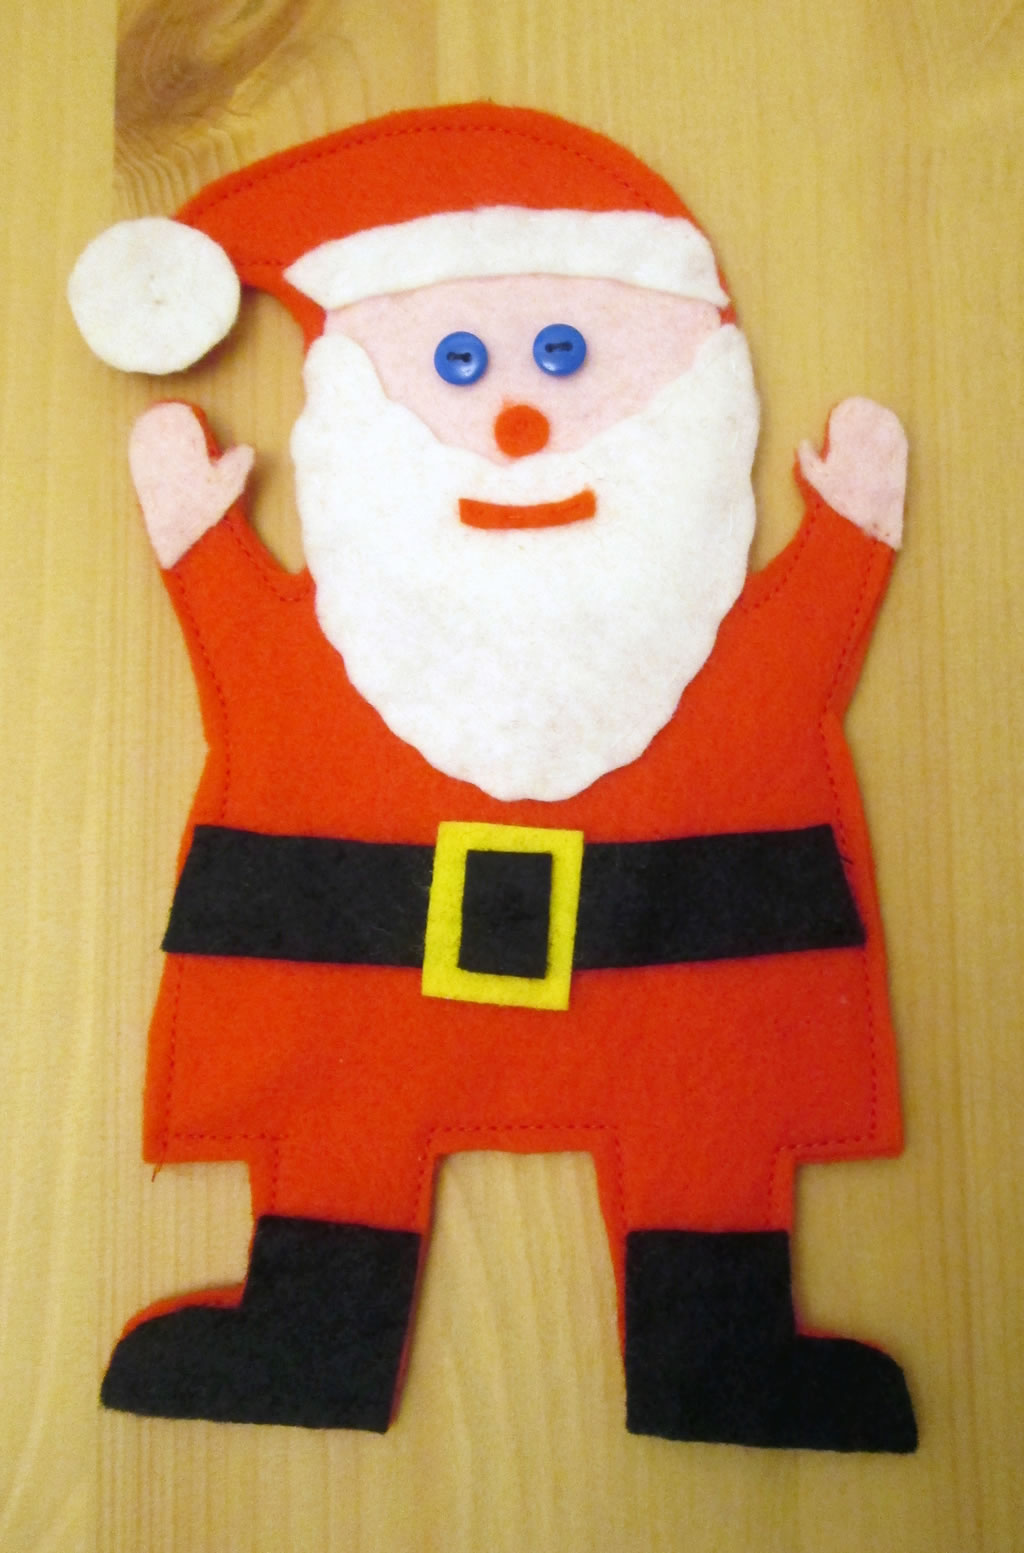
The elements you will need are: chimney, Santa’s body, boots, belt, hands, head, beard, hair, eyes, nose and mouth, hat.
Check that the Santa will fit inside the chimney.
If you don’t want to make your own, you can buy the one I used here.
2. Cut the pieces out of felt. You will need 2 of the body pieces.
3. Make up the Santa by appliqueing the various bits of him to one of the body pieces. I hand sewed the pieces on; you could use a sewing machine if you prefer.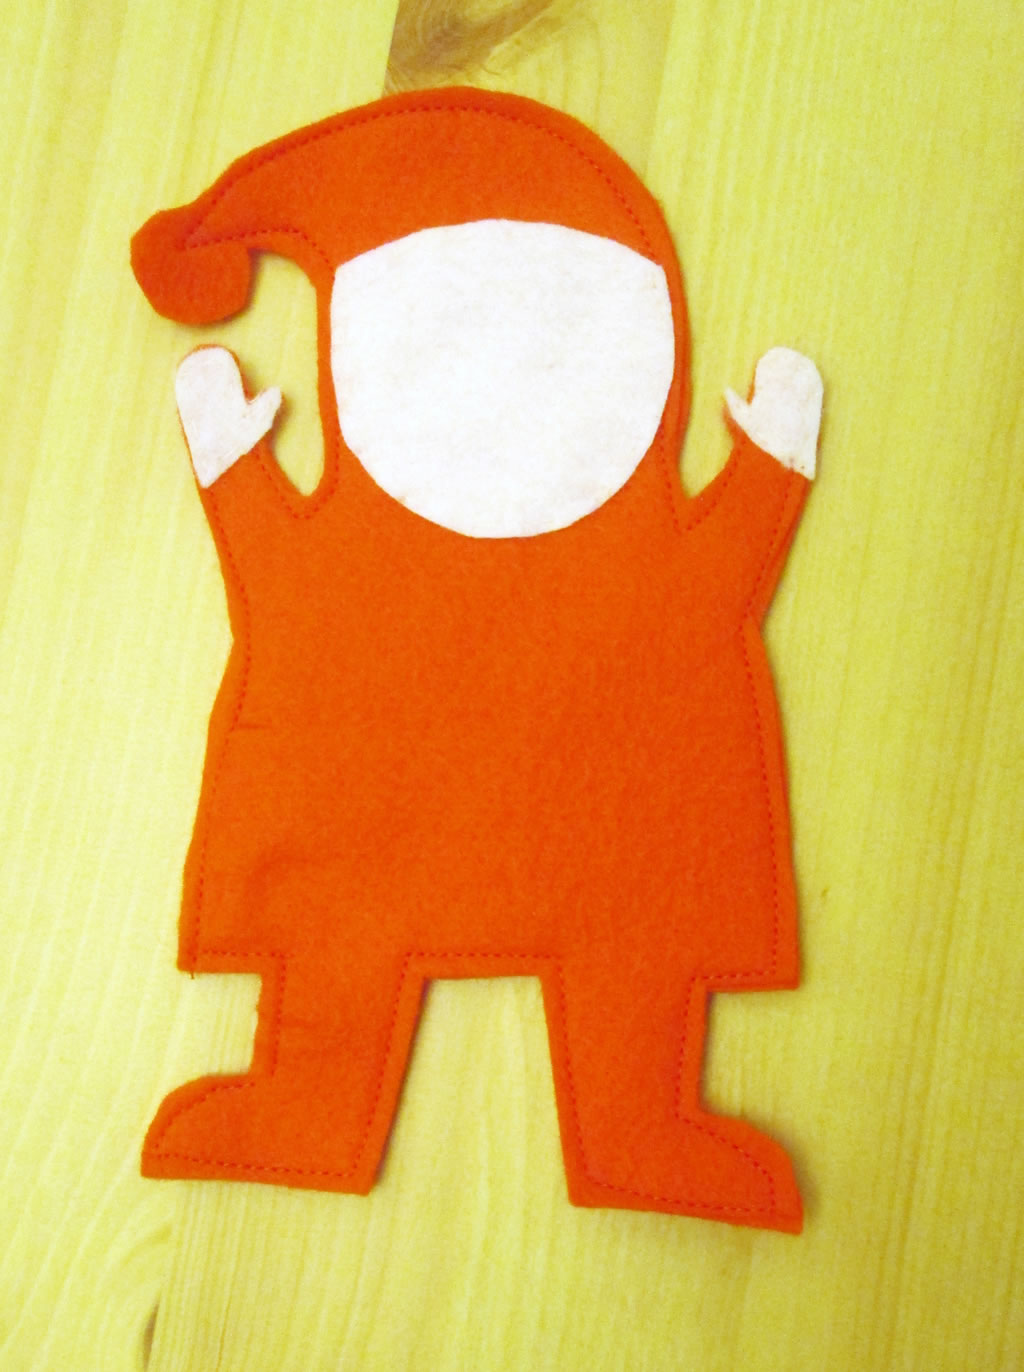
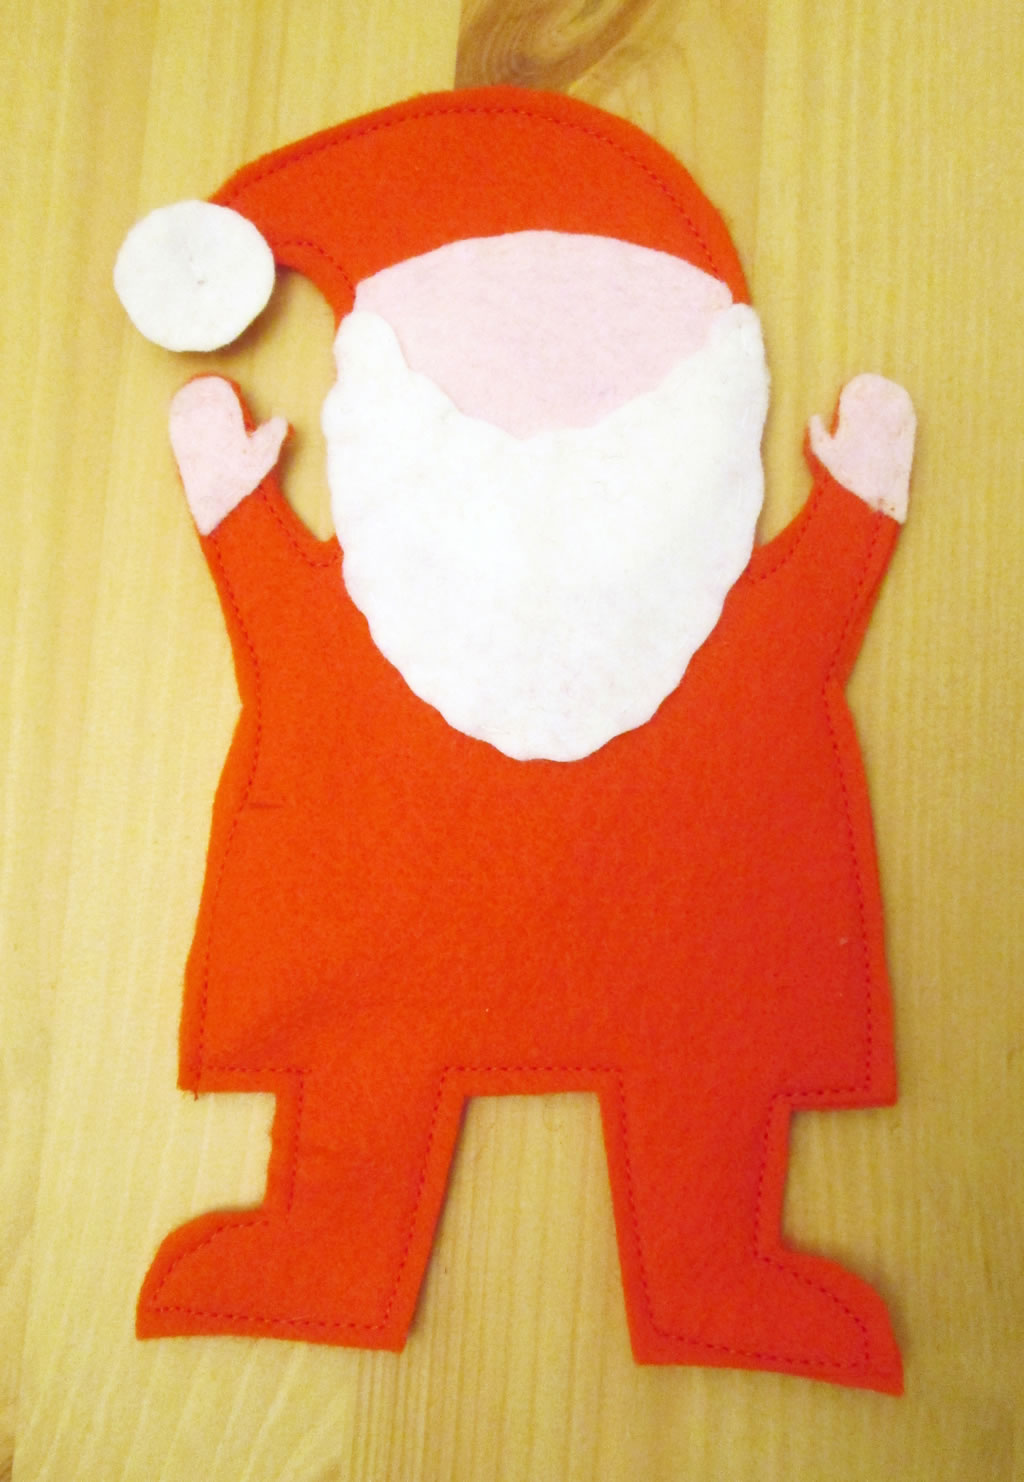
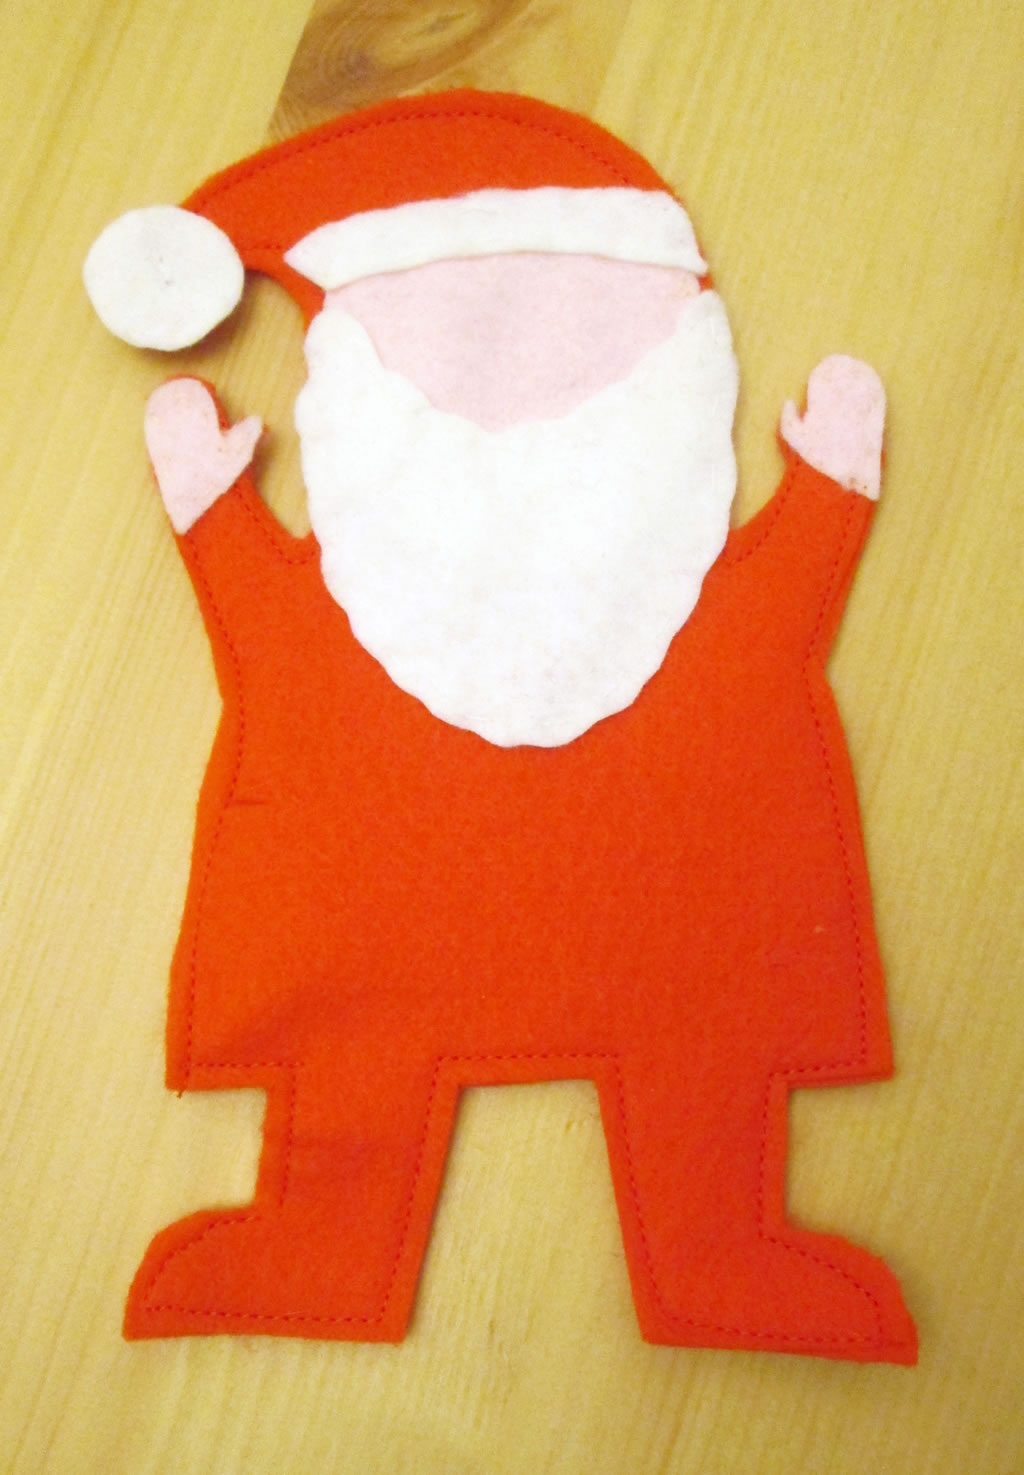
4. Sew the other body section on to cover the stitching at the back.
5.Sew the ribbon to the back of Santa’s hand.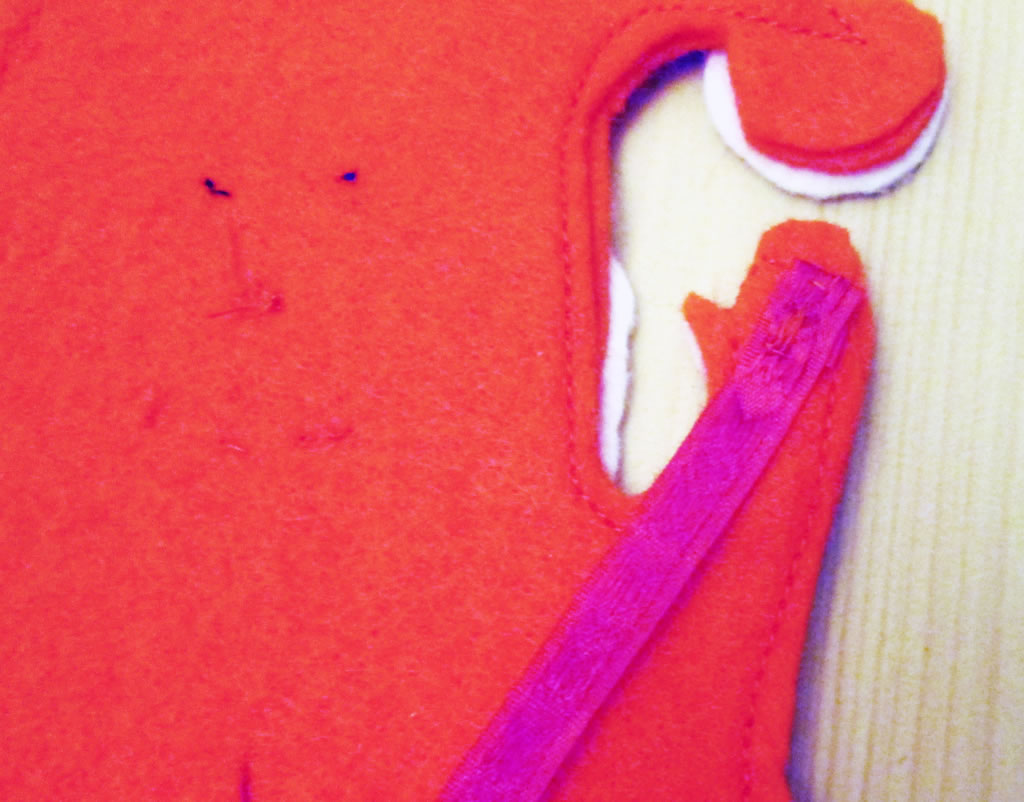
6. Sew the snow to the top of the chimney.
7. Pin the chimney to the jumper, near the bottom. Your little person will need to be able to get the Santa out of the chimney, so don’t put it too high up. Sew around the sides and bottom of the chimney. Reinforce where you start and finish to make the pocket a bit stronger. And before any of you say anything, I am very aware that the chimney minus the Santa looks very much like a mug of beer ;).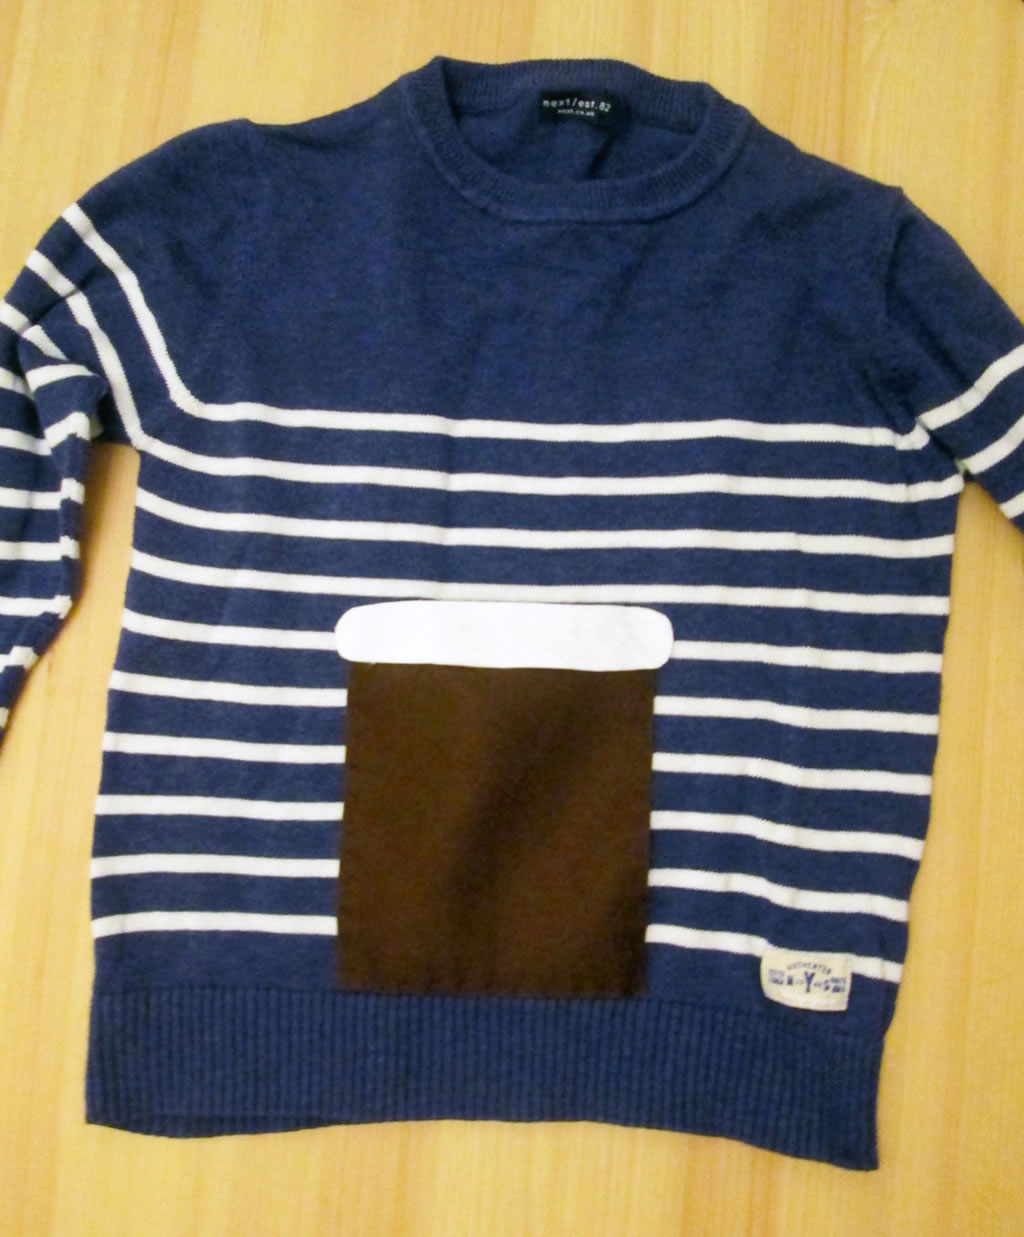
8. Sew the other end of the ribbon inside the chimney pocket.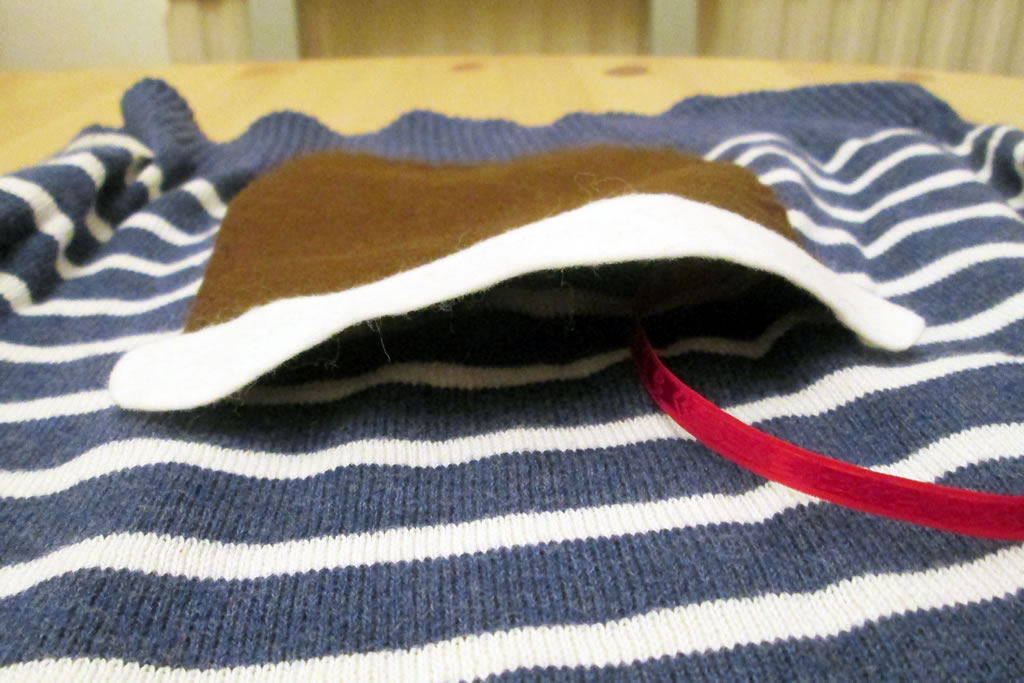
Your Christmas jumper is finished and you’re good to go!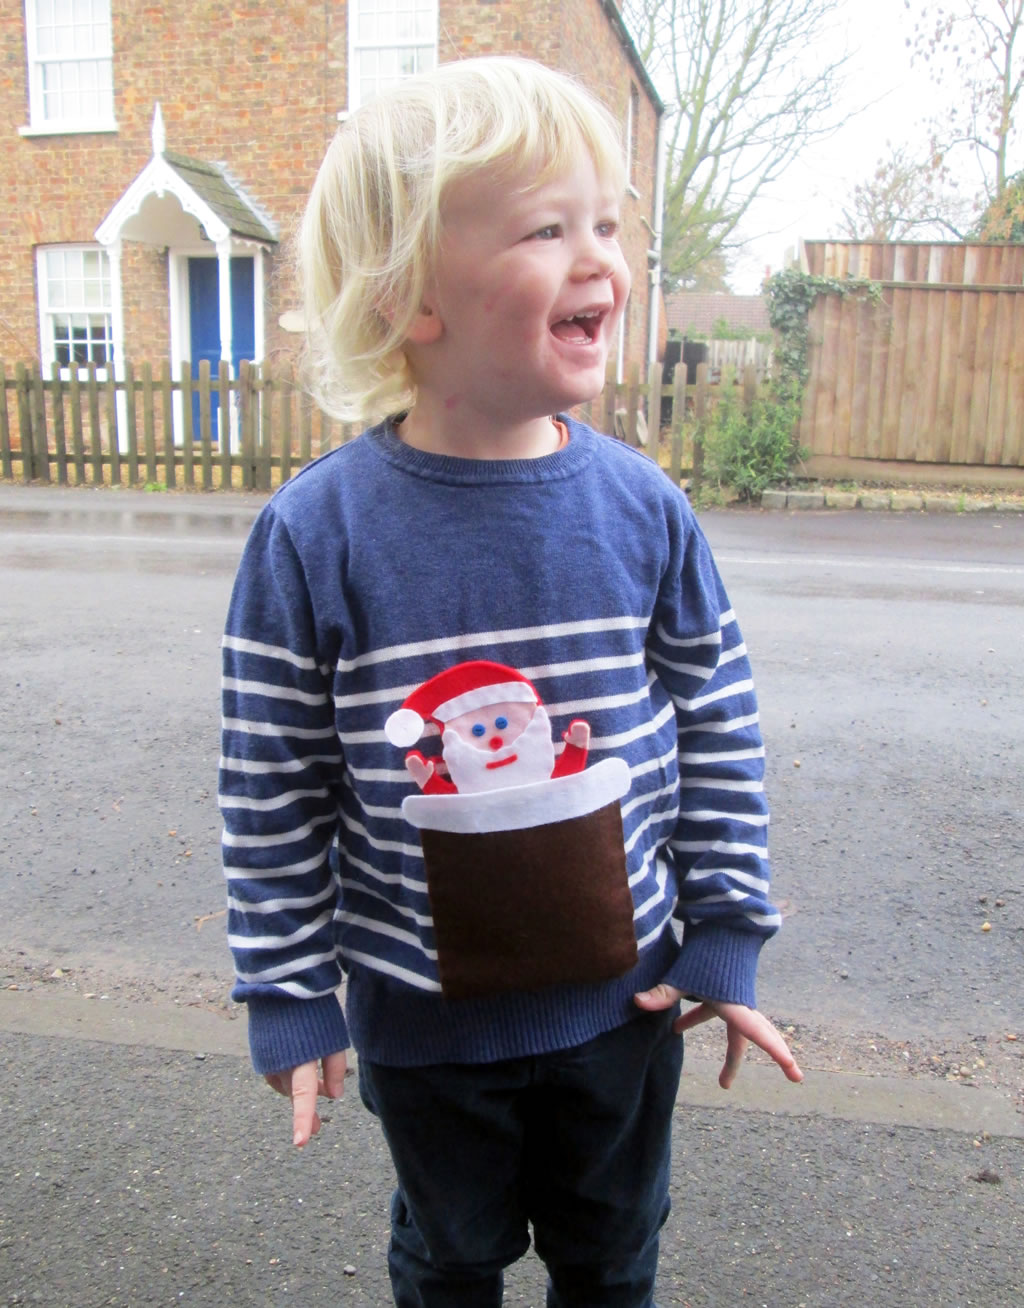


Boy 4 would have loved his Santa, complete with chimney, Anna. A very clever idea!!!
Pam @Threading My Way recently posted…Handmade Christmas Tags ~ Sew Your Own with Paper
What a great and very cute idea.
Thank you. Having a cute little model helps!
Such a cute idea! Your Santa is adorable! I love him going down the chimney! So fun! Thanks for sharing at the Submarine Sunday Link Party!!
Thank you 🙂
The jumper is so cute, remember I had 1 when about 4 it had a golly in the top pocket, loved it
Thank you!
That’s brilliant! Great photos too.
I remember my daughter having a jumper with a pocket and a little knitted giraffe that went in – she’s 21 now mind, so it was a while ago!
Thank you. He likes having his photo taken! That jumper sounds sweet 🙂
Un Père Noël à appliquer sur un sweat
https://t.co/RchU5y5WMS https://t.co/pQeZAwm4BV
How to make an interactive Christmas jumper using an existing jumper and scraps of felt https://t.co/YdQlowBp5r https://t.co/yMrfPdRYNv
What a fantastic idea! My son would LOVE it. I wonder if i have time…
It only took me an evening 🙂
Cute!! I’ve got a Craft Gossip post scheduled for tomorrow that features your tutorial: http://sewing.craftgossip.com/?p=85809 –Anne
Thank you xx
#new Interactive DIY Christmas Jumper https://t.co/OlF0Y4Zn9B https://t.co/HAfTfABTrG