How to Make a Bag
Making bags is great. Being smallish they don’t take too long to make or use up too much fabric, making them perfect for using up smaller pieces of fabric that either cost a fortune so you didn’t want to buy too much, or stuff left over from other projects.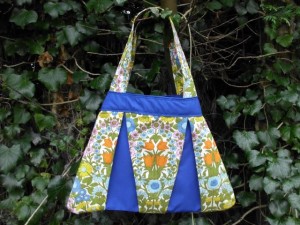
There are lots of ways to make bags, and the approach you choose to take will depend a lot on what you are planning to use the bag for. Obviously a bag for shopping or for storing your daughter’s huge collection of stuffed toy dogs will require a different approach to a little bag for your purse, keys and phone.
Now I don’t know if this is the “right” way to make a bag, but it is my favourite! The fundamental thing with this type of bag is that everything is held together by the band at the top. So the handles (or the D rings if I am making a longer strap for it) are sewn into the band and the main body of the bag is attached to it too.
Here’s how to make a bag my way!
The first thing I do is decide how much stuff I will need to carry in it. As my boys get bigger, I find I need less stuff, nappies and changes of clothes etc, but I end up carrying the things they pick up while we are out, like feathers, stones, sticks and bus timetables.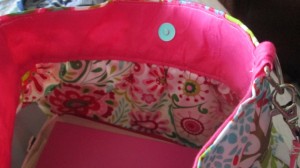

Using a tape measure and maybe if I can be bothered some paper, I decide on the dimensions. How much fabric I have will also be a factor. The top of the bag will need to be wide enough to be able to shove the stuff in, so if it needs to hold my diary or an A4 folder, this will also need to be taken into consideration.
Having decided on the dimensions for the bag band, I can cut the out the bits for it. I will cut 2 pieces from the outer fabric, for the front and the back, and 2 from the lining.
The bottom of the bag main will usually be wider than the top. Either I will cut it like that or I will gather it, like I did for my Tardis bag (so called because I can get far more stuff in it than actually looks possible!). I will cut 2 pieces for the bag outer and 2 for the lining.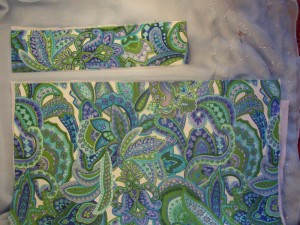

To make the handles I will decide firstly on whether I want 1 or 2 and secondly how long they need to be. Using 1 strip of the main fabric and 1 strip of the lining, I make a tube by pinning them right sides together then sewing along both of the long edges, leaving the short edges raw.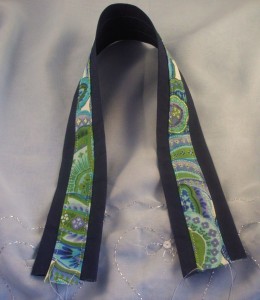

To assemble the bag, I start with the bag main outer. With the right sides together, sew along the sides and the bottom. Trim seams and turn out. Repeat for the lining.
Next, join the outer bag band pieces at the short edges, checking that it’s the same width as the bag. Repeat with the lining. If you are gathering your bag main, do that next and check that it is the same width as the bag outer.
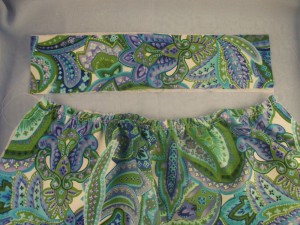

Next, pin the band outer to the bag main outer, right sides together and matching the side seams.
Pin the band lining to the bag main lining, right sides together and sides seams matching.
Sew round the top of the bag to attach the band to the bag main. Turn the band right side out. You might wish to iron it. Top stitching might look nice too.
Tuck the raw edges of the bag band inside. Pin and/or iron. Decide where you would like your handles to go. Tuck the handles in between the band outer and lining and pin in place.
Topstitch around the top of the bag band.
All sorts of variations are possible here. As well as making bags of different sizes and gathering or not gathering the bag main, you could use different fabrics for the various pieces, add different panels, applique, embroidery, pleats and godet thingies.
Here are some bags I have made using this method.
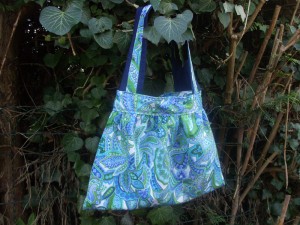
Paisley Bag
This is a simple version of the bag. The bag main is made from two rectangles. The top edge is about a third longer than the bag band and I gathered it to make it fit. It has one handle which I made by cutting a strip from the main fabric and a wider strip from some navy blue fabric. I put the main fabric on top of the blue with the wrong sides together, folded the blue fabric over the main fabric, folded the raw edges underneath then top stitched it in place.
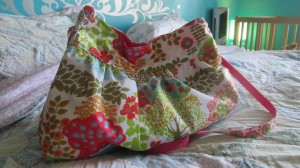
Floral Godet Bag


The bits were cut to size so there was no need to gather the bag main. To make it a little bit more interesting I added godets in a nice bright blue and I made the bag band from the same fabric.
I also rounded off the corners to give it a slightly different shape.
Evening Bag
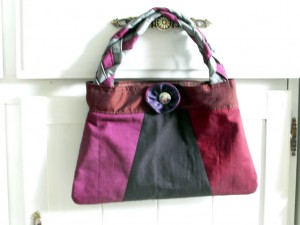

It is a similar shape to the Floral Godet Bag. The bag main is not gathered as the pieces were cut to size and I rounded the corners. Instead of using godets I made panels of different fabric.
To make the handles, I made strips of grey and purple and plaited them together.
The flower detail I made by gathering strips of fabric and joining the short edges. I added a shiny button to the centre to finish it off.
I wanted to make a bag that was a bit bigger than the others, was waterproof and had a shoulder strap. I was imagining struggling on and off the bus with the boys in the pouring rain! Holding a baby, a buggy and a bag while herding three other children and getting soaked in the process is not much fun. Having a bag that I can sling over my shoulder makes things slightly easier!
To make the bag waterproof, I used ripstop fabric. The bag main is gathered and to make it even roomier, I squared off the corners. The D rings for the strap were attached in the same way as the handles on the other bags.
Do you have a favourite way of making bags?

