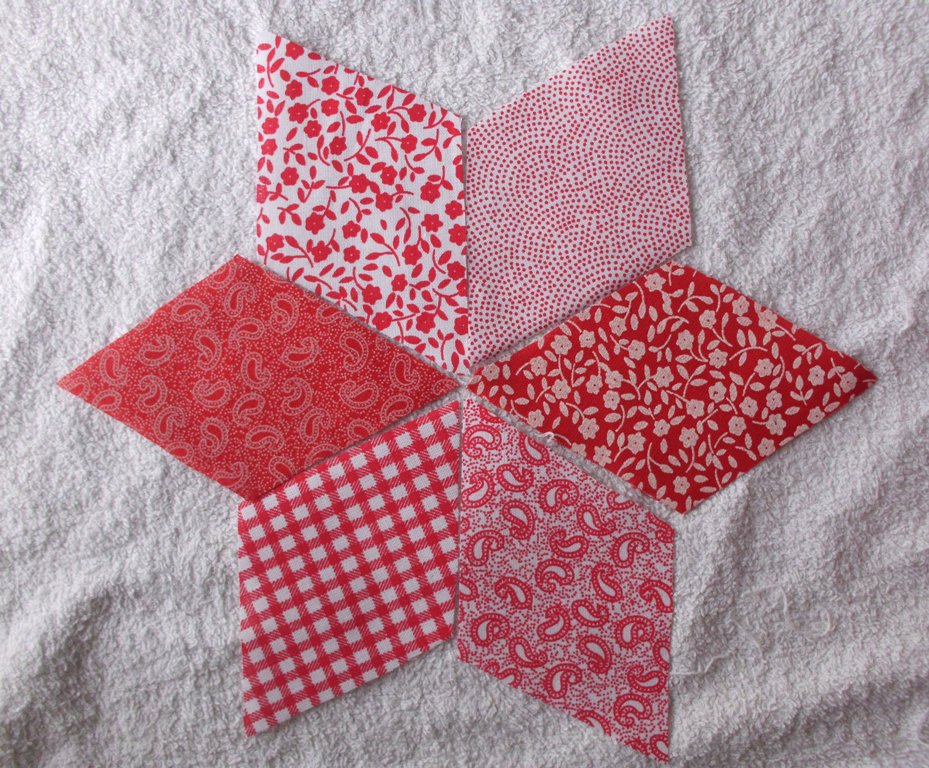
How to Make a Patchwork Star
Here is another easy little tutorial for fabric Christmas decorations. It is a patchwork star made using 12 diamonds, 6 for the front and 6 for the back. This is a perfect scrap project as the star can be made as large or as small as you like. How…