
How to Make a Quilted Mug Cosy
Last week it felt like it had been such a long time since I’d sewn anything I was desperate to dust of my sewing machine and make something.
 I had some smaller pieces of fabric left over from other projects and as I rarely seem to finish a cup of tea before it goes cold, I decided to make a quilted mug cosy!
Simplest is often best and I didn’t want to faff about with buttons and button holes on this occasion. So instead there is elastic above and below the hole for th handle, so it just slips on and off.
The cosy fits a standard sized mug.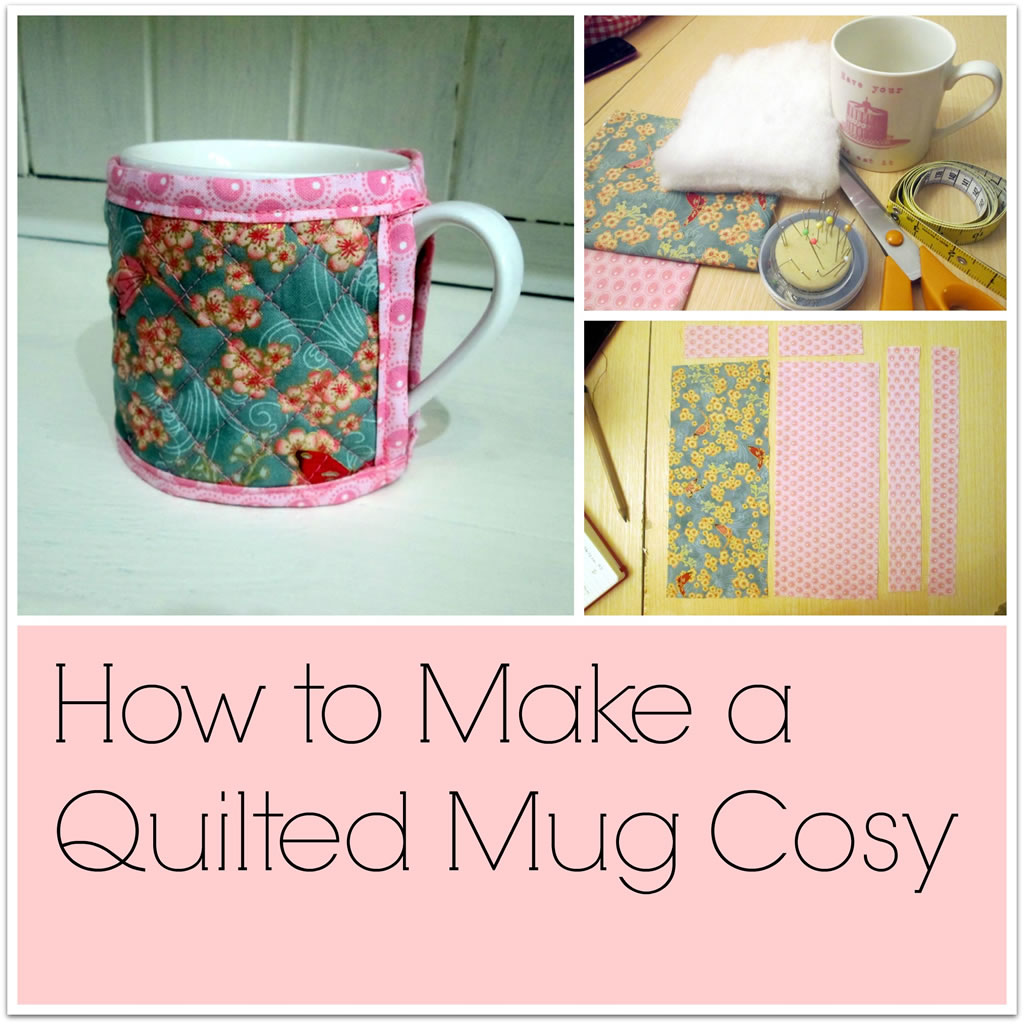
Quilted Mug Cosy Instructions
A text only pdf version of these instructions can be downloaded here: Quilted Mug Cosy Instructions.
You Will Need: fabric for outer and lining, wadding, elastic, bias binding or fabric for binding the edges, pins, sewing machine or needle and thread.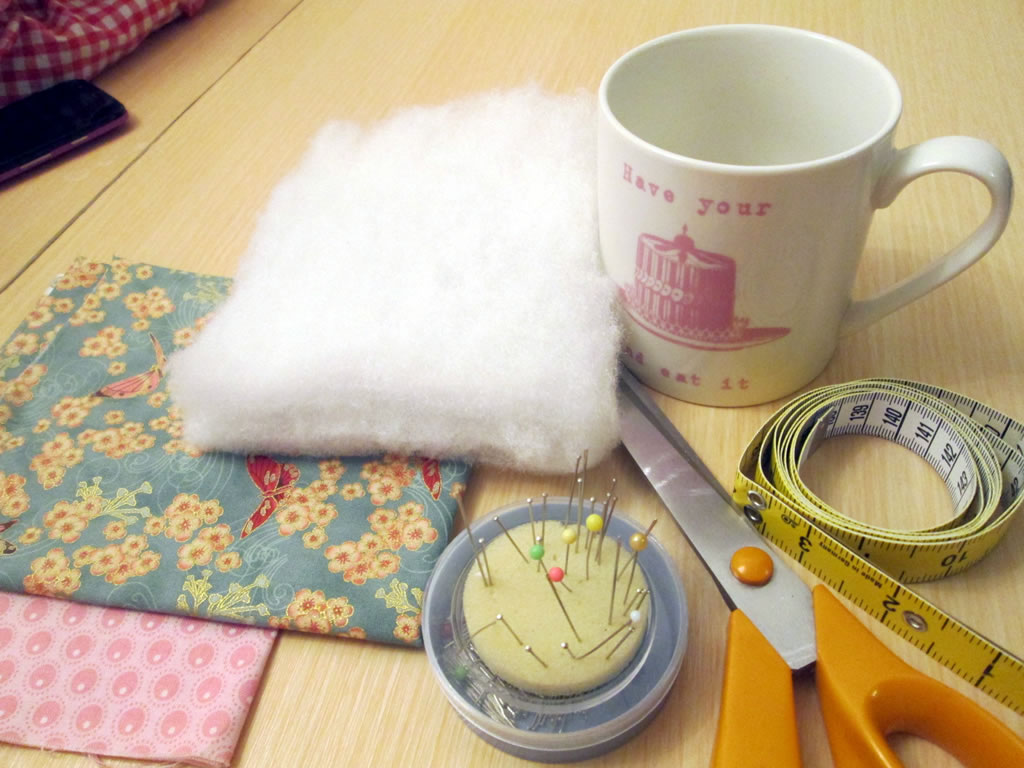
1. From the outer, lining and wadding cut 1 rectangle from each measuring 28 cm x 8 cm.
2. Take the lining and place it face down. Layer the wadding on top of it, then the outer on top of the wadding, face up. Carefully pin the wadding sandwich together.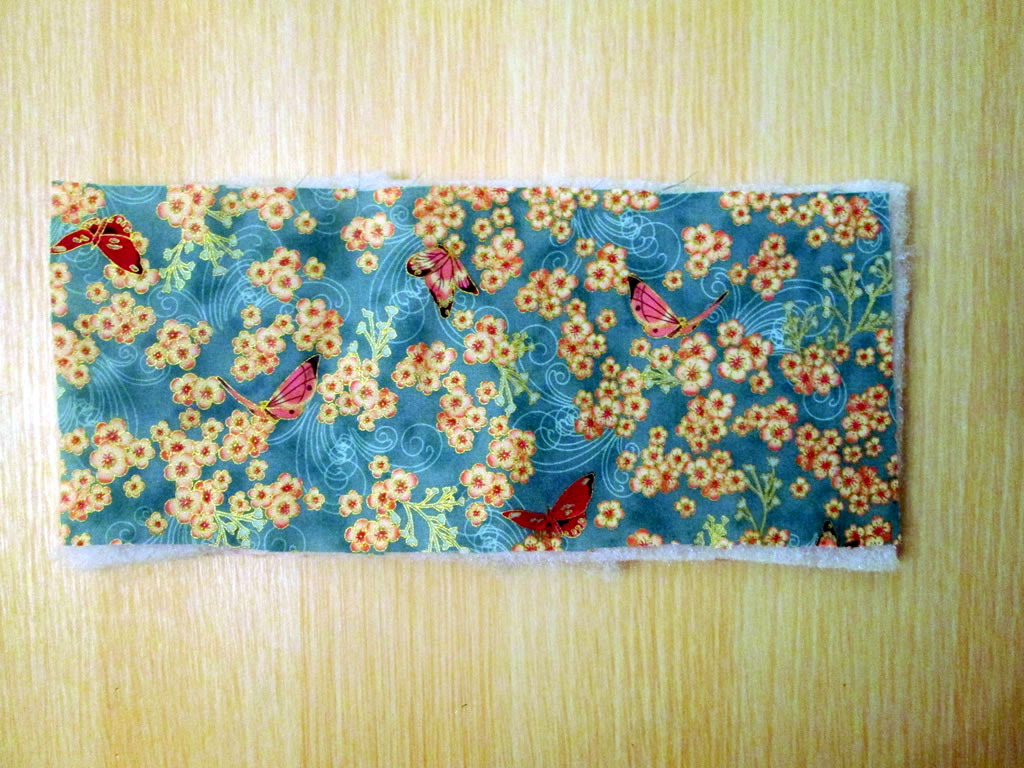
3. With a pin, mark half way along the top edge. Repeat for the bottom edge. From these pins, mark off 9 cm top and bottom on either side of the central pins.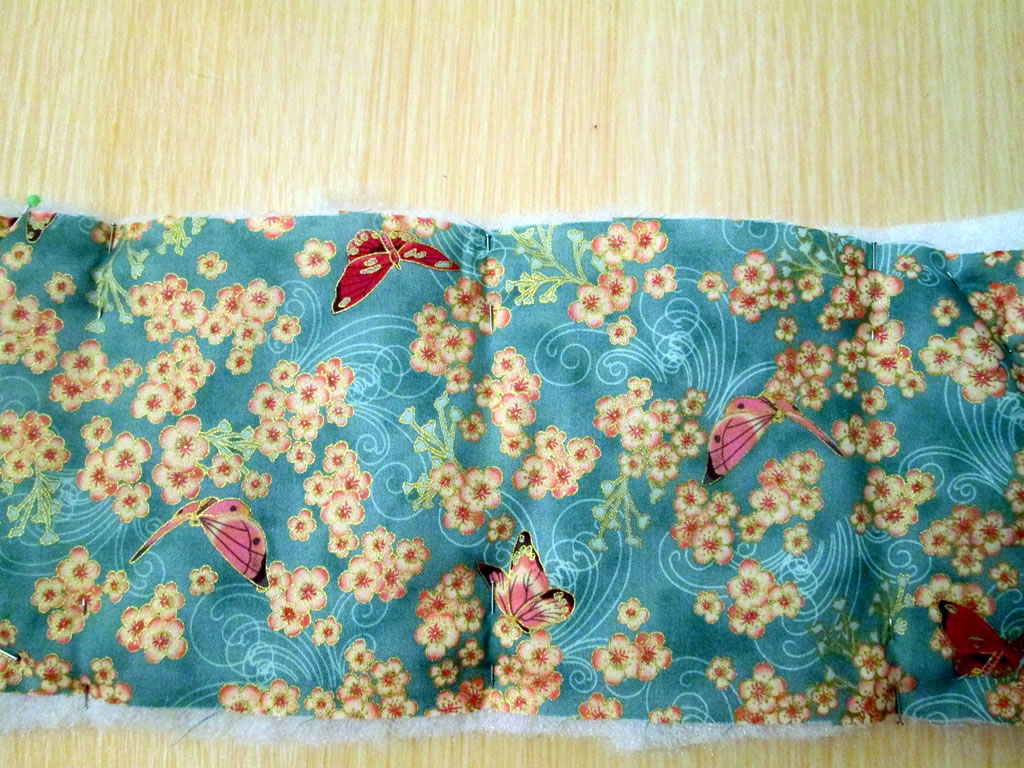
4. Using a long straight stitch and starting from the middle top pin, sew diagonally to one of the bottom pins. Turn the fabric round and repeat, until you have a diamond shape.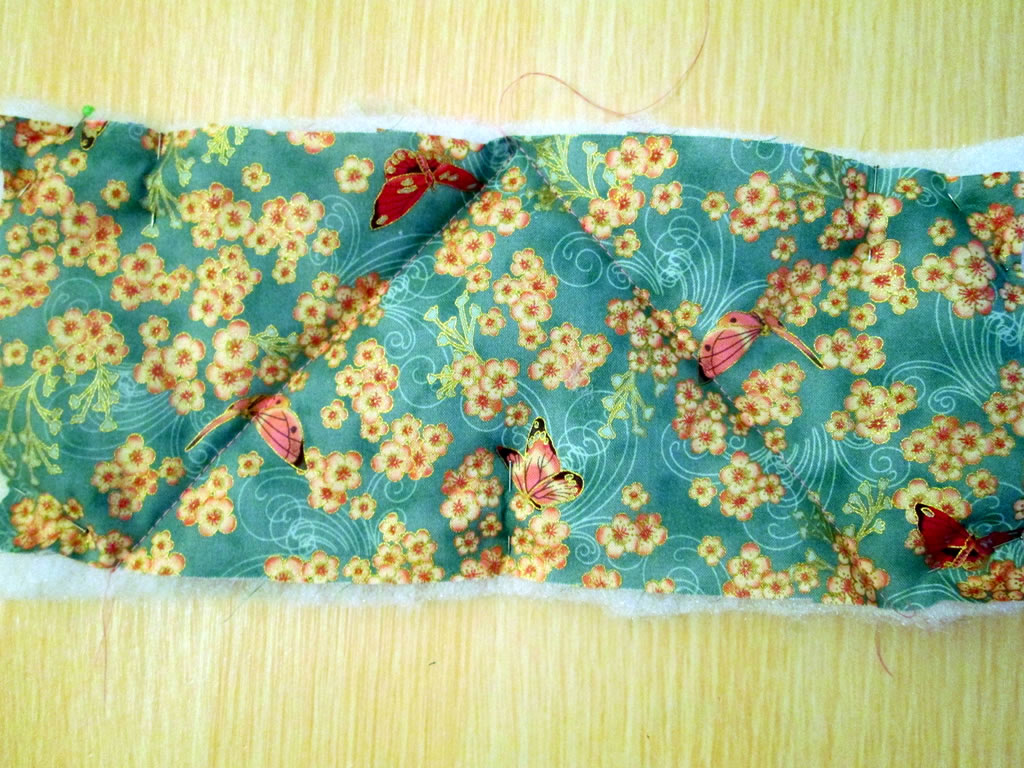
 Tip! Turning the fabric will help to prevent it from becoming distorted while you are quilting.
5. Continue to quilt the wadding sandwich by sewing lines of stitches 2 cm apart parallel to the lines of the diamond sewn in the previous step. Remember to turn the fabric as you go.
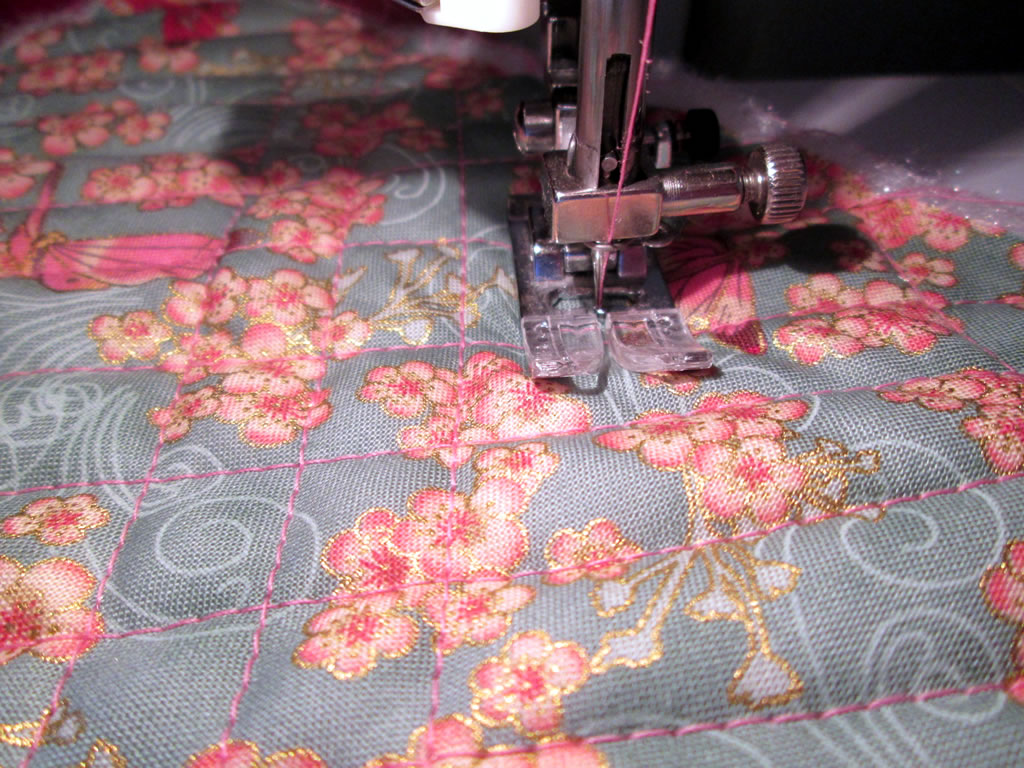
You should end up with lots of little diamonds sewn into your wadding sandwich.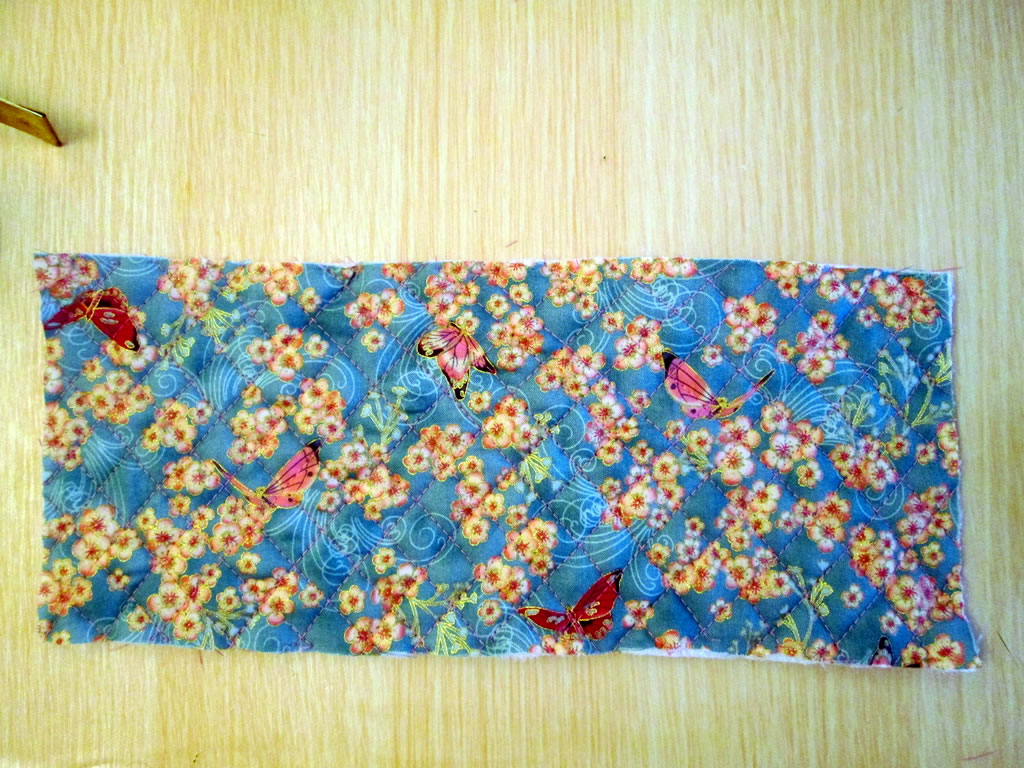
6. Check the size of your piece of quilting against your mug. You may need to trim it down a little.
7. If you are using bias binding, cut 2 pieces 30 cm long and 2 pieces 10 cm long. Now skip the rest of this step and go to Step 8!
If you are making your own binding, cut 2 strips of fabric 30 cm x 4 cm and 2 strips 10 cm x 4 cm.
Take 1 strip and fold in half lengthways. Press. Open it out.
Fold the long raw edges into the centre. Press.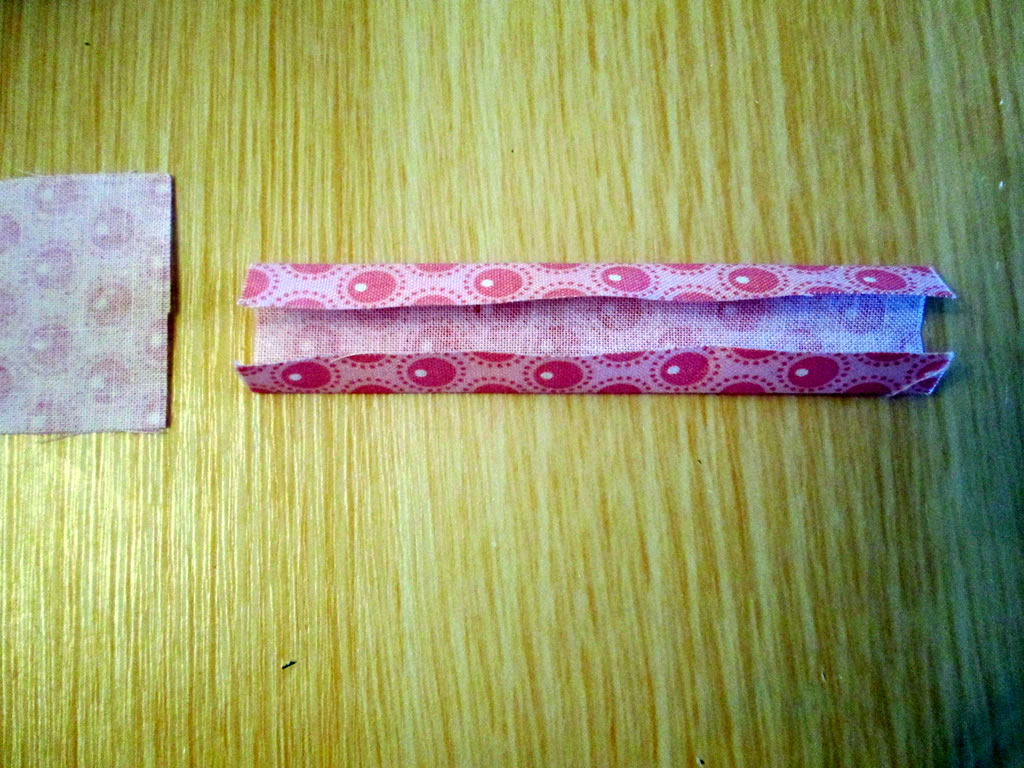
Fold in half and press again.
You should now have a strip of fabric with the raw edges folded up inside.
Repeat for the other strips.
8. Pin the shorter pieces of binding to the short edges of the quilted piece. Top stitch. Trim the ends.
9. Pin the longer strips to the long edges of the quilted piece. Tuck the raw edges underneath. Don’t sew it just yet!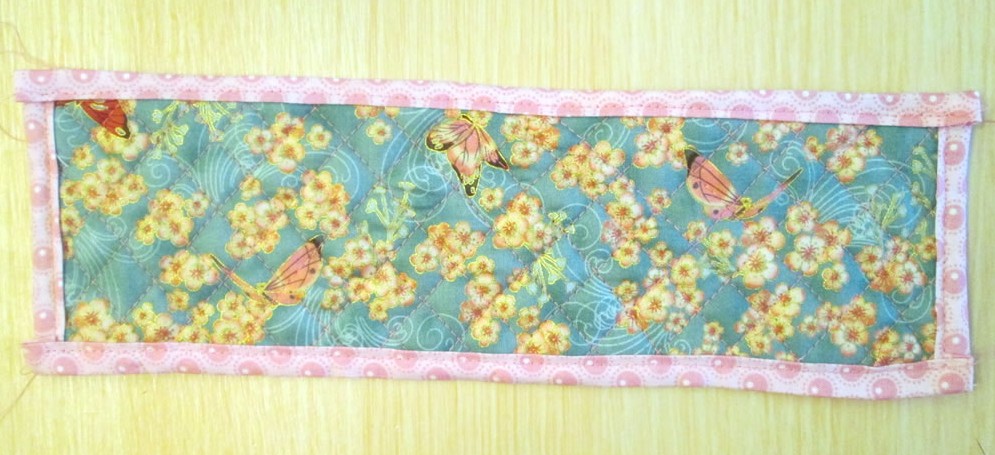
10. Cut 2 pieces of elastic 4 cm long. Take one of the pieces and tuck one end under the binding on the lining side of the cosy. Repeat for the other piece of elastic.
Tuck the ends of the elastic under the binding on the other side of the cosy.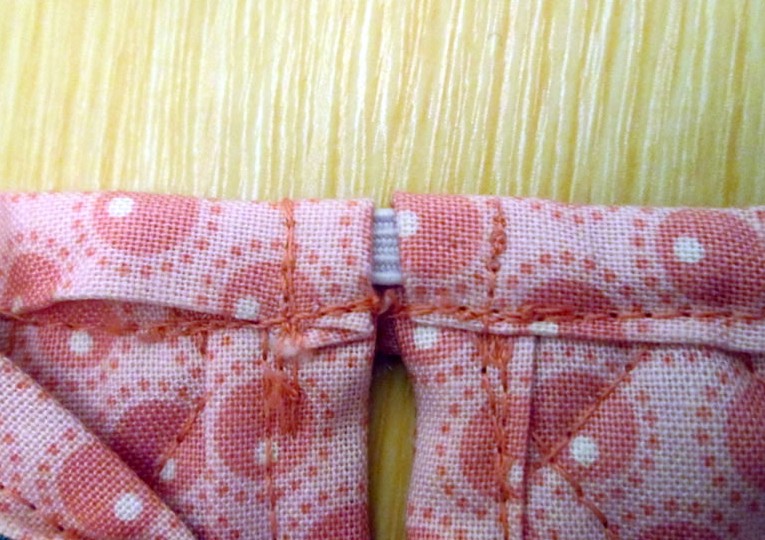
11. Top stitch along the binding. Sew across the elastic at either end a couple of times so that it is secure. 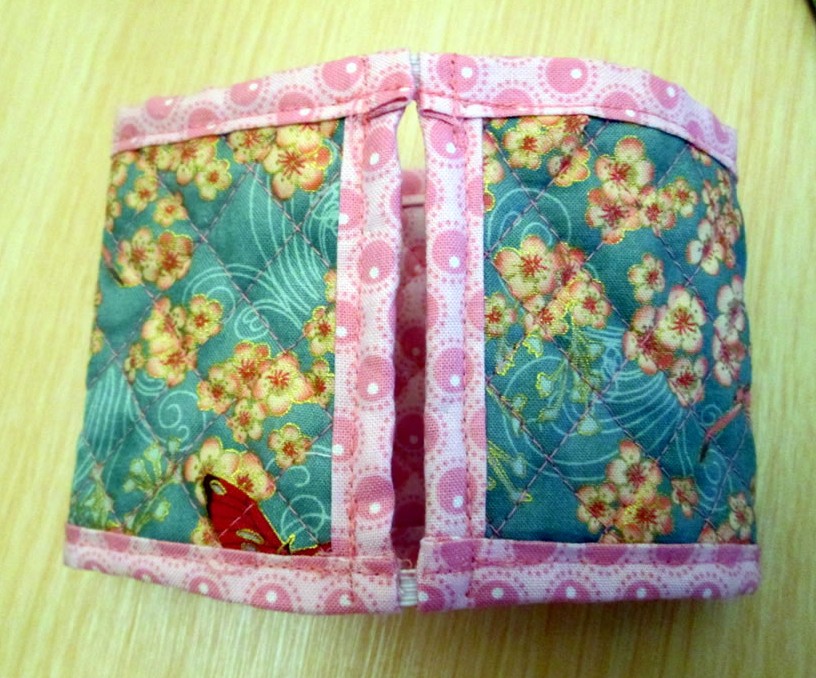 Trim the loose threads and your quilted mug cosy is ready to use!
Download a text only version of these instructions here! Quilted Mug Cosy Instructions

I think this cozy is going to get all wet .There is no lip room.
I was looking for a simple quilted cosy after forgetting to add batting to a mug bag. I thought it would serve to cushion the mug in the bag as well as ‘cosying’ it. Thank you for this.
Crisky
What a pretty mug cozy! In addition it is a short/quick item to make with scraps and to practice quilting if it it’s been a while since I’ve been in that mode. With the season changing I have been thinking about placemats but this is a better place to start. I have spent all my crafting time since spring, on afghans for my grandchildren, so I feel like I need to give my fingers (and brain) a new texture and design.
Thank you for the inspiration and well detailed instructions. The last mug cozy I made was a crocheted one for my friend at Christmas last year. I also made a Mug Mat to match. Maybe this year I should give her a new mug with a quilted cozy to match!
Glad you found it helpful 🙂 Placemats are a fab idea, especially if they match a mug cosy!
Perfectly fits my mug, really simple and effective. I love it, thank you.
Krissy, if you email me a picture I’ll put it in the readers’ gallery. The page isn’t up yet because I need stuff to put on it!
My mother hates her tea getting cold, so this would be perfect for her. Great scrap buster.
Pam @Threading My Way recently posted…Handmade Christmas Tags ~ Sew Your Own with Paper