Vintage Style Sundress Without a Pattern
Vintage Style Sundress Without a Pattern
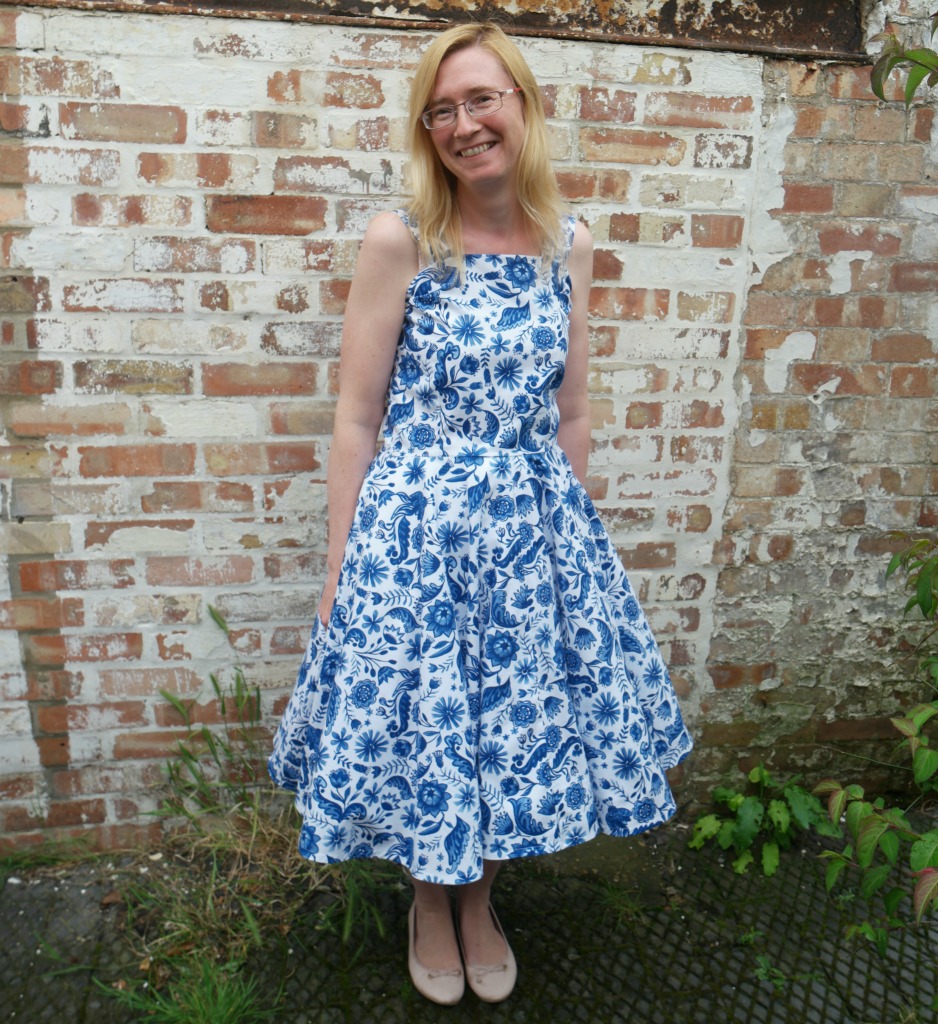
Here’s a tutorial for my new favourite dress!
The idea for this vintage style sundress had been cooking away for a while, and after the sewalong was a good time to make it as I had the bodice pattern piece I’d made to hand.
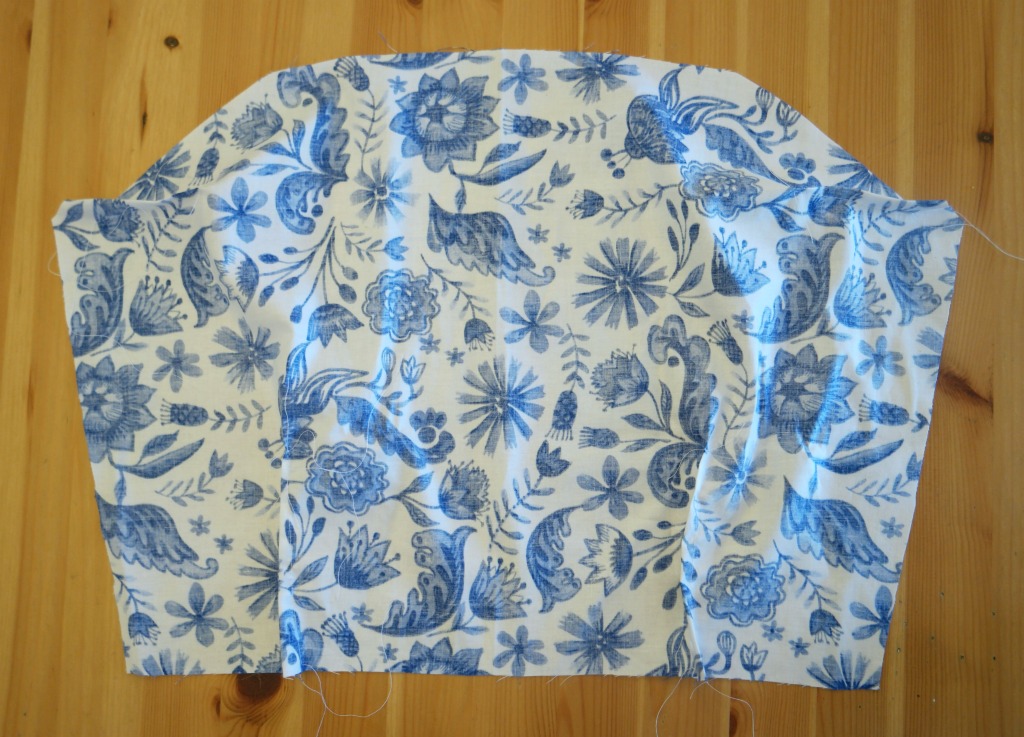
Like my other dresses, the skirt is a circle and the bodice is made from 2 pieces. There’s a zip at the side and the shoulder straps are each made from one piece.
If you took part in the sewalong you’ll be able to use your pattern pieces and modify them a bit.
This vintage style sundress is lined. If you don’t usually make things with linings, there’s no need to panic! It just means making a second version of the dress out of lining fabric.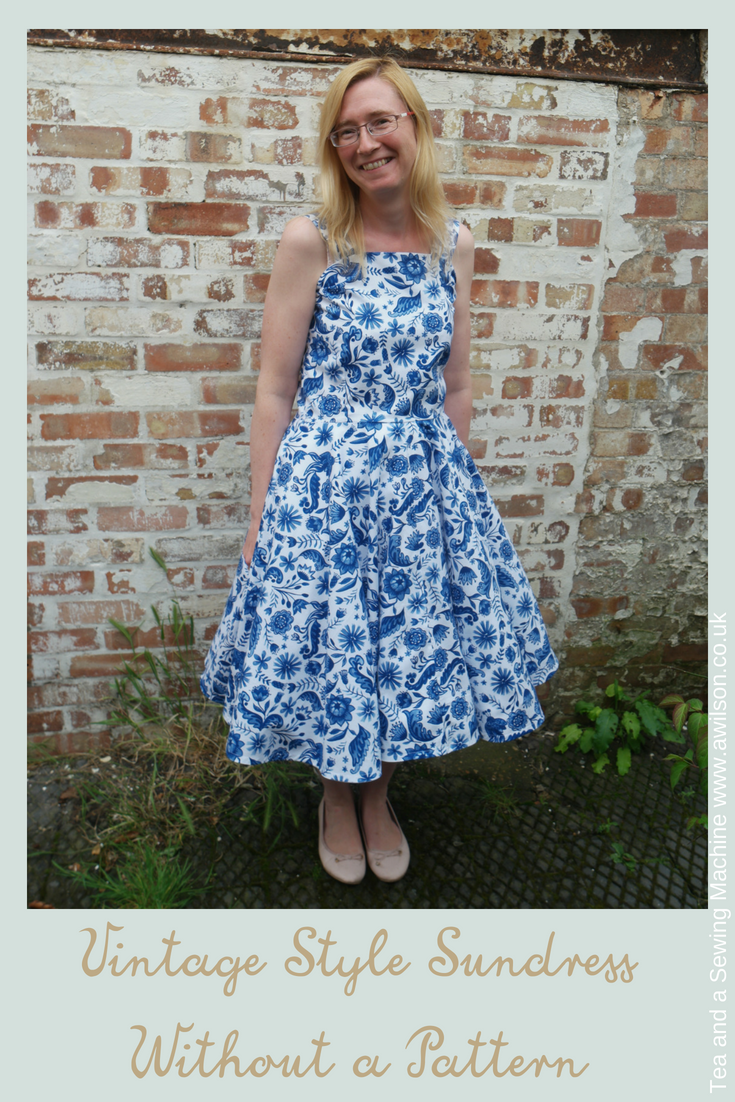
How to Make a Vintage Style Sundress Without a Pattern
You Will Need
Fabric and Habby
4-5 m of cotton or polycotton fabric. 4 m is enough for a UK size 16.
4-5 m of lining fabric.
A 20 cm zip
7 m of bias binding
Matching thread
Other Things You’ll Need
Sewing machine
Pins in a pin cushion
Needle
Fabric scissors
Seam ripper
Pattern paper
Tape measure
Pencil
Tailors’ chalk or a vanishing ink fabric pen
A long ruler
A French curve or a plate
A calculator
Rotary cutter and cutting mat (optional)
Before You Start
Before starting your vintage style sundress, you’ll need to take your measurements.
If you took part in the Cherry Blossom Dress Sewalong and you still have the pattern pieces you can skip this bit.
To help with the measurements you can download a free printable here. I’d recommend using the printable as some of the measurements will need to be divided by 2 or by 4 when you draft the bodice, and the printable will help to prevent muddles and confusion later on!
This is where you’ll need to measure:
Across your collar bone
From one shoulder to the other
Chest under your armpits
Bust
Waist, where the tape measure rests comfortably.
From the top of your shoulder to your waist
From the top of your shoulder to under your armpit.
From the top of your shoulder to where you took your bust measurement.
From the top of your shoulder to where you want the top of the dress to be.
From your waist to just below your knee.
There are some tips about taking measurements here.
Drafting the Bodice
The bodice of the vintage style sundress is in 2 sections. There are darts in the front section to give it some shape, and there’s a zip in the side seam.
The bodice is drafted in the same way as for my other dresses, then we’ll adapt it for the vintage style sundress.
If you still have your bodice pattern pieces from the Cherry Blossom Dress sewalong, you can use those. If not, you’ll need to draft the bodice front and back sections.
Drafting the Bodice Front
Start off with a large piece of pattern paper.
It will need to be about 10 cm (4 inches) longer and wider than your longest and widest measurements.
Draw a vertical line the same length as the distance from the top of your shoulder near your neck to your waist. This will be the centre line of the bodice. When you cut out your fabric, it will be this line that goes on the fold.
On this line, mark off the distance from your shoulder to your armpit and from your shoulder to bust.
At the top of the vertical line, draw another line at right angles to it the same length as half the distance across your collarbone.You only need half the measurement because you’re drawing half of the bodice front.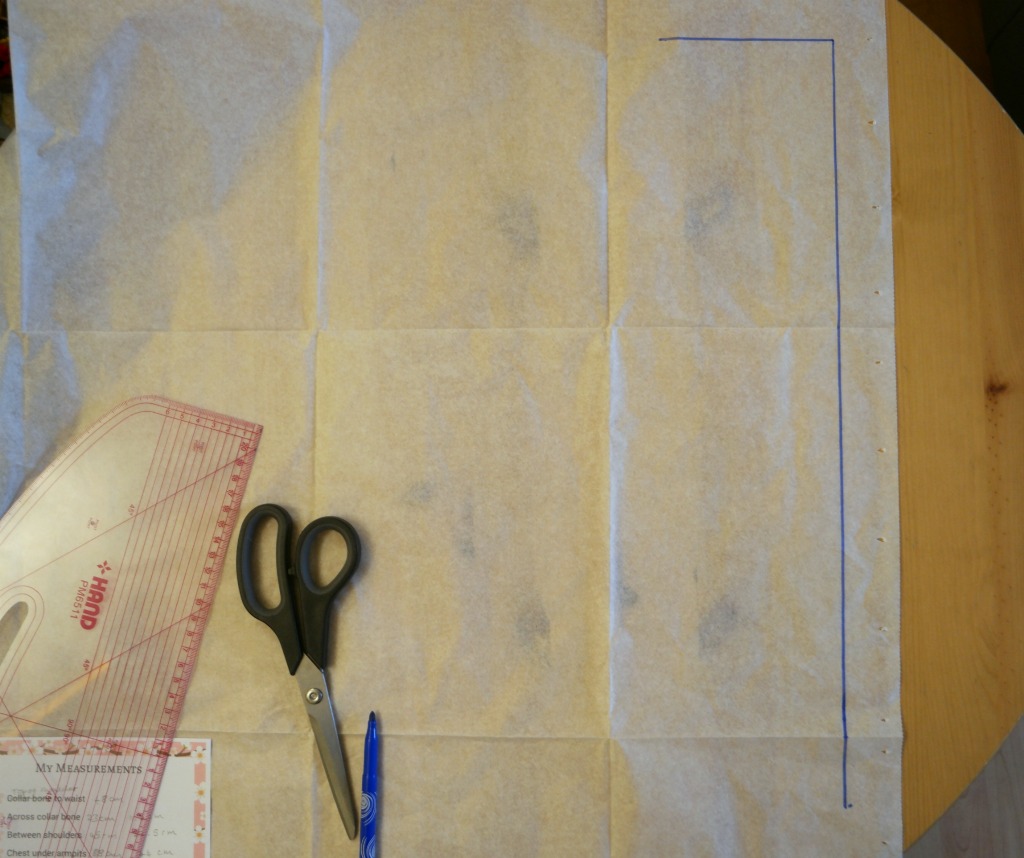
A couple of cm (about an inch) below and using the measurement across your shoulders divided by 2, draw another line below the first horizontal line.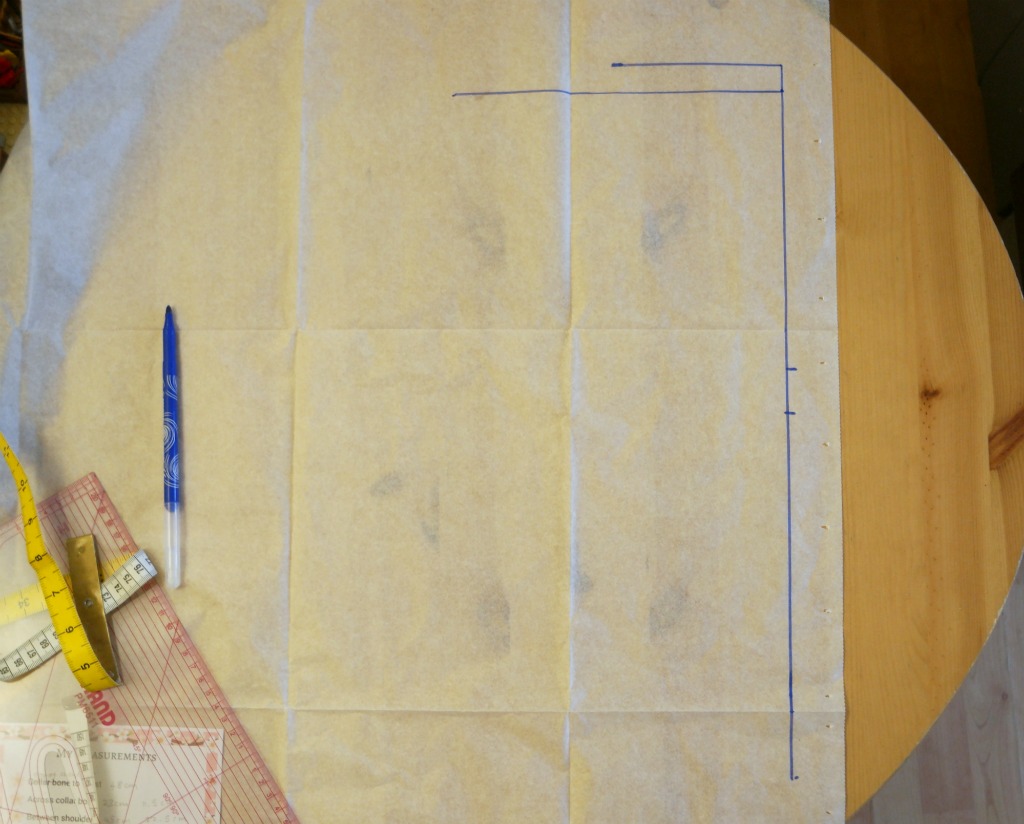
For the next horizontal line, find where you marked your shoulder to armpit measurement. Draw a horizontal line the same length as your chest measurement divided by 4.
Now find where you marked your shoulder to bust measurement. Draw another horizontal line the same length as your bust measurement divided by 4.
From the bottom end of the first vertical line, draw a horizontal line the same length as a quarter of your waist measurement, plus 2 cm (3/4 inch). The extra cm are to make allowances for the waist darts. We’ll come onto those in a minute!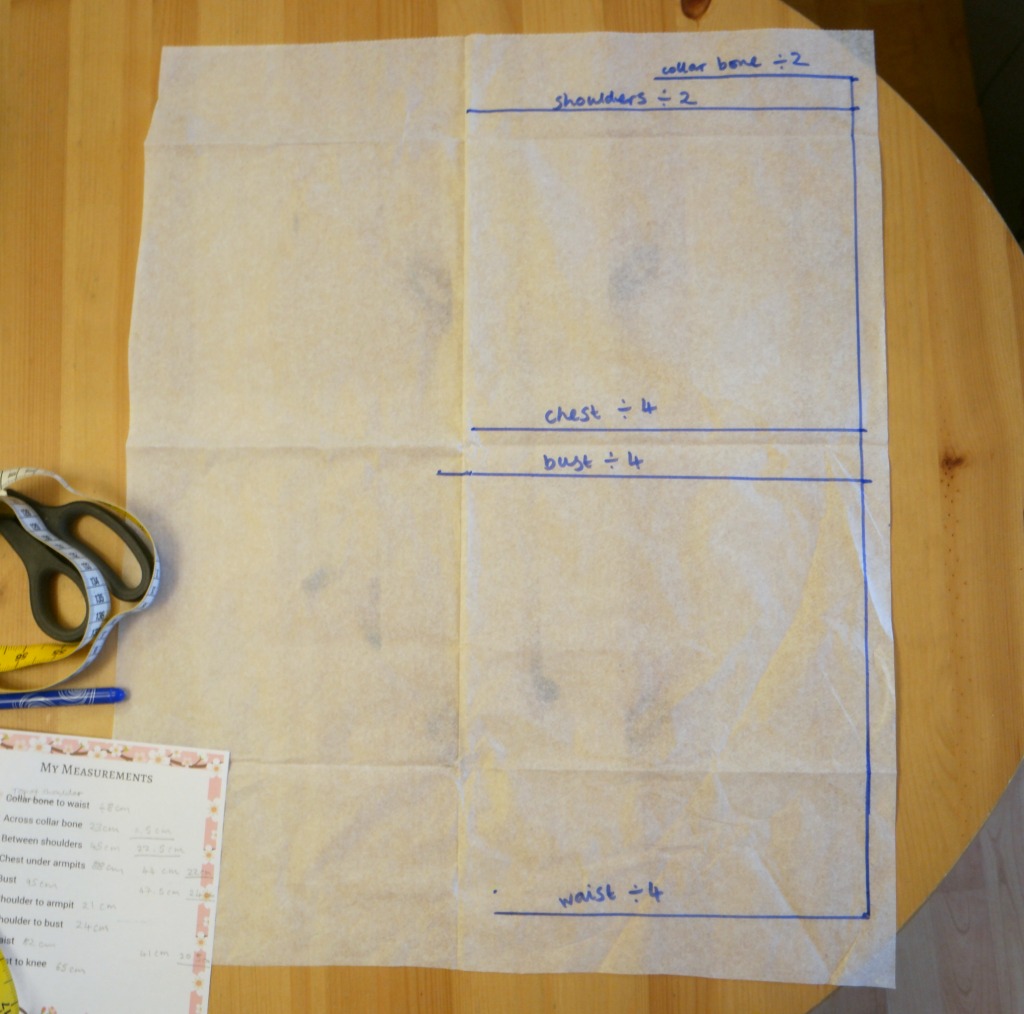
Now join the lines up! To get the curve of the armhole, you might like to use a French curve. If you don’t have a French curve, you can use a plate instead.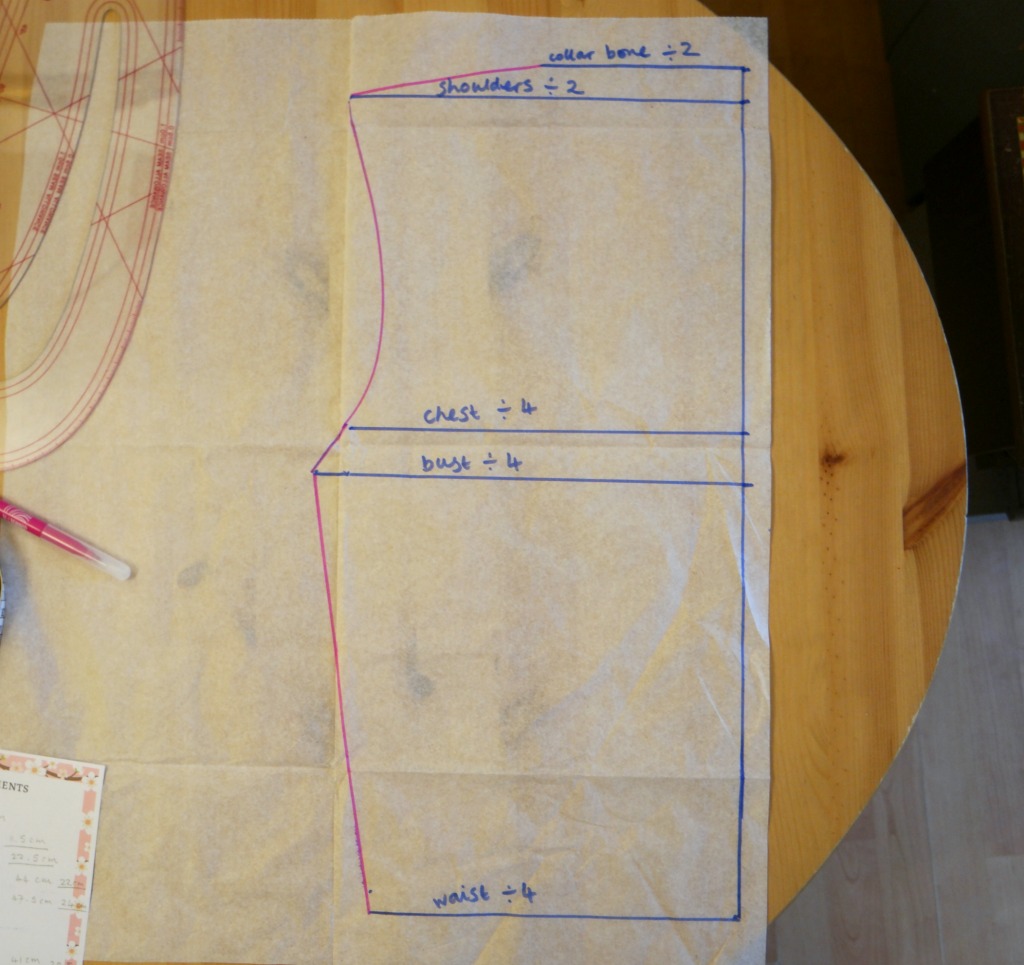
To draw the neckline, measure down about 15 cm (6 inches) from the top of the centre line. Using a French curve, join from here to the far end of the collarbone line.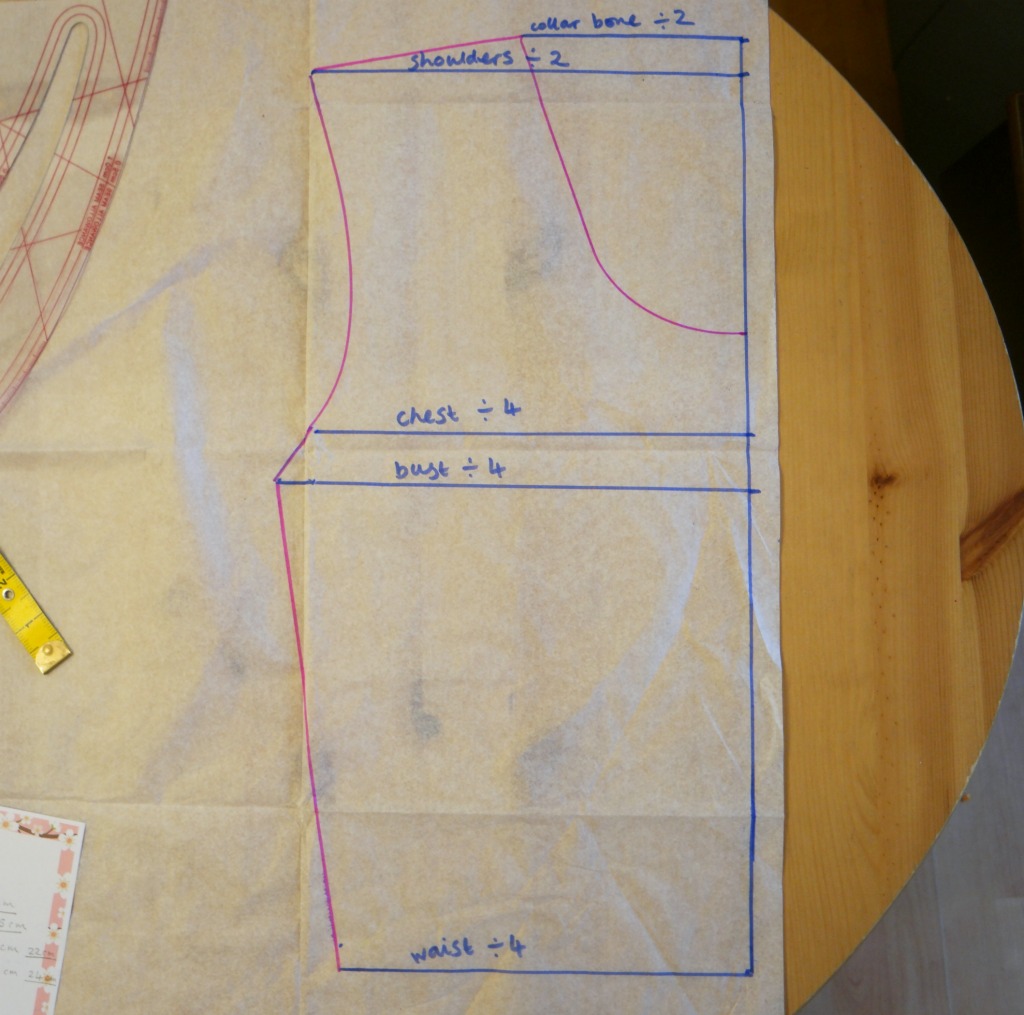
To position the side darts, find the bust line and mark a couple of cm (3/4 inch) either side. Join these marks to a point about 8 cm (3 inches) along the bust line.
You will need to check this on yourself or on your dress form to determine whether the darts are in the right place, so pin the darts on your pattern piece and hold it onto yourself. If they’re not right, adjust them.
You might need to make them wider or narrower, shorter or longer, or adjust the position a little bit.
To add darts at the bottom of the bodice, find the halfway point on the piece you have made.They will need to be about 10 cm (4 inches) long and 2 cm (3/4 inch) wide in total, so 1 cm (3/8 inch) either side of the line. Check it on yourself to get them in the correct place.
Now add a 2 cm (3/4 inch) seam allowance to the bottom, the side and the shoulder edges.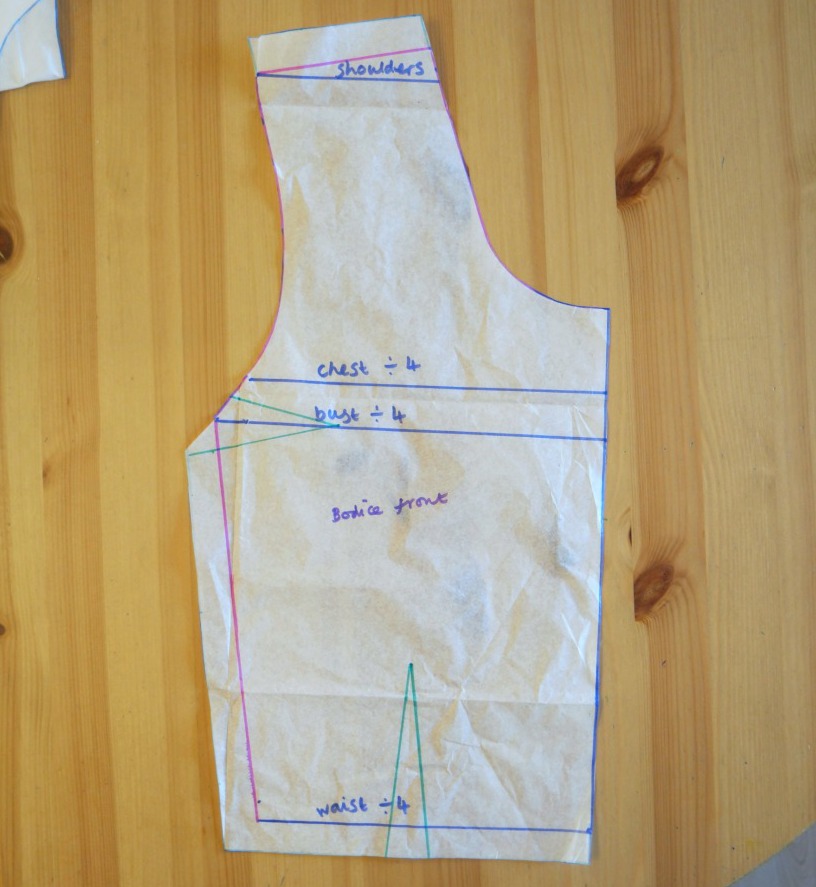
Adapting Your Bodice Pattern Piece For the Vintage Style Sundress
***Cherry Blossom Dress Sewalong people can jump back in here!***
You can either use this pattern piece and adapt it for the vintage style sundress, or if you prefer, draw round it and put the original to one side.
Find the halfway point at the bottom of the shoulder.
From the bottom of the neckline, draw a straight line to the point at the bottom of the shoulder. Now draw another line from this point to the chest line.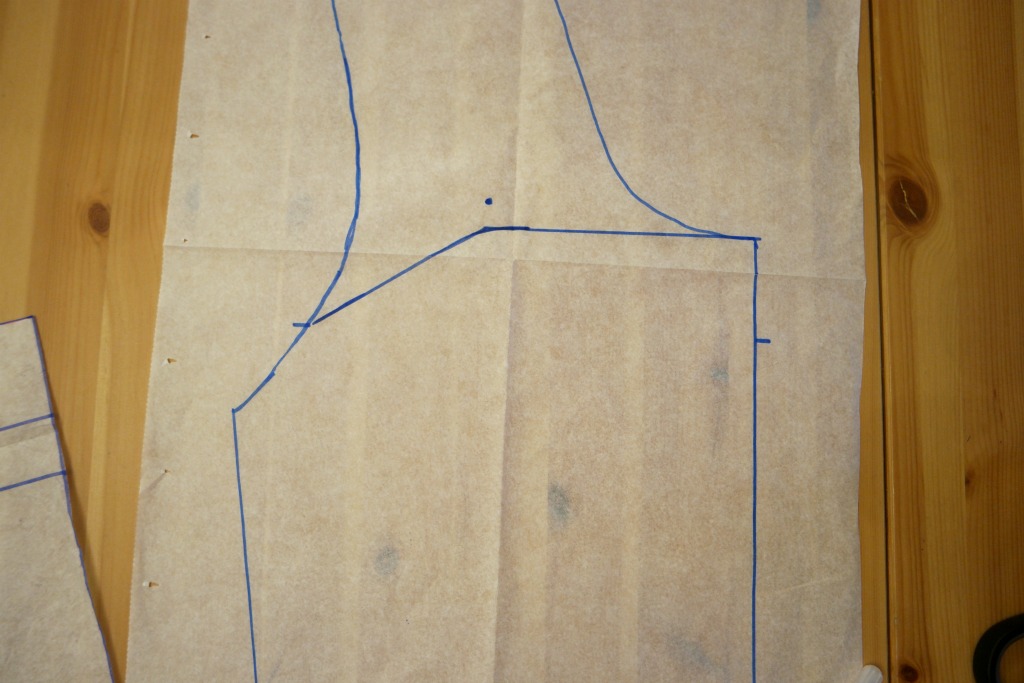
Using a French curve (or a plate), make the pointy bit curved.
Don’t forget to add the darts!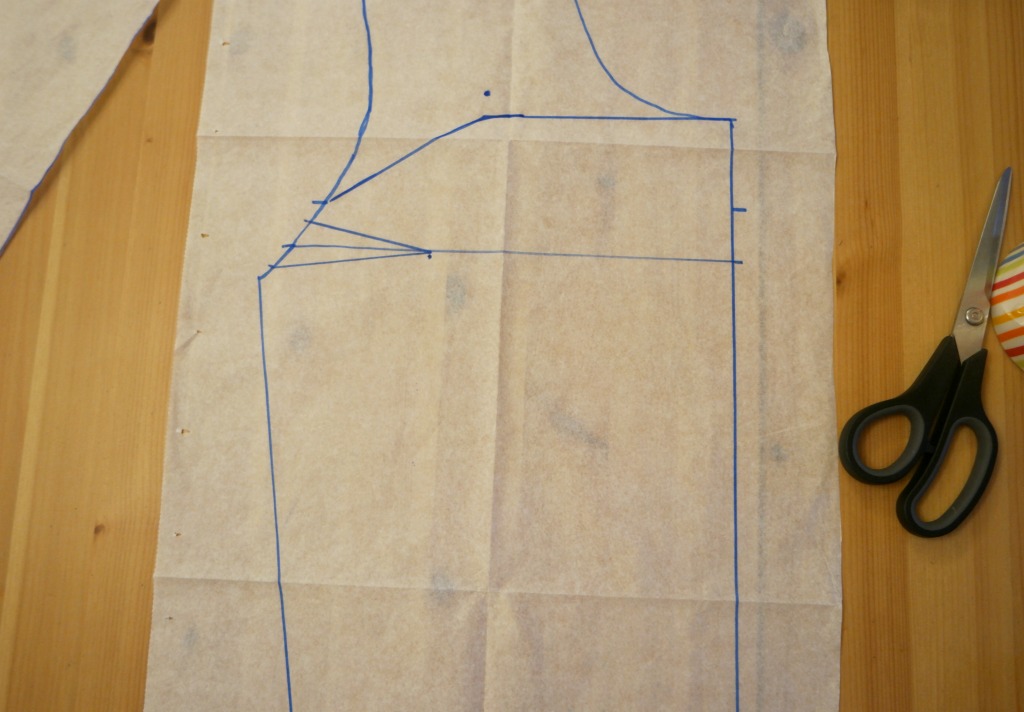
Cut it out.
Drafting the Bodice Back
Draw round the adapted bodice front onto another piece of pattern paper.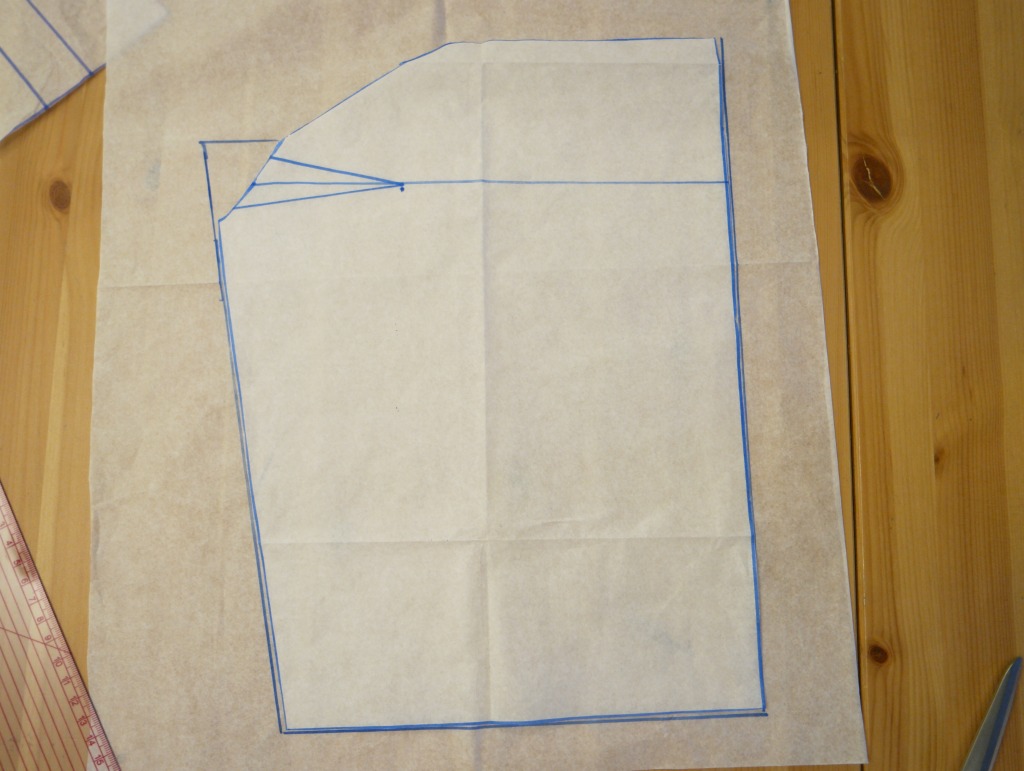
Find point where the chest line meets the armhole. Draw a straight, horizontal line across the pattern piece.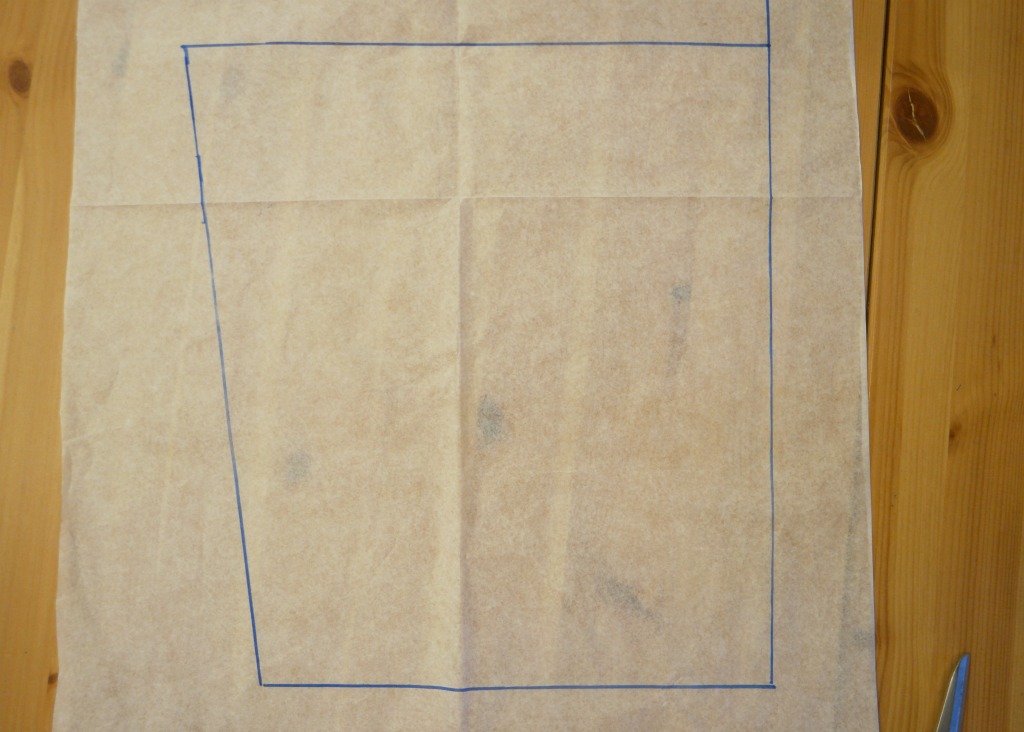
Cut it out.
Working Out the Skirt Measurements
The skirt of the vintage style sundress is made up of 4 quarter circles with the middle cut out, like a doughnut.
To work out the size of square you need, you will need the length of the skirt, plus the distance from the edge of the doughnut hole to centre.
To do this, you will need pi. If maths isn’t your thing, don’t panic!
Pi is the relationship between the distance around the edge of a circle and the distance across it, passing through the centre. The distance around the edge is roughly 3 times the distance round the middle. We only need to know from the edge to the centre, not right the way across, but this is easy to work out as we can just halve it.
It’s easiest to do this on a calculator. There’s probably one on your phone, or if you Google calculator, it will bring one up.
To calculate the dimensions of the skirt and how much fabric you need, take your waist measurement and add 10 cm (4 inches) for seams and ease.
Divide it by pi, then divide this answer by 2. Jot this down somewhere as you will need it in a minute.
Now add this number to your desired skirt length.
This new number tells you how long the sides of the squares of fabric need to be.
Cutting Out
Cutting Out the Bodice Pieces
You’ll need to cut one bodice front and one bodice back each from the dress fabric and the lining fabric.
Cut them out on folded fabric with the grain running up and down the centre.
Remember to transfer the darts to both the main fabric and the lining.
Cutting Out the Straps
From the dress fabric, cut 2 rectangles 10 cm x 50 cm. It’s best to check your measurements first. If this will make the straps either massively too long or too small, adjust the length.
Cutting Out the Skirt
You will need 4 squares of fabric long enough for the total quarter circle, plus a bit extra.
Cut your 4 squares of fabric. Decide where the top is on each piece.If you’re cutting out more than one at a time, make sure that the pieces are all the same way up.
If you are using fabric with a directional print, you’ll need to have 2 pieces with the right side up, and 2 pieces with the right side down.
Find the number you added to your desired skirt length. This number is the distance from the edge of the inside of the doughnut to the centre. Measure this amount from the top corner down the side, then repeat for the other side.
Now take your tape measure. By holding one end of the tape measure to the top corner and moving the other end across the fabric, measure this amount across from one side to the other, marking as you go. I used pins, but you could use tailors’ chalk or a fabric pen.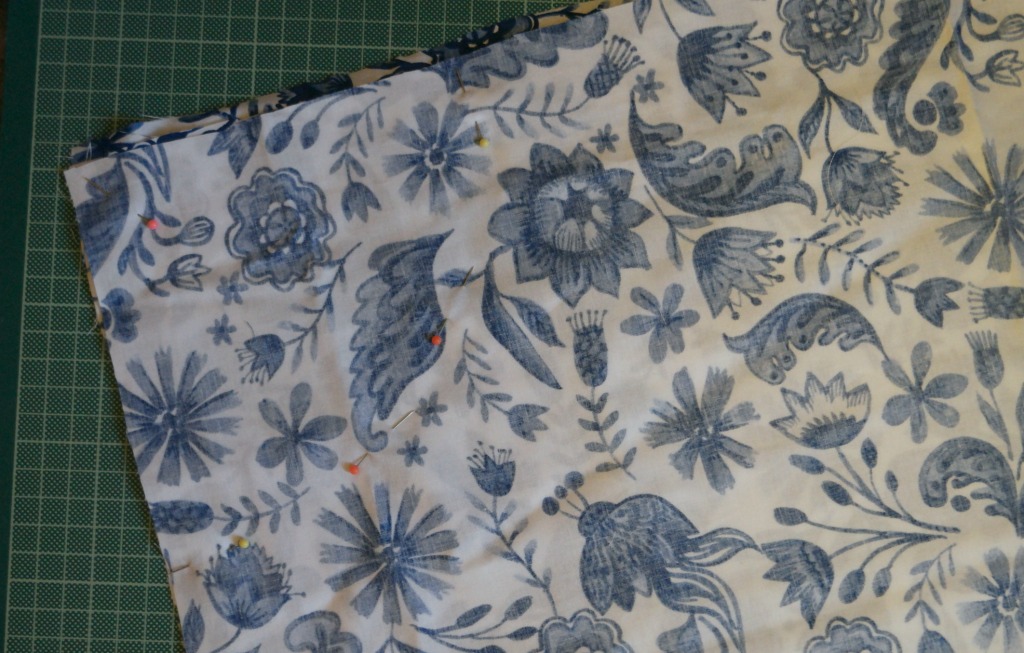
Now take the total of this number plus your desired skirt length. From the same corner, measure down this amount on either side. Mark off this same distance all the way across as you did in the previous step.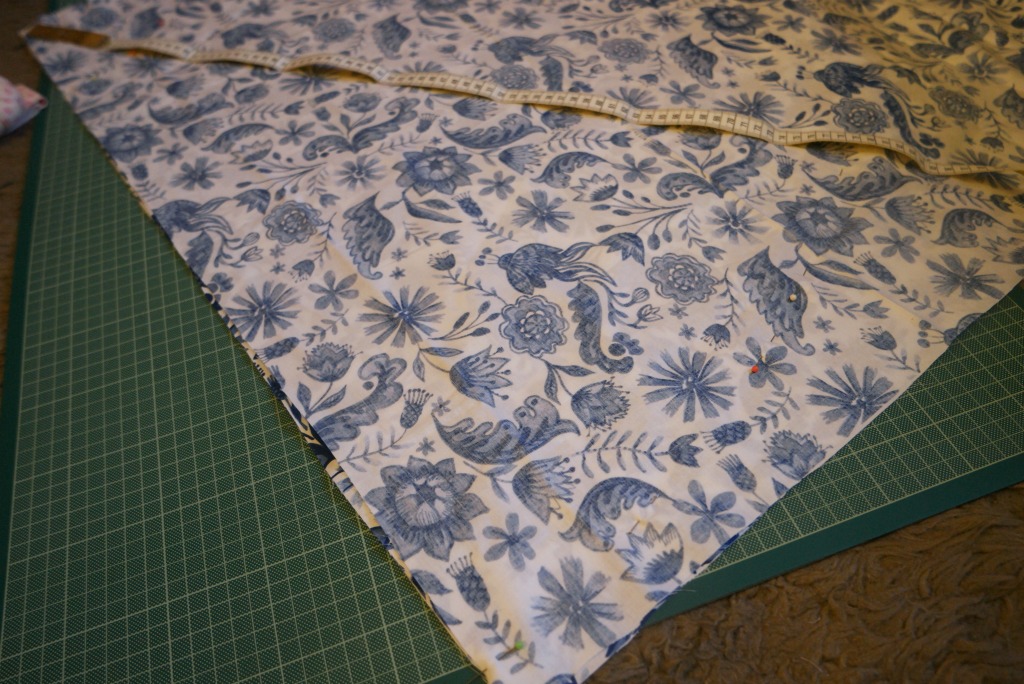
Now cut where you have pinned. I used a rotary cutter for this. You should have 4 quarter circles with another smaller quarter circle cut out of the top.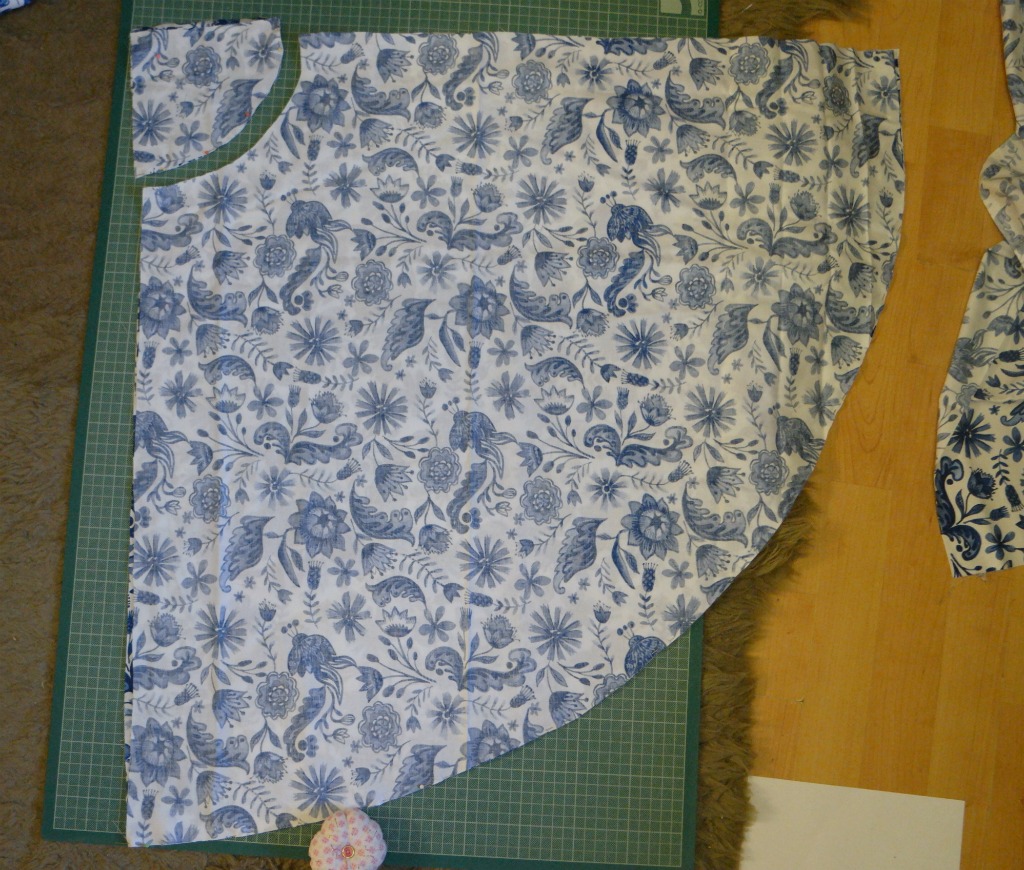
You’ll need to cut the lining in the same way, except that the skirt pieces will need to be about 10 cm (4 inches) shorter.
Sewing Up
1. Sew the darts. There’s a tutorial showing how to do this here.
2. Sew the skirt sections.
Take 2 of the skirt pieces, one of the pieces cut right side down, and the other one of the pieces cut right side up.
Pin 2 of the straight edges together. To ensure that the skirt of the dress hangs well, check that the edges you are pinning are both on the grain.
If you can’t remember which of the straight edges is on the grain, gently pull the fabric, first one way, then the other. The way that stretches least is the grain.
Sew the centre seam, then press.
You’ll need to do this with the other 2 skirt sections and the lining.
3. Sew the skirt to the bodice.
Take one skirt section and one bodice piece.
Find the centre of the waist edge of the bodice by folding it in half. You might want to mark it with a pin, or you could just press it with your finger.
Match the centre seam of the skirt to the centre of the bodice and pin. Then working outwards from the centre, pin the skirt to the bodice.
Sew the skirt to the bodice, taking care that the waist darts in the bodice are facing outwards. Then sew the seam and press it downwards.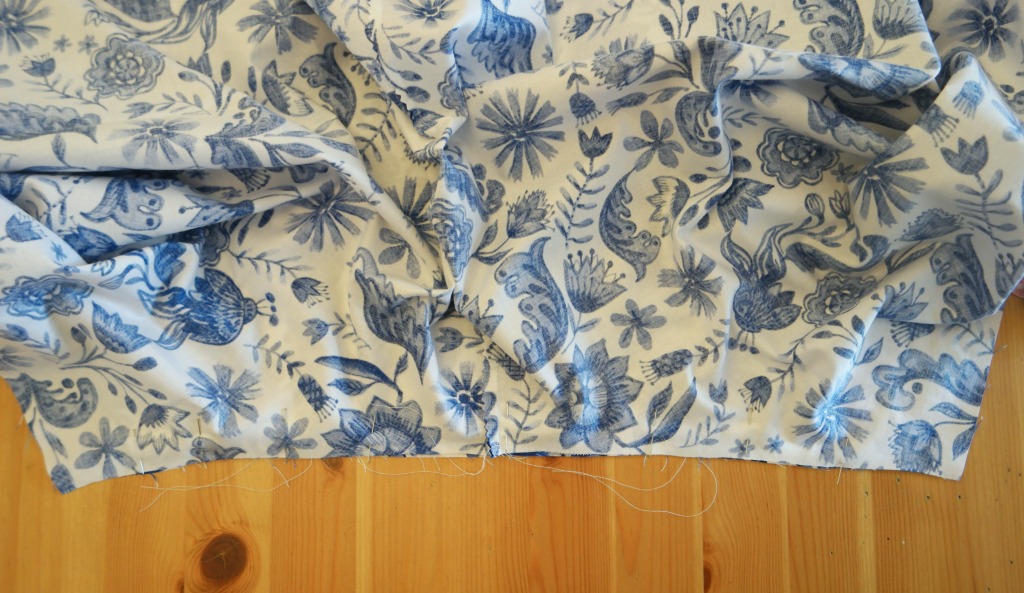
Repeat with the other bodice and skirt sections, and the lining.
4. Sew the dress front and back together.
Put the dress pieces together so that the right sides are on the inside. Pin one of the side seams, just the bodice, no need to worry about the skirt at the moment.
Slip the dress on and pin the bodice on the other side. Don’t worry about pinning the skirt, as long as you pin the waist. You might need to adjust the seams so that they are the same width.
On one side, mark where you have pinned with tailors’ chalk, a pencil or fabric pen. Unpin the dress, take it off, then repin where you marked.
Sew the side seams. Start at the waist and sew the bodice, then go back to waist and sew the skirt.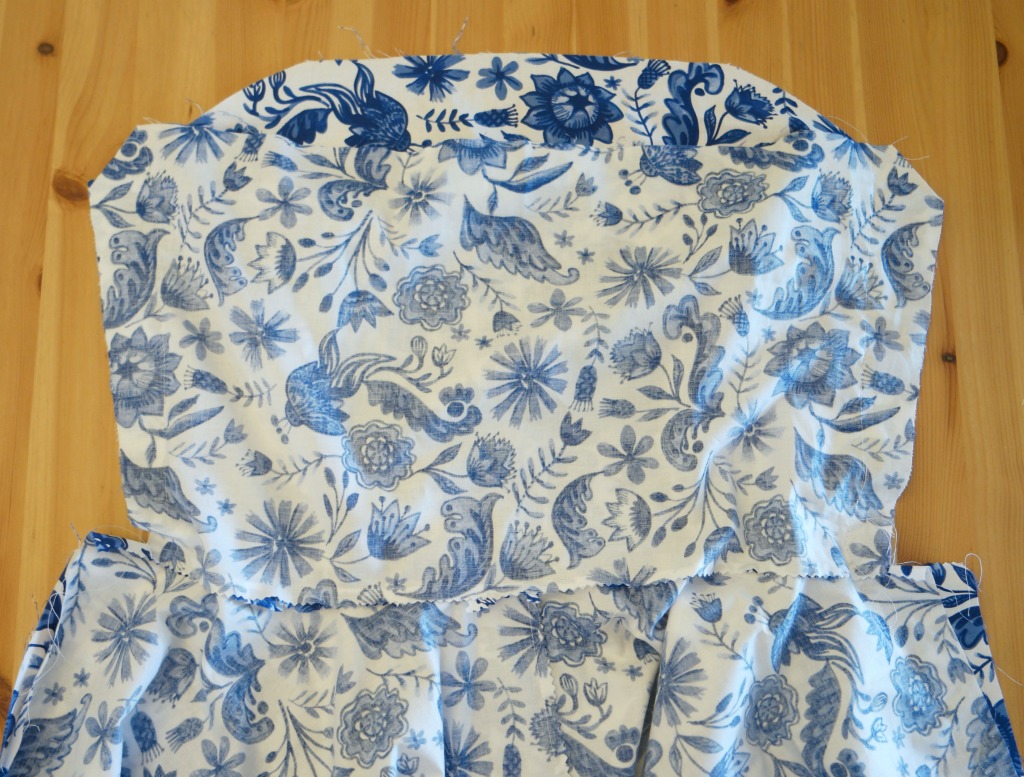
Using the seams on the dress as a guide, repeat with the lining.
Press the seams open.
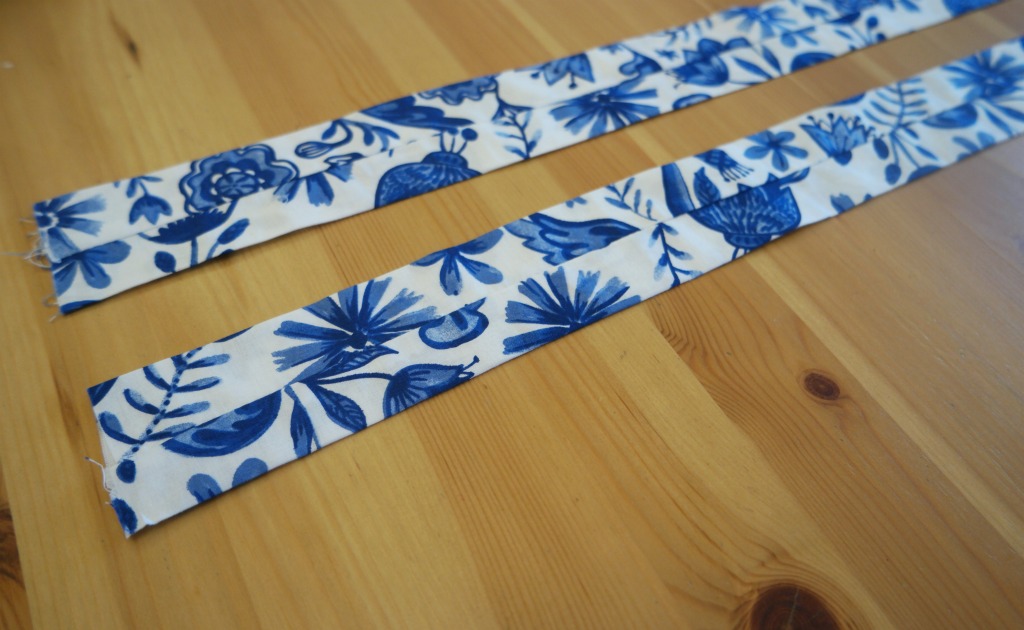
5. Sew the straps.
Take one of the strap pieces. Fold it in half lengthways so that the wrong side is outwards. Sew along the open long edge.
Turn the strap the correct way out.
Make sure that the seam is in the centre, then press the strap.
6. Attach the lining.
Lay the dress out, right side out, so that the bodice is flat. Pin the shoulder straps to the back of the bodice. The outer edges of the straps need to be aligned with where the straight edge of the bodice front ends.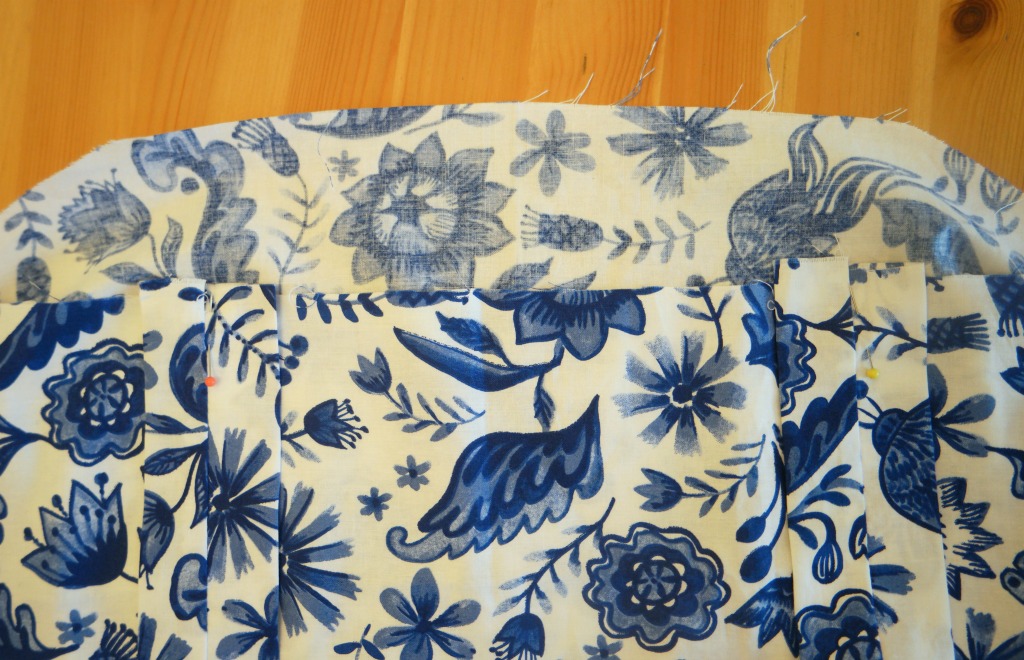
Slip the dress inside the lining so that the right sides are together. Pin the lining to the top of the dress.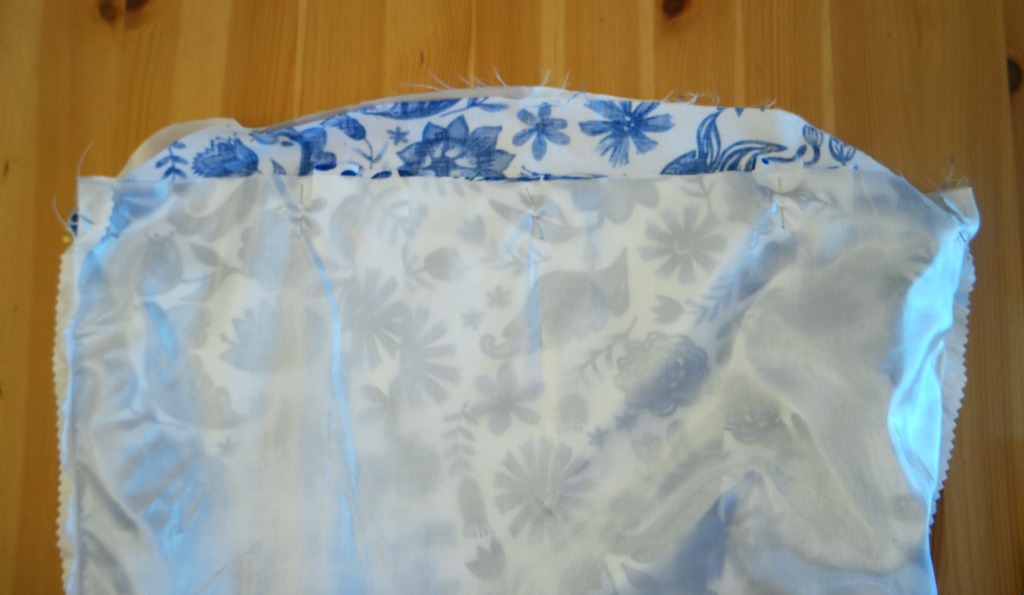
Sew all the way around. Trim the seams and turn the dress the right way out.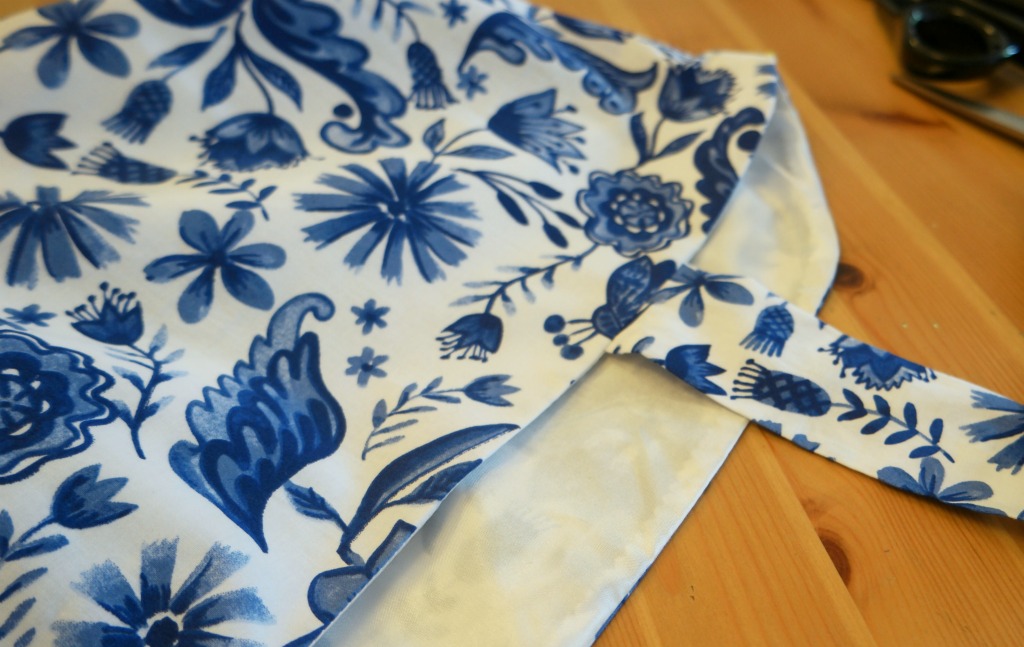
7. Sew in the zip.
Decide on which side you’d like the zip to be. For right handed people, the left side is usually most comfortable. If you’re left handed, you might prefer the zip on the right hand side.
Put the zip over the seam and mark the top and bottom of the zip with pins. There’s no need to go right up to the top edge of the bodice, but make sure that the bottom of the zip extends past the waist.
Unpick the lining between the pins.
Pin the zip over the seam. Tack, then sew in place. 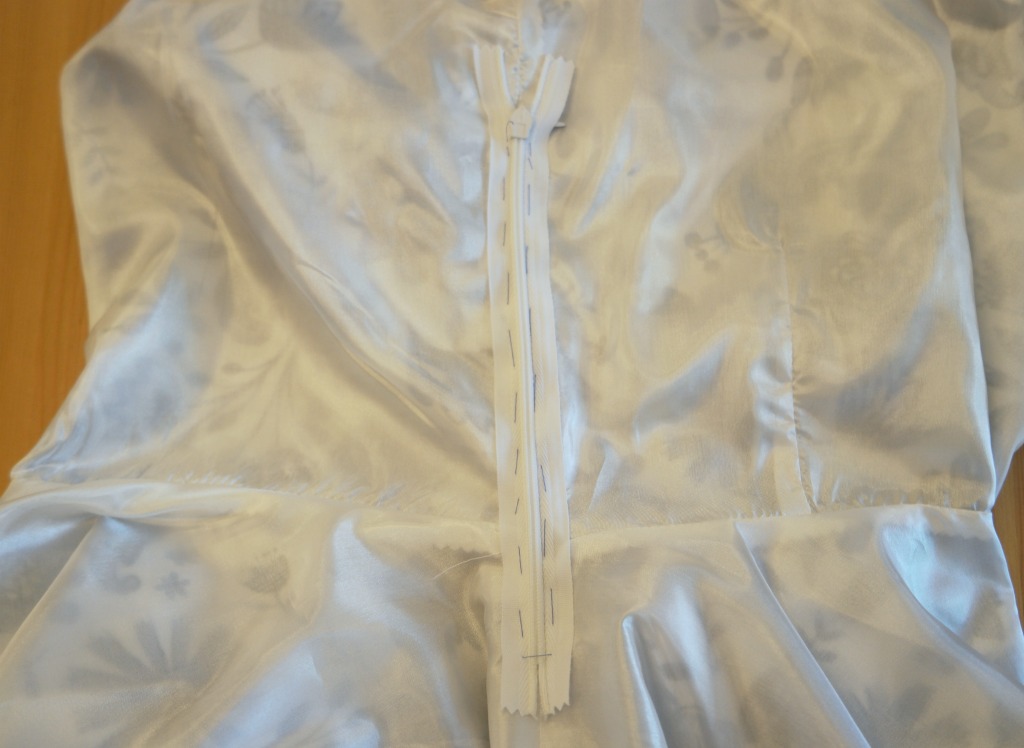 Unpick the seam to expose the teeth of the zip.
There’s a detailed tutorial showing how to sew in an invisible zip here.
8. Attach the straps at the front.
Unpick the seam between the at the top of the dress between the dress and the lining. at the edge of the straight bit at the front. There’s no need to unpick the whole thing, just the width of the straps.
Slip the straps in between the lining and the bodice. Pin the straps.
Now pop the dress on and adjust the straps so that they are the right length.
Sew up the seam. If you find this too fiddly with the sewing machine, you could sew them by hand instead.
9. Finish the hems with bias binding.
The hem of the vintage style sundress is finished with bias binding because hemming a circle can be tricky!
Unroll some of the bias binding. Open it out and pin one edge to the edge of the skirt, right sides together. Don’t worry about pinning it all the way round, just at the start will do.
Sew the bias binding to the skirt, keeping close to the folded edge. When you get back to where you started, overlap the ends by a couple of cm (an inch).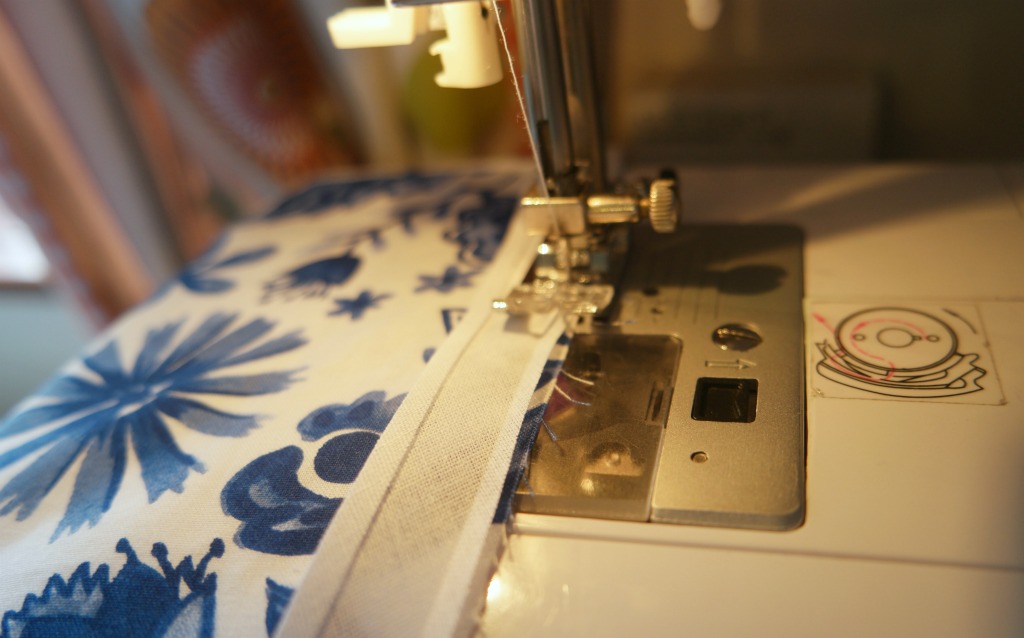
Press the seam towards the skirt, then fold the bias binding underneath and press it again.
Sew the bias binding to the bottom of the skirt, keeping close to the other folded edge.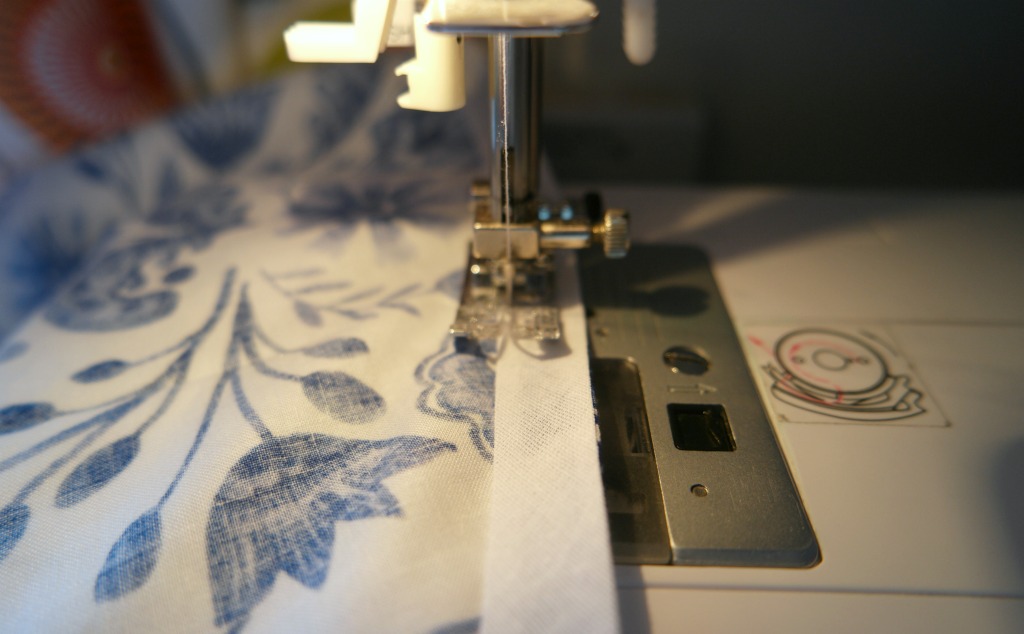
There’s a more detailed tutorial showing how to do this here.
Do the same with the lining.
All that’s left to do now is to run the iron over your vintage style sundress and wait for some sunshine!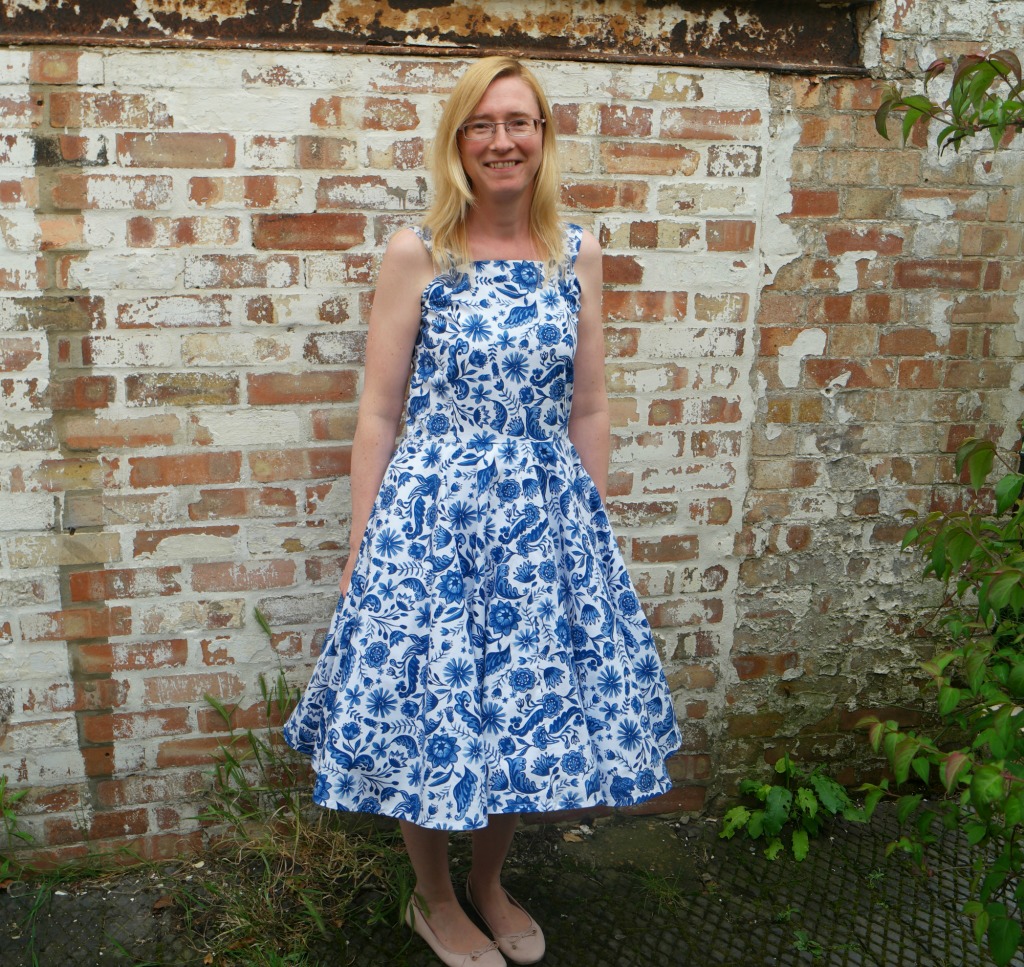
PS To make the skirt of your vintage style sundress stick out a bit, you might want to wear it with a foofy petticoat. I got mine from Amazon here (affiliate link).


E’ veramente bello e ti sta proprio bene l’abito. Grazie per il tutorial, metto da parte ed un domani vediamo se riesco a creare qualcosa di simile.
Thank you, and if you make one I’d love to see it!